Introduction
Logging is an essential aspect of software development that enables us to track and understand the behavior of our applications. In fact, there are many logging frameworks to help with this task. In this post, I've shown how to use Serilog to generate structured logging.
In .NET 5.0, Microsoft introduced a new feature for logging, log formatters. Prior to that, the logging system only supported a single log format, which was plain text: you could only create logs using plain text and, if you wanted something different, you had to format the data by yourself. The introduction of logging formatters made it possible to format log messages in different formats, such as JSON and SystemD (it also allowed developers to create their own custom formatters).
In this blog post, we will show log formatters, exploring their purpose, implementation, examples on how to use and create formatters that suit your needs.
What are Log Formatters?
Log formatters are components responsible for formatting log messages in a specific way. They take raw log data, such as timestamps, log levels, and message details, and transform them into a human-readable format. Log formatters greatly help in the analysis and comprehension of log entries, making troubleshooting and debugging easier.
Predefined log formatters
The .NET team has implemented three predefined log formatters:
- Simple - With this formatter, you can add time and log level in each log message, and also use ANSI coloring and indentation of messages.
- JSON - This formatter generates the log in a json format.
- SystemD - This formatter allows to use the Syslog format, available in containers, does not color the messages and always logs the messages in a single line.
To show the usage of the formatters, we'll create a console app that will use these new features to log data.
Create a new console app with these commands
dotnet new console -o PredefFormatters
cd PredefFormatters
code .
Add the packages Microsoft.Extensions.Logging
and Microsoft.Extensions.Logging.Console
with
dotnet add package Microsoft.Extensions.Logging
dotnet add package Microsoft.Extensions.Logging.Console
In VS Code, add this code in Program.cs
:
using Microsoft.Extensions.Logging;
var loggerFactory = LoggerFactory.Create(builder =>
{
builder.AddSimpleConsole();
});
var logger = loggerFactory.CreateLogger<Program>();
logger.LogTrace("This is a trace message");
logger.LogDebug("This is a debug message");
logger.LogInformation("This is an information message");
logger.LogWarning("This is a warning message");
logger.LogError("This is an error message");
logger.LogCritical("This is a critical message");
When you run it, you will get something like this:
At this point, you must be puzzled, asking yourself what's happened with the other messages. The answer is that the logger is caching the messages, and the program finishes before it can show all messages, thus you can only see one message. You can see a detailed answer here.
The solution in this case is to add a delay at the end to wait all the messages to be shown:
using Microsoft.Extensions.Logging;
var loggerFactory = LoggerFactory.Create(builder =>
{
builder.AddSimpleConsole();
});
var logger = loggerFactory.CreateLogger<Program>();
logger.LogTrace("This is a trace message");
logger.LogDebug("This is a debug message");
logger.LogInformation("This is an information message");
logger.LogWarning("This is a warning message");
logger.LogError("This is an error message");
logger.LogCritical("This is a critical message");
Task.Delay(1000).Wait();
At the end, I'm adding a delay of 1 second to flush all messages. Usually you won't need this hack, but that's good to know.
EDIT - After publishing the article, Thomas (see comment below) pointed me a cleaner way to flush the log queue: just dispose the logger factory. This is a cleaner way to do it and should be used, instead of the Delay. In this case, the code will be like this:
using Microsoft.Extensions.Logging;
// With this notation, we don't need the braces, the logger factory will be disposed at the end
// Feel free to use the braces if you feel that it's more explicit
using var loggerFactory = LoggerFactory.Create(builder =>
{
builder.AddSimpleConsole();
});
var logger = loggerFactory.CreateLogger<Program>();
logger.LogTrace("This is a trace message");
logger.LogDebug("This is a debug message");
logger.LogInformation("This is an information message");
logger.LogWarning("This is a warning message");
logger.LogError("This is an error message");
logger.LogCritical("This is a critical message");
If you notice the output of the program:
You can see that there are still two messages missing: the Trace and Debug messages. That's because the default level for logging is Information and, without any configuration, you you won't be able to see these messages. One way to configure logging is by changing the builder configuration to set the new level:
using Microsoft.Extensions.Logging;
var loggerFactory = LoggerFactory.Create(builder =>
{
builder
.AddSimpleConsole()
.SetMinimumLevel(LogLevel.Trace);
});
var logger = loggerFactory.CreateLogger<Program>();
logger.LogTrace("This is a trace message");
logger.LogDebug("This is a debug message");
logger.LogInformation("This is an information message");
logger.LogWarning("This is a warning message");
logger.LogError("This is an error message");
logger.LogCritical("This is a critical message");
Task.Delay(1000).Wait();
If you run the program again, you will get the missing messages. Although this is a good way to configure logging, you have to recompile the code every time you want to change something. In this case, there is a better way to do it, using a configuration file.
For that we must follow the steps shown at this article and add the packages Microsoft.Extensions.Configuration
and Microsoft.Extensions.Configuration.Json
:
dotnet add package Microsoft.Extensions.Configuration
dotnet add package Microsoft.Extensions.Configuration.Json
And add this code to add the configuration:
using Microsoft.Extensions.Configuration;
using Microsoft.Extensions.Logging;
var configuration = new ConfigurationBuilder()
.SetBasePath(Directory.GetCurrentDirectory())
.AddJsonFile($"appsettings.json", false, true)
.Build();
var loggerFactory = LoggerFactory.Create(builder =>
{
builder
.AddConfiguration(configuration.GetSection("Logging"))
.AddSimpleConsole();
});
var logger = loggerFactory.CreateLogger<Program>();
logger.LogTrace("This is a trace message");
logger.LogDebug("This is a debug message");
logger.LogInformation("This is an information message");
logger.LogWarning("This is a warning message");
logger.LogError("This is an error message");
logger.LogCritical("This is a critical message");
Task.Delay(1000).Wait();
Once you do this and add an appsettings.json
file to the folder with this content:
{
"Logging": {
"LogLevel": {
"Default": "Trace"
}
}
}
You will be able to see all messages. As you can see from the output, every message is shown in two lines: the first one shows the category (Program, that was used in the CreateLogger
method), and the other has the message. If we want everything in a single line, we can add this configuration:
{
"Logging": {
"LogLevel": {
"Default": "Trace"
},
"Console": {
"FormatterOptions": {
"SingleLine": true
}
}
}
}
This will cause the output to be in a single line:
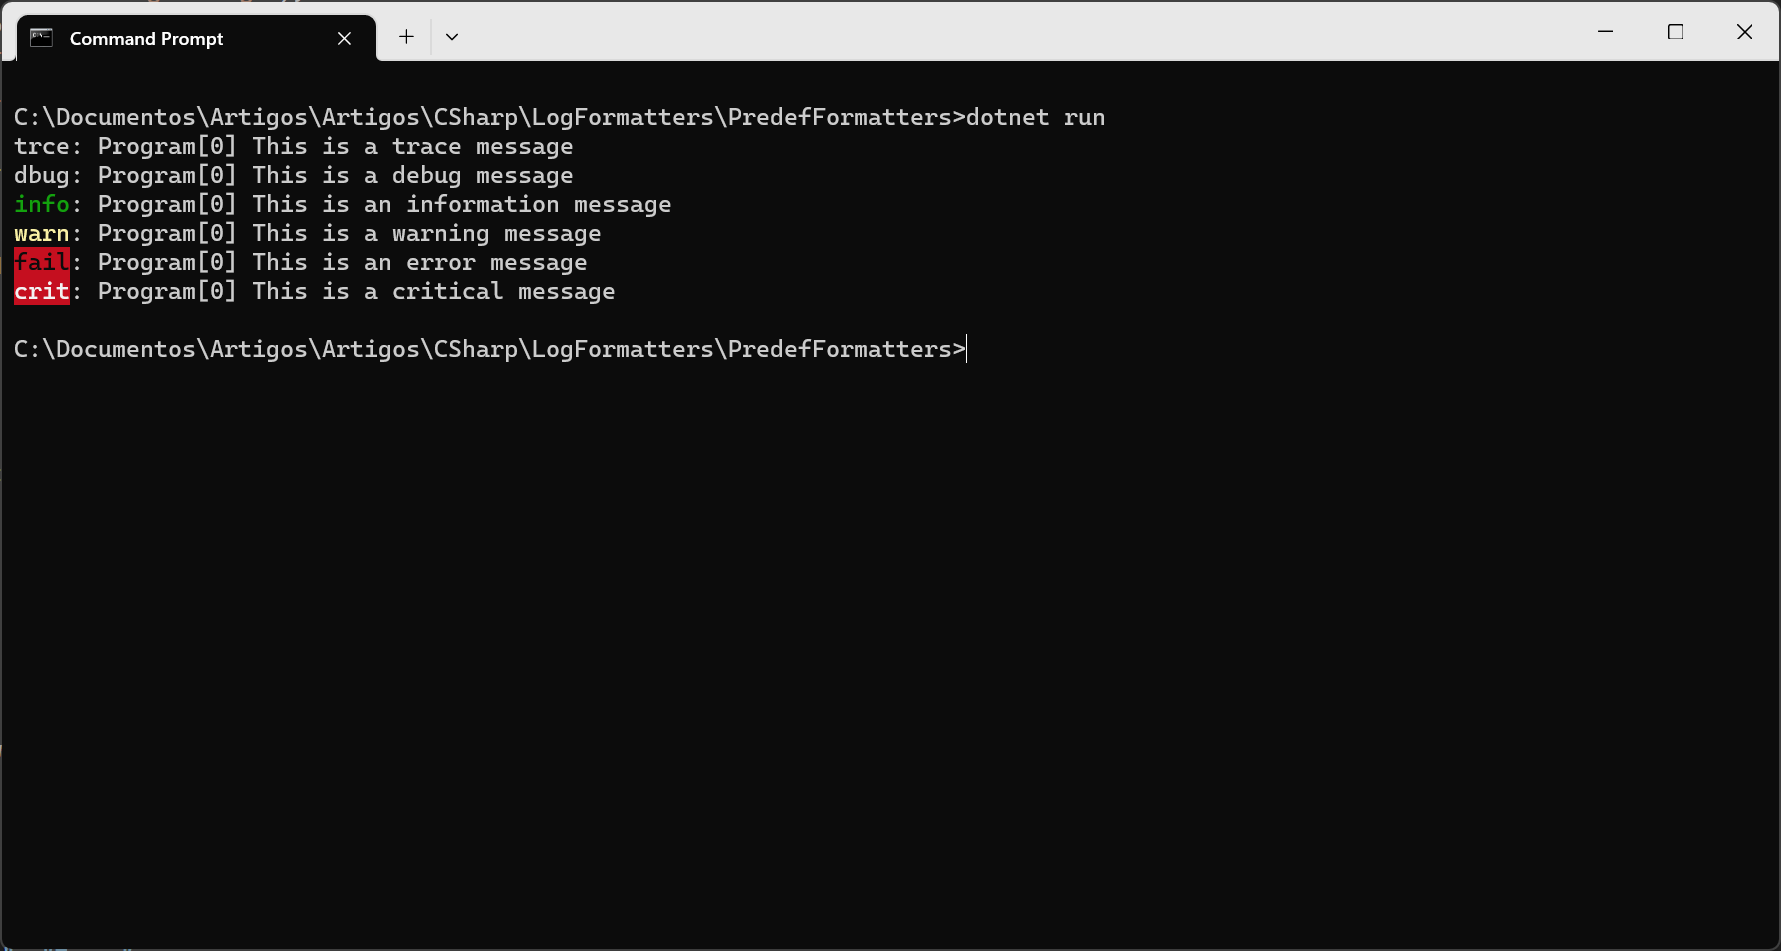
We can even change the log formatting in the configuration, but for that, we need to change the line .AddSimpleConsole();
to .AddConsole();
and change the Console
section in appsettings to
"Console": {
"FormatterName": "simple",
"FormatterOptions": {
"SingleLine": true
}
}
Now, we can change the FormatterName
setting to json
or systemd
and have different formatting for the log:
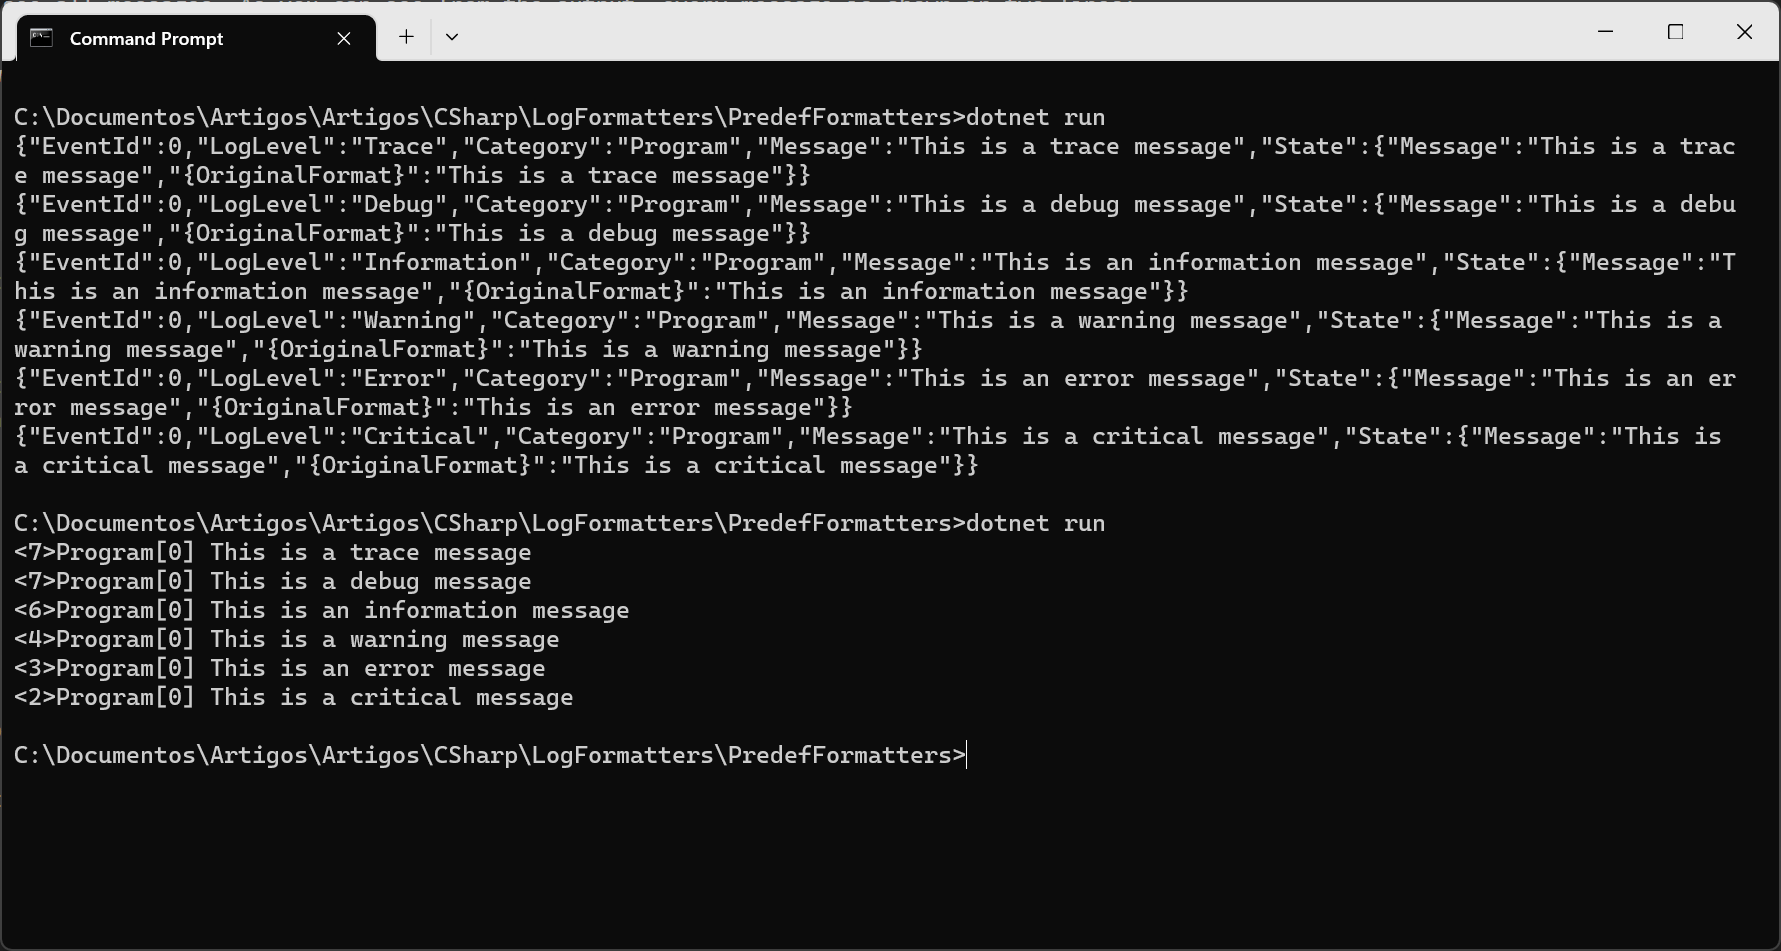
As you can see, we can change the log formats by changing the configuration file. We can add more configurations for the logs, by adding new options:
"Console": {
"FormatterName": "simple",
"FormatterOptions": {
"SingleLine": true,
"IncludeScopes": true,
"TimestampFormat": "yyyy-MM-dd HH:mm:ss zzz",
"ColorBehavior": "disabled"
}
}
"Console": {
"FormatterName": "json",
"FormatterOptions": {
"SingleLine": true,
"IncludeScopes": true,
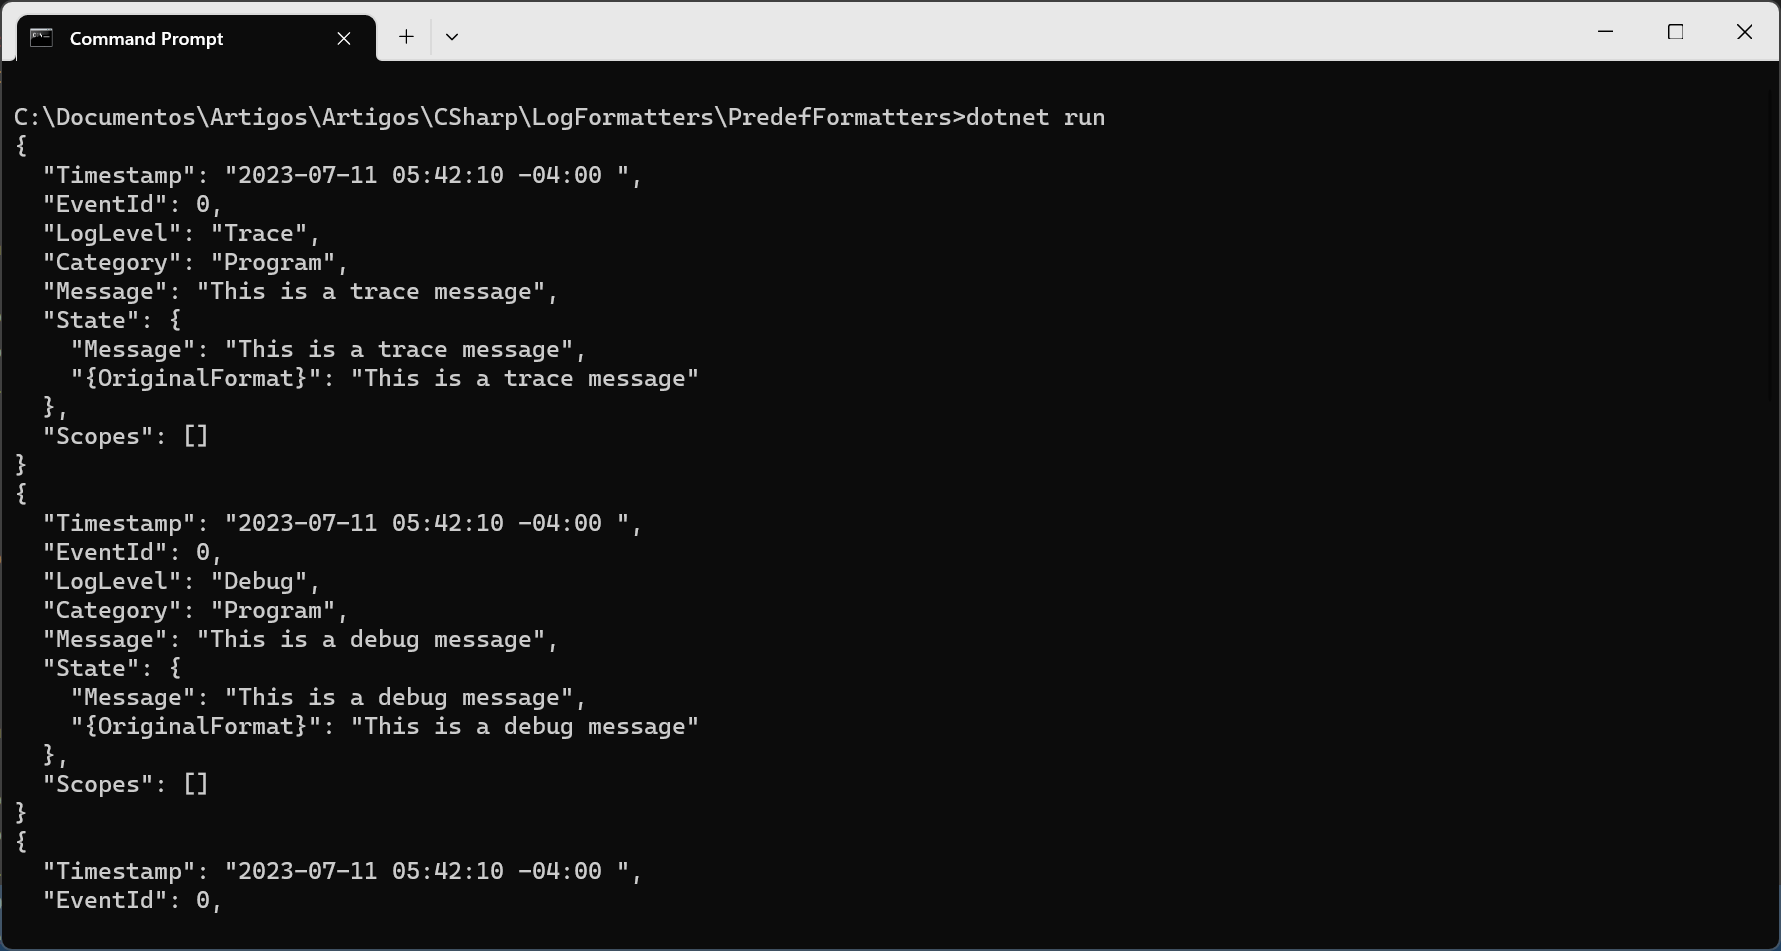
"TimestampFormat": "yyyy-MM-dd HH:mm:ss zzz",
"ColorBehavior": "disabled",
"JsonWriterOptions": {
"Indented": true
}
}
}
You may be asking what does the number [0] besides the category mean. This is the event Id, a struct that has the properties Id and Name, to identify the types of events. When you do something like this:
using Microsoft.Extensions.Configuration;
using Microsoft.Extensions.Logging;
EventId AppLogEvent = new EventId(100, "AppLog");
EventId DbLogEvent = 200;
var configuration = new ConfigurationBuilder()
.SetBasePath(Directory.GetCurrentDirectory())
.AddJsonFile($"appsettings.json", false, true)
.Build();
var loggerFactory = LoggerFactory.Create(builder =>
{
builder
.AddConfiguration(configuration.GetSection("Logging"))
.AddConsole();
});
var logger = loggerFactory.CreateLogger<Program>();
logger.LogTrace(AppLogEvent,"This is a trace message");
logger.LogDebug(DbLogEvent,"This is a debug message");
logger.LogInformation(300,"This is an information message");
logger.LogWarning("This is a warning message");
logger.LogError("This is an error message");
logger.LogCritical("This is a critical message");
Task.Delay(1000).Wait();
As you can see, you can create EventIds explicitly, use the implicit conversion from an int or use an int directly as the first parameter for the log, and the log will show the id numbers instead of the [0]:
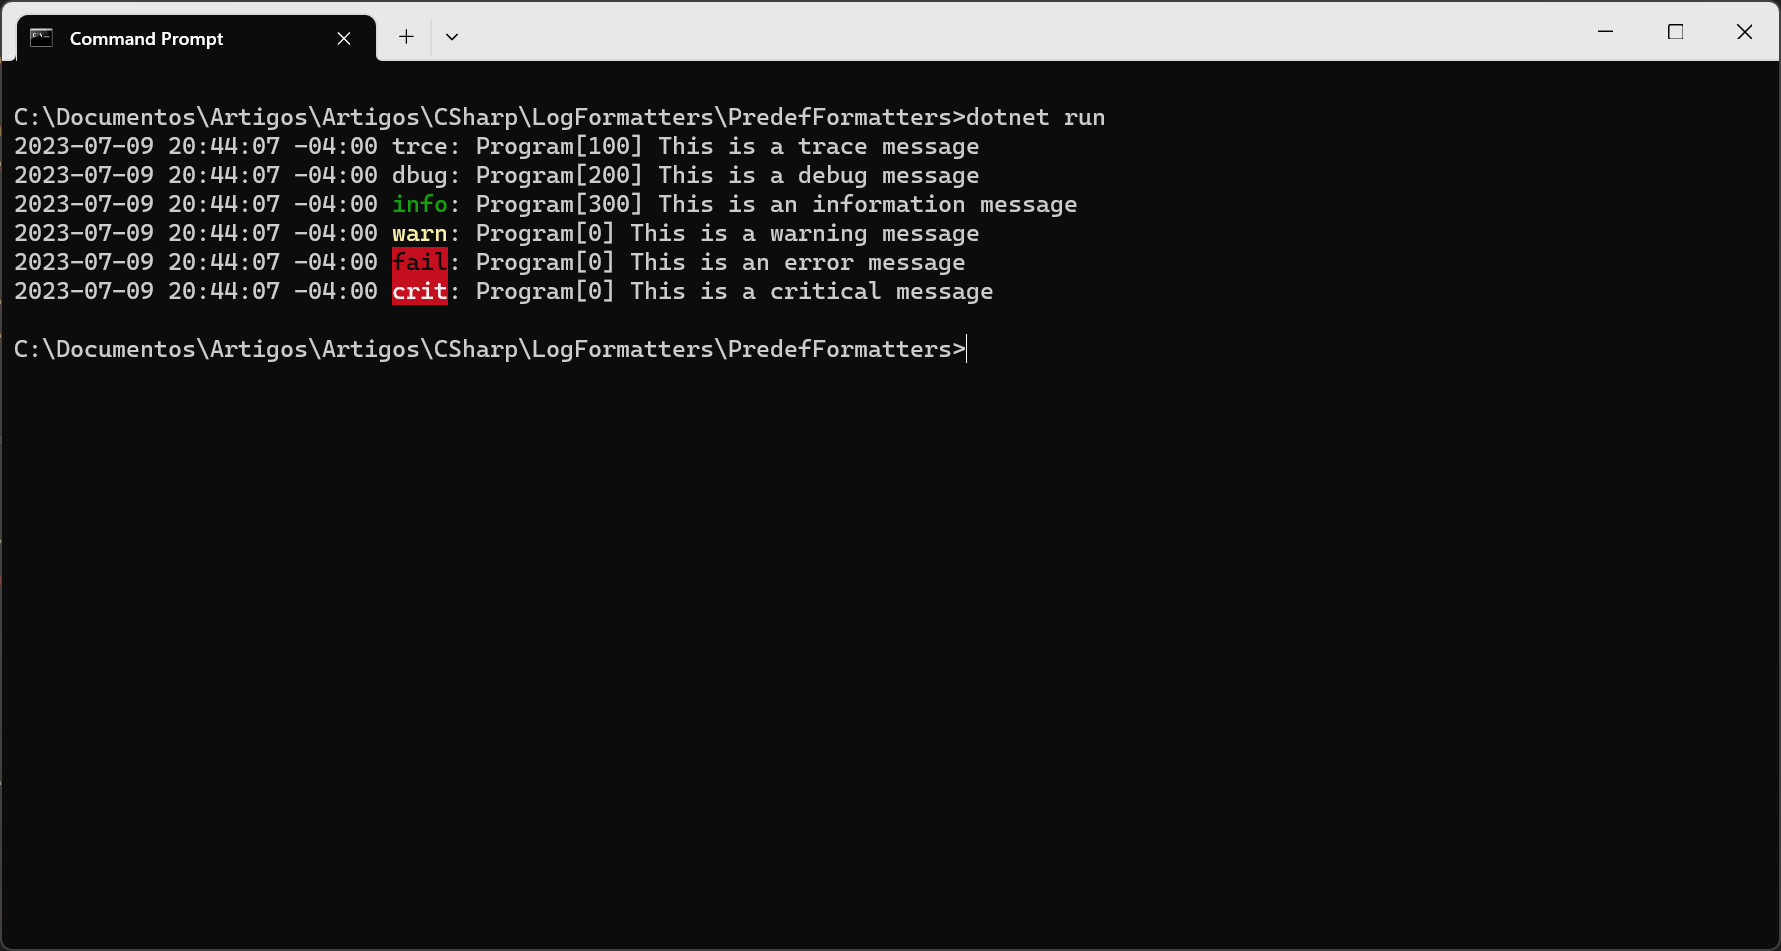
Scopes
You can also group the messages by using Scopes. A scope is a class that implements IDisposable
and is created by the BeginScope
method. It remains active until it's disposed. Scopes can be nested.
For example, we could create scopes in our program with this code:
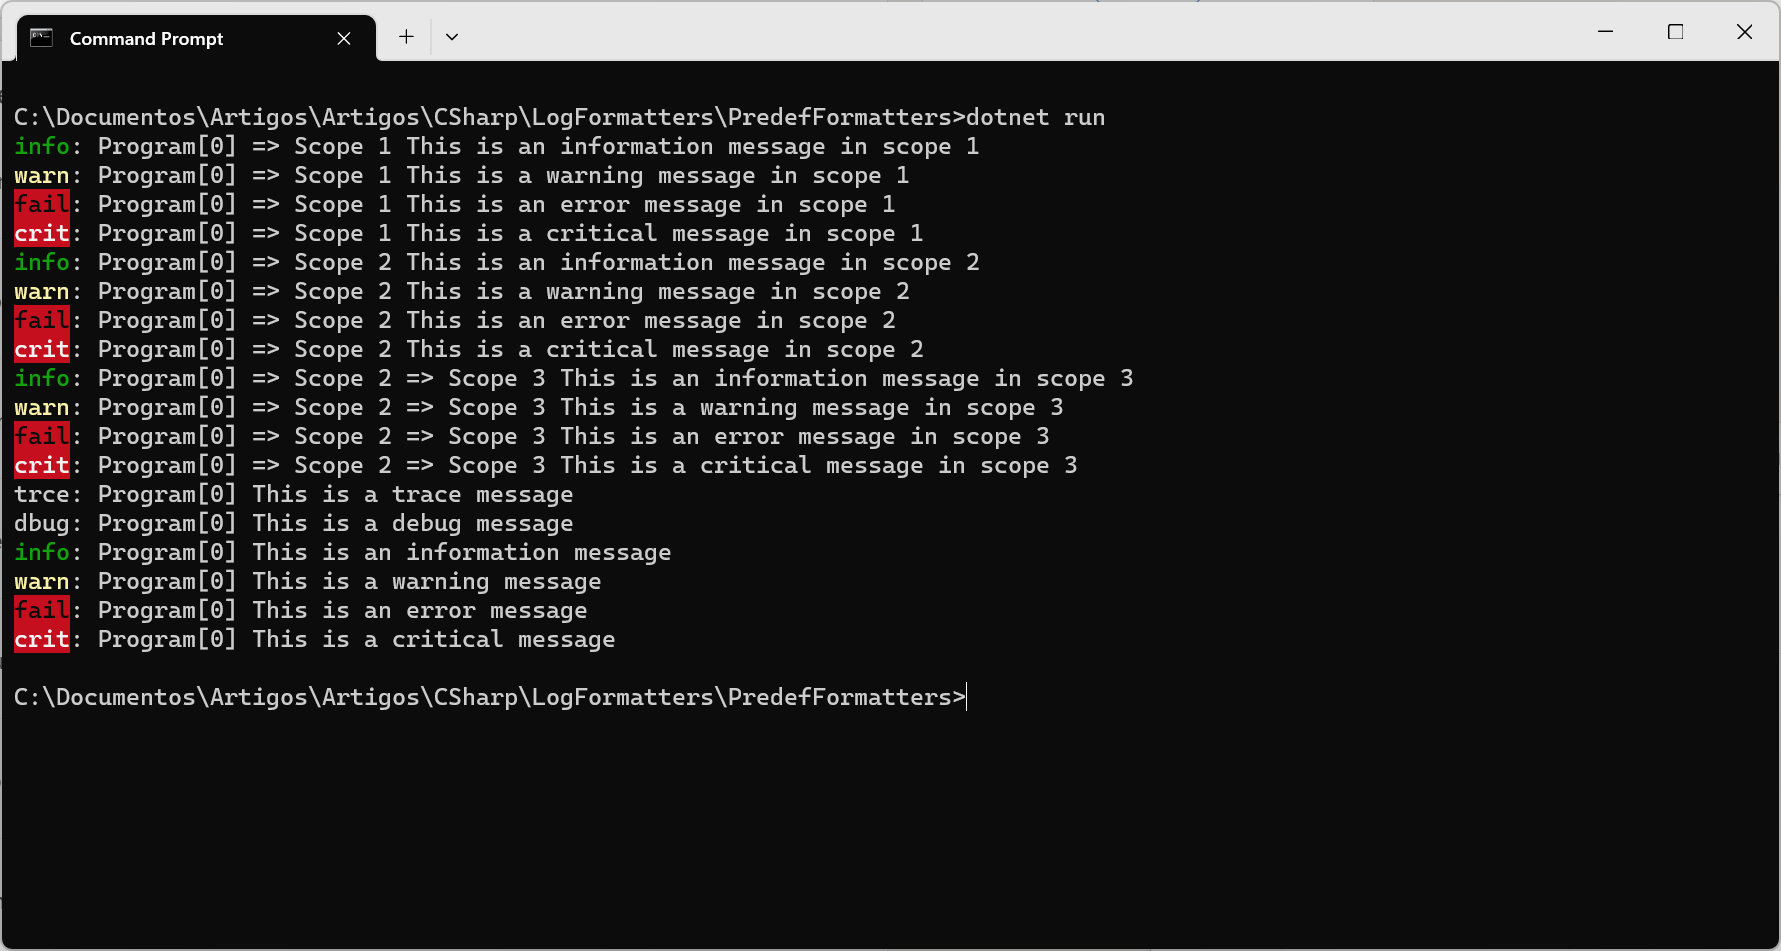
using Microsoft.Extensions.Configuration;
using Microsoft.Extensions.Logging;
var configuration = new ConfigurationBuilder()
.SetBasePath(Directory.GetCurrentDirectory())
.AddJsonFile($"appsettings.json", false, true)
.Build();
var loggerFactory = LoggerFactory.Create(builder =>
{
builder
.AddConfiguration(configuration.GetSection("Logging"))
.AddConsole();
});
var logger = loggerFactory.CreateLogger<Program>();
using(var scope1 = logger.BeginScope("Scope 1"))
{
logger.LogInformation("This is an information message in scope 1");
logger.LogWarning("This is a warning message in scope 1");
logger.LogError("This is an error message in scope 1");
logger.LogCritical("This is a critical message in scope 1");
}
using(var scope2 = logger.BeginScope("Scope 2"))
{
logger.LogInformation("This is an information message in scope 2");
logger.LogWarning("This is a warning message in scope 2");
logger.LogError("This is an error message in scope 2");
logger.LogCritical("This is a critical message in scope 2");
using(var scope3 = logger.BeginScope("Scope 3"))
{
logger.LogInformation("This is an information message in scope 3");
logger.LogWarning("This is a warning message in scope 3");
logger.LogError("This is an error message in scope 3");
logger.LogCritical("This is a critical message in scope 3");
}
}
logger.LogTrace("This is a trace message");
logger.LogDebug("This is a debug message");
logger.LogInformation("This is an information message");
logger.LogWarning("This is a warning message");
logger.LogError("This is an error message");
logger.LogCritical("This is a critical message");
Task.Delay(1000).Wait();
Creating a custom formatter
In addition to using the available formatters, you can create your own formatter that formats the data according to your specific needs. For that, you must create a new class that inherits from ConsoleFormatter
and use it to generate the data. Create a new file and name it CsvLogFormatter.cs
. Add this code to create the formatter:
using Microsoft.Extensions.Logging;
using Microsoft.Extensions.Logging.Abstractions;
using Microsoft.Extensions.Logging.Console;
public class CsvLogFormatter : ConsoleFormatter
{
public CsvLogFormatter() : base("CsvFormatter")
{
}
public override void Write<TState>(in LogEntry<TState> logEntry, IExternalScopeProvider? scopeProvider, TextWriter textWriter)
{
string? message =
logEntry.Formatter?.Invoke(
logEntry.State, logEntry.Exception);
if (message is null)
{
return;
}
var scopeStr = "";
if (scopeProvider != null)
{
var scopes = new List<string>();
scopeProvider.ForEachScope((scope, state) => state.Add(scope?.ToString() ?? ""), scopes);
scopeStr = string.Join("|", scopes);
}
var logMessage = $"\"{logEntry.LogLevel}\",\"{logEntry.Category}[{logEntry.EventId}]\"," +
$"\"{scopeStr}\",\"{message}\"";
textWriter.WriteLine(logMessage);
}
}
The formatter inherits from ConsoleFormatter
and overrides the Write
method, that receives the log entry, the scope provider (which will proved the scopes for the message) and the TextWriter
, used for the log output. This method will format the message received, then it will obtain the scopes and join them in a string separated by "|" and then set the complete log message that will be written by the text writer.
This class works fine and outputs each log message as a line of comma-separated values, where every field is enclosed by quotes and the fields are separated by commas. To use it, we must set it up in Program.cs
by calling AddConsoleFormatter
within the ConfigureLogging
method, as shown in the code snippet below:
var loggerFactory = LoggerFactory.Create(builder =>
{
builder
.AddConfiguration(configuration.GetSection("Logging"))
.AddConsole()
.AddConsoleFormatter<CsvLogFormatter, ConsoleFormatterOptions>();
});
As you can see, the ConsoleFormatterOptions
is the second parameter in the generic call, which is automatically provided by the logging framework. However, there is currently no mention of these options in the formatter code. To use options in the code, we need to enhance the code, but, before that, we will create an options class specific for this formatter. One thing that must be added is the list separator character, which we will add in the CsvFormatterOptions
class.
public sealed class CsvFormatterOptions : ConsoleFormatterOptions
{
public string? ListSeparator { get; set; }
}
This class inherit from the ConsoleFormatterOptions
class and introduces a new property called ListSeparator
. To use it, we must enhance our formatter like this:
public class CsvLogFormatter : ConsoleFormatter, IDisposable
{
CsvFormatterOptions? _options;
private readonly IDisposable? _optionsReloadToken;
public CsvLogFormatter(IOptionsMonitor<CsvFormatterOptions> options) : base("CsvFormatter")
{
_options = options.CurrentValue;
_optionsReloadToken = options.OnChange(ReloadLoggerOptions);
}
private void ReloadLoggerOptions(CsvFormatterOptions currentValue)
{
_options = currentValue;
}
public override void Write<TState>(in LogEntry<TState> logEntry, IExternalScopeProvider? scopeProvider, TextWriter textWriter)
{
string? message =
logEntry.Formatter?.Invoke(
logEntry.State, logEntry.Exception);
if (message is null)
{
return;
}
var scopeStr = "";
if (_options?.IncludeScopes == true && scopeProvider != null)
{
var scopes = new List<string>();
scopeProvider.ForEachScope((scope, state) => state.Add(scope?.ToString() ?? ""), scopes);
scopeStr = string.Join("|", scopes);
}
var listSeparator = _options?.ListSeparator ?? ",";
if (_options?.TimestampFormat != null)
{
var timestampFormat = _options.TimestampFormat;
var timestamp = "\"" +DateTime.Now.ToLocalTime().ToString(timestampFormat,
CultureInfo.InvariantCulture) + "\"";
textWriter.Write(timestamp);
textWriter.Write(listSeparator);
}
var logMessage = $"\"{logEntry.LogLevel}\"{listSeparator}"+
$"\"{logEntry.Category}[{logEntry.EventId}]\"{listSeparator}" +
$"\"{scopeStr}\"{listSeparator}\"{message}\"";
textWriter.WriteLine(logMessage);
}
public void Dispose() => _optionsReloadToken?.Dispose();
}
Now the class also implements the IDisposable
interface. The implementation of IDisposable
is necessary because the constructor of CsvLogFormatter
receives an IOptionsMonitor<CsvFormatterOptions>
that registers an event handler for detecting changes in the options. By implementing IDisposable
, we can ensure the proper disposal of the options event handler. This instance also has the current options value, that we use to initialize the options.
Since our options inherit from ConsoleFormatterOptions
, we have access to all properties in the parent class, allowing us to utilize them for enhancing the output:
- If
IncludeScopes
istrue
, we will gather the scopes and include them to the log entry - If
TimestampFormat
is defined, we will add the current timestamp to the output - We can use the
ListSeparator
option to change the list separator between the log values
All these options can still be configured in appsettings.json
. For example, if we change the file to:
{
"Logging": {
"LogLevel": {
"Default": "Trace"
},
"Console": {
"FormatterName": "CsvFormatter",
"FormatterOptions": {
"SingleLine": true,
"IncludeScopes": true,
"ColorBehavior": "enabled",
"TimestampFormat": "yyyy-MM-dd HH:mm:ss.fff zzz",
"JsonWriterOptions": {
"Indented": true
},
"ListSeparator": ";"
}
}
}
}
And run the program, we will get something like this:
Conclusion:
As you can see, log formatters offer flexibility, and you can tailor them to suit your specific requirements. You can change the output format for the data and even transform or filter it. That can improve a lot your logging experience.
All the source code for this project is at https://github.com/bsonnino/LogFormatters
Very nice and thorough article. Just a quick comment about the Task.Delay(1000).Wait(); line. This may work fine for console-outputting scenarios only. But it’s better to just Dispose the LoggerFactory. This will force all well-written loggers to process all remaining log messages.
Yes, you are right, thanks for pointing it out – the
Delay
is a hack, but disposing the factory works fine and should be the way to go. In this case, I would just change the linevar loggerFactory = LoggerFactory.Create(builder =>
to
using var loggerFactory = LoggerFactory.Create(builder =>
and remove the
Delay
at the end, it will work fine.