
The models available in the Windows AI APIs have unlocked a whole new world of features: you can add chat to your apps, answer questions in natural language, describe images for accessibility, enhance image resolution, remove image backgrounds or extract text from an image.
These were features very difficult to implement, but the Windows AI APIs makes this very easy. One useful feature is to read a table from an image and convert it into a text table that can be edited or processed. This article will show how to use the Windows OCR model to read a table from an image and convert it to an ASCII table.
The OCR model was promoted to stable release status, so you can use it in your production code with version 1.7.2 of Windows App SDK or later.
We will build a WinUI 3 app in this article, but you can create a console or WPF app with the WinAppSDK. For more info, just take a look at my last article.
In Visual Studio, create a blank, WinUI3 packaged app:

To use the Windows AI models, we will have to change some things:
- In the Solution Explorer, right-click in the project and select Properties. Change the Target OS Version and Supported OS Version to 10.0.22621.0

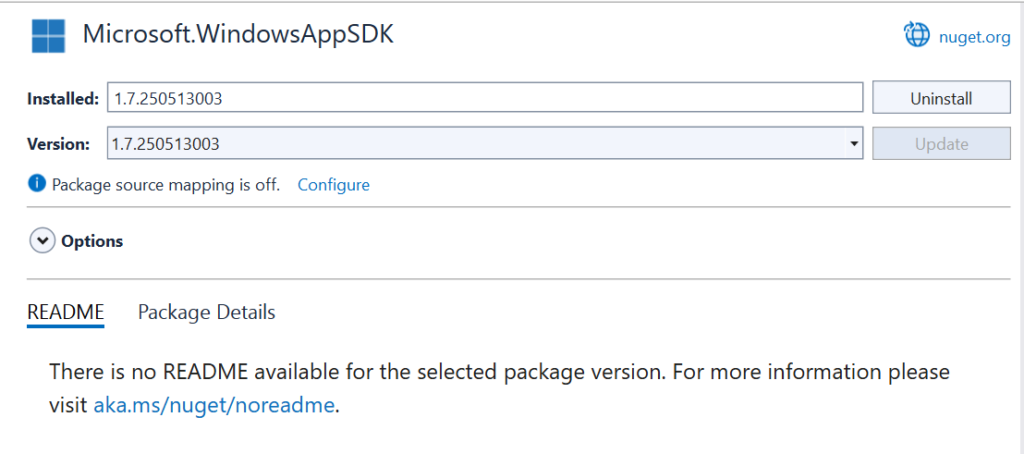
- In the Solution Explorer, right-click in the project dependencies and select Manage NuGet packages. Ensure that the Microsoft.WindowsAppSDK NuGet package version is 1.7.250513003 or later. If not, change to it
After these changes, you are able to use the Windows AI models in your application. Don't forget to match the platform of the app to the platform you are using (ARM64 or x64). You should be aware that the Windows AI models only work on Copilot+PCs with a Neural Processing Unit (NPU) capable of at least 40+TOPs of performance.
The next step is to add the UI for our app. In MainWindow.xaml, add this code
<Window
    x:Class="ImageToTable.MainWindow"
    xmlns="http://schemas.microsoft.com/winfx/2006/xaml/presentation"
    xmlns:x="http://schemas.microsoft.com/winfx/2006/xaml"
    xmlns:local="using:ImageToTable"
    xmlns:d="http://schemas.microsoft.com/expression/blend/2008"
    xmlns:mc="http://schemas.openxmlformats.org/markup-compatibility/2006"
    mc:Ignorable="d"
    Title="ImageToTable">
    <Grid x:Name="MainGrid">
        <Grid.RowDefinitions>
            <RowDefinition Height="Auto" />
            <RowDefinition Height="*" />
            <RowDefinition Height="30" />
        </Grid.RowDefinitions>
        <StackPanel Orientation="Horizontal">
            <Button x:Name="PasteButton" Click="PasteImage_Click" Margin="10"
                    Style="{StaticResource AccentButtonStyle}">Paste Image</Button>
        </StackPanel>
        <Grid Grid.Row="1">
            <Grid.ColumnDefinitions>
                <ColumnDefinition Width="*" />
                <ColumnDefinition Width="*" />
            </Grid.ColumnDefinitions>
            <Image x:Name="ImageSrc" Grid.Column="0" HorizontalAlignment="Stretch"
                    VerticalAlignment="Stretch" Stretch="Uniform" />
            <TextBlock x:Name="TableText" Grid.Column="1" HorizontalAlignment="Stretch"
                    VerticalAlignment="Stretch" TextWrapping="Wrap" Margin="10,0,10,0"
                    FontFamily="Consolas" />
        </Grid>
        <TextBlock x:Name="StatusText" HorizontalAlignment="Stretch" Grid.Row="2"
                Padding="10,3" />
    </Grid>
</Window>
We have one button to paste the image from the clipboard, an image to display the pasted image, and a TextBlock to show the converted table. At the bottom, there's a status bar.
The code to paste the image from the clipboard is:
private async void PasteImage_Click(object sender, RoutedEventArgs e)
{
    var package = Clipboard.GetContent();
    if (!package.Contains(StandardDataFormats.Bitmap))
    {
        StatusText.Text = "Clipboard does not contain an image";
        return;
    }
    StatusText.Text = string.Empty;
    var streamRef = await package.GetBitmapAsync();

    IRandomAccessStream stream = await streamRef.OpenReadAsync();
    BitmapDecoder decoder = await BitmapDecoder.CreateAsync(stream);
    var bitmap = await decoder.GetSoftwareBitmapAsync();
    var source = new SoftwareBitmapSource();

    SoftwareBitmap displayableImage = SoftwareBitmap.Convert(bitmap,
        BitmapPixelFormat.Bgra8, BitmapAlphaMode.Premultiplied);
    await source.SetBitmapAsync(displayableImage);
    ImageSrc.Source = source;
    RecognizeAndAddTable(displayableImage);
}
We check if there is an image in the clipboard. If there is no image, we display a message in the Status Bar and return. If there is an image, we get a reference to the stream, open it, read it into a Bitmap, convert the bitmap to a standard format, assign the bitmap to the Image Source and process the image to recognize the table and add it to the TextBlock.
Before using the OCR, it must be initialized. That is done in the InitializeRecognizer method:
private TextRecognizer? _textRecognizer;

public async void InitializeRecognizer()
{
    try
    {
        SetButtonEnabled(false);
        var readyState = TextRecognizer.GetReadyState();
        if (readyState is AIFeatureReadyState.NotSupportedOnCurrentSystem or AIFeatureReadyState.DisabledByUser)
        {
            StatusText.Text = "OCR not available in this system";
            return;
        }
        if (readyState == AIFeatureReadyState.EnsureNeeded)
        {
            StatusText.Text = "Installing OCR";
            var installTask = TextRecognizer.EnsureReadyAsync();

            installTask.Progress = (installResult, progress) => DispatcherQueue.TryEnqueue(() =>
            {
                StatusText.Text = $"Progress: {progress * 100:F1}%";
            });

            var result = await installTask;
            StatusText.Text = "Done: " + result.Status.ToString();
        }
        _textRecognizer = await TextRecognizer.CreateAsync();
        SetButtonEnabled(true);
    }
    catch (Exception ex)
    {
        ContentDialog dialog = new ContentDialog
        {
            Title = "Error initializing OCR",
            CloseButtonText = "Ok",
            DefaultButton = ContentDialogButton.Primary,
            Content = ex.Message
        };

        dialog.XamlRoot = this.Content.XamlRoot;
        await dialog.ShowAsync();
    }
}
This method disables the Paste button and gets the TextRecognizer state with GetReadyState. If this method returns NotSupportedOnCurrentSystem or DisabledByUser, a message is displayed in the status bar and returns. If there is an update for the model, this method will return EnsureNeeded and we must call EnsureReadyAsync. EnsureReadyAsync will download the model. As this can be a lenghty operation, it can return the progress of the operation, which is shown in the Progress handler. Once the model finishes downloading, an instance is initialized with CreateAsync. SetButtonEnabled is:
private void SetButtonEnabled(bool isEnabled)
{
    PasteButton.IsEnabled = isEnabled;
}
The InitializeRecognizer method is called when the UI is loaded. In the construtor of MainWindow.xaml.cs, add:
public MainWindow()
{
    this.InitializeComponent();
    MainGrid.Loaded += (s, e) => InitializeRecognizer();
}
RecognizeAndAddTable is:
public void RecognizeAndAddTable(SoftwareBitmap bitmap)
{
    if (_textRecognizer == null)
    {
      StatusText.Text = "OCR not initialized";
      return;
    }
    var imageBuffer = ImageBuffer.CreateBufferAttachedToBitmap(bitmap);
    var result = _textRecognizer.RecognizeTextFromImage(imageBuffer,
        new TextRecognizerOptions() { MaxLineCount = 1000 });
    if (result.Lines == null || result.Lines.Length == 0)
    {
        StatusText.Text = "No text found";
        return;
    }

    var cells = result.Lines.Select(l =>
      new RecognizedCell(l.Text, l.BoundingBox.TopLeft, l.BoundingBox.BottomRight)).ToList();

    var maxRow = SetRows(cells);
    SetCols(cells);

    var table = CreateTable(cells, maxRow);
    TableText.Text = table;
}
The two first lines is what you need to recognize the text in the image: create an ImageBuffer and pass it as a parameter to _textRecognizer.RecognizeTextFromImage. This method will return you all the recognized text in the Lines property. Each RecognizedLine in the result will have the text, bounding box and words for the piece of recognized text.
In our case, we don't need the individual words, just the text and the bounding boxes. We transform the lines property into an array of RecognizedCell instances, more suited for our purposes:
public class RecognizedCell(string Text, Point TopLeft, Point BottomRight)
{
    public string Text { get; } = Text;
    public Point TopLeft { get; } = TopLeft;
    public Point BottomRight { get; } = BottomRight;
    public int Top => (int)TopLeft.Y;
    public int Left => (int)TopLeft.X;
    public int Bottom => (int)BottomRight.Y;
    public int Right => (int)BottomRight.X;
    public int Row { get; private set; }
    public int Column { get; private set; }
    public void SetRow(int row) => Row = row;
    public void SetColumn(int column) => Column = column;
    public override string ToString() => $"({Text}, {TopLeft}, {BottomRight}, R: {Row}  C: {Column})";
}
Then, we set the Row and Column properties of each element and create the table to add to the TextBlock. SetRows will set the row for each element:
private static int SetRows(List<RecognizedCell> cells)
{
    var sortedByRows = cells.OrderBy(r => r.Top).ThenBy(r => r.Left);
    var currentY = 0.0;
    var currRow = 0;
    foreach (var box in sortedByRows)
    {
        if (box.Top > currentY)
        {
            currRow++;
            box.SetRow(currRow);
            currentY = Math.Max(box.Bottom, currentY);
        }
        else
        {
            box.SetRow(currRow);
        }
    }

    return currRow;
}
SetRows sorts the cells by their top position. Then, it walks through the cells verifying if the top is greater than the highest one found until now. If it is, we determine that a new row has started. This function returns the number of rows, so it can be used later, when creating the table.
SetCols is very similar to SetRows, the differences are that the elements are sorted by their left position and organized in a way that we check if each element has a position to the right of the largest one found until now.
private static void SetCols(List<RecognizedCell> cells)
{
    var sortedByCols = cells.OrderBy(r => r.Left).ThenBy(r => r.Top);
    var currentX = 0.0;
    var currCol = 0;
    foreach (var box in sortedByCols)
    {
        if (box.Left > currentX)
        {
            currCol++;
            box.SetColumn(currCol);
            currentX = Math.Max(box.Right, currentX);
        }
        else
        {
            box.SetColumn(currCol);
        }
    }
}
CreateTable creates an ASCII table, using '+', '-' and '|' characters as the borders:
private static string CreateTable(List<RecognizedCell> cells, int maxRow)
{
    var columnWidths = cells.GroupBy(b => b.Column).OrderBy(g => g.Key)
        .Select(g => g.Max(b => b.Text.Length)).ToArray();
    var tableTop = columnWidths.Aggregate(string.Empty,
        (current, width) => current + $"+{new string('-', width + 2)}") + '+' +
            Environment.NewLine;
    var headerColumns = cells.Where(b => b.Row == 1).ToArray();
    var tableHeader = GetLine(headerColumns, columnWidths);
    var table = tableTop + tableHeader + tableTop;
    for (var i = 1; i < maxRow; i++)
    {
        var columns = cells.Where(b => b.Row == i + 1).ToArray();
        table += GetLine(columns, columnWidths);
    }
    table += tableTop;
    return table;
}
This method will get the column widths by grouping the columns and getting the maximum text length for each one. Then, it will create the table by assembling the table top (that will be used also to separate the header and to close the table at the bottom), the header and then will add the rows to the table. GetLine will generate the table line with the row data:
private static string GetLine(RecognizedCell[] columns, int[] columnWidths)
{
    if (columns.Length == 0)
    {
        return string.Empty;
    }
    var line = string.Empty;
    for (var j = 0; j < columnWidths.Length; j++)
    {
        var column = columns.FirstOrDefault(c => c.Column == j + 1);

        line += column == null ? "| " + new string(' ', columnWidths[j]) + " " :
            "| " + column.Text.PadRight(columnWidths[j]) + " ";
    }
    line += '|' + Environment.NewLine;
    return line;
}
With that in place, you can run the program and convert an image to the ASCII table:
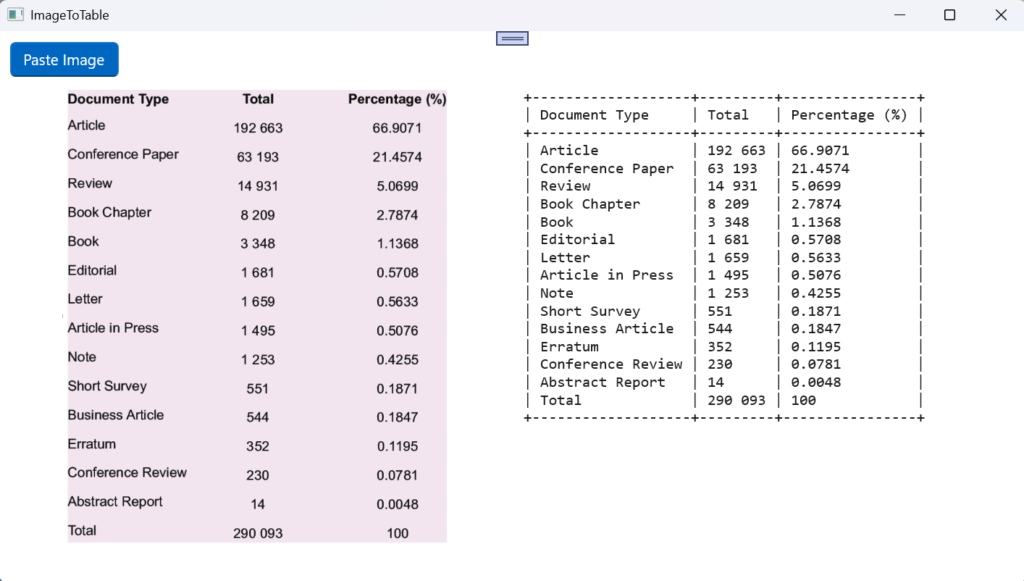
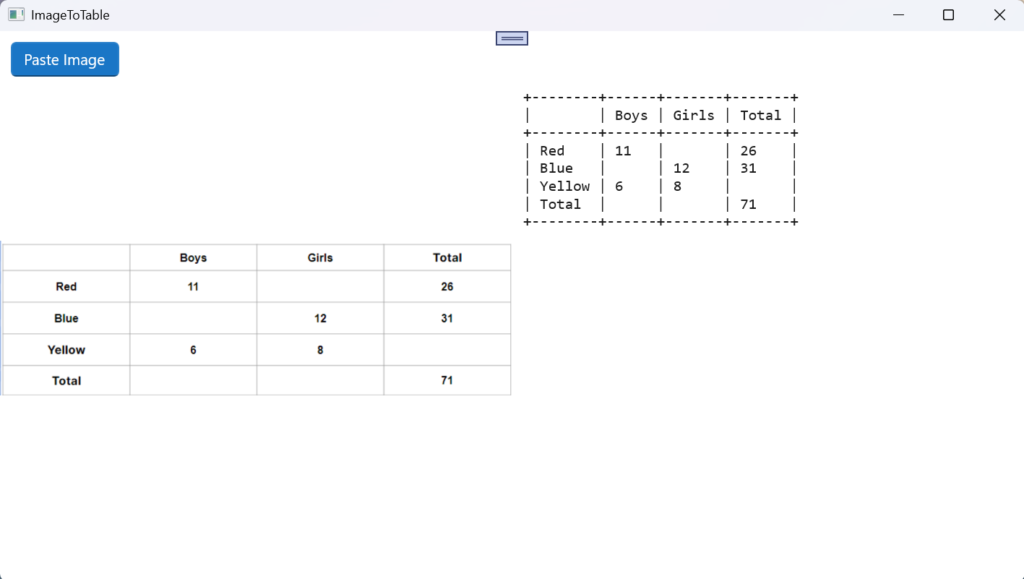
As you can see, it's very easy to recognize text in an image. These two lines do all the hard work and the rest of the program is just a matter of arranging the recognized text the way you want:
var imageBuffer = ImageBuffer.CreateBufferAttachedToBitmap(bitmap);
var result = _textRecognizer.RecognizeTextFromImage(imageBuffer,
        new TextRecognizerOptions() { MaxLineCount = 1000 });
The full source code for this article is at https://github.com/bsonnino/ImageToTable
1 thought on “Transforming an image into a table with Windows OCR”