
In my last post, I talked about the new WCR APIs that are available for your Windows App SDK apps. When you take a look at the WCR Website and the AI Dev Gallery, you may think "that's great for new WinAppSDK apps, but what about WPF apps, both the existing ones I have and the newer ones I want to create?".
In both resources, there's no mention of how to create an app that is not a WinUI3 app, but that isn't a requirement for adding the WCR Apis to your application: in fact, you can create a console or a WPF app using the same APIs. In this post, I will show you how to create a console and a WPF app that use Phi-Silica, the small language model included in Windows. The only restriction is that these programs only run on Copilot+PCs with an NPU.
Creating a console app with Phi-Silica
When we want to create an app that uses the WCR API, it has to meet some prerequisites:
- You must add the Windows App SDK 1.8 Experimental1 Nuget package
- The app must be targeted to Windows version 10.0.22621.0 or greater
- The app must be targeted to a specific platform (it can't be Any CPU)
- The app must be packaged - it should have a Windows identity, given by the package
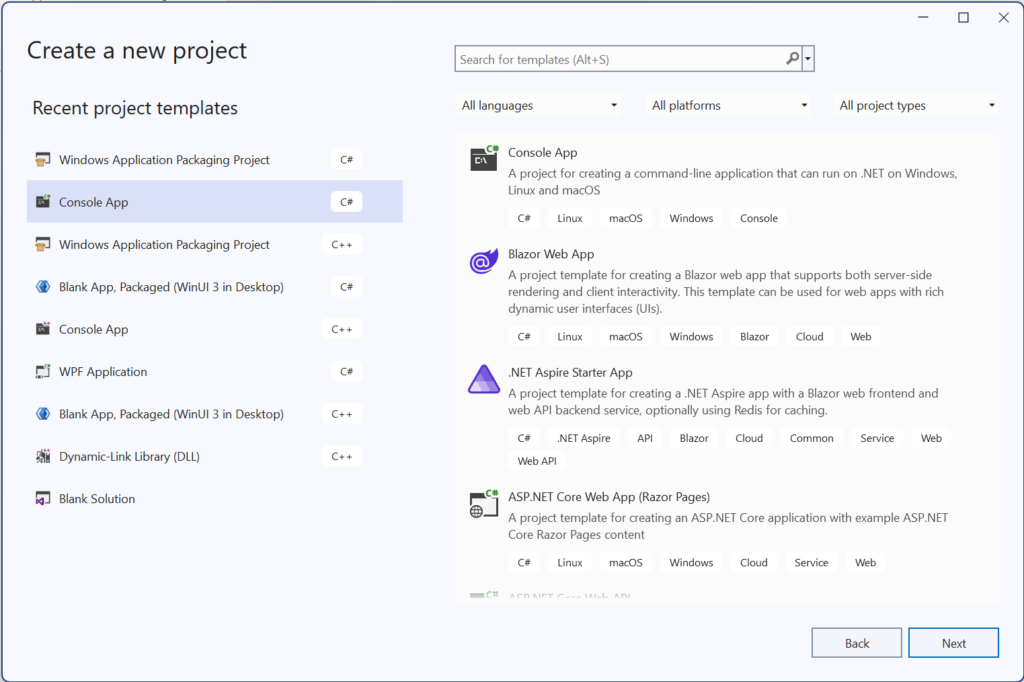
Let's tackle these one by one. First, in Visual Studio, let's create a console app:
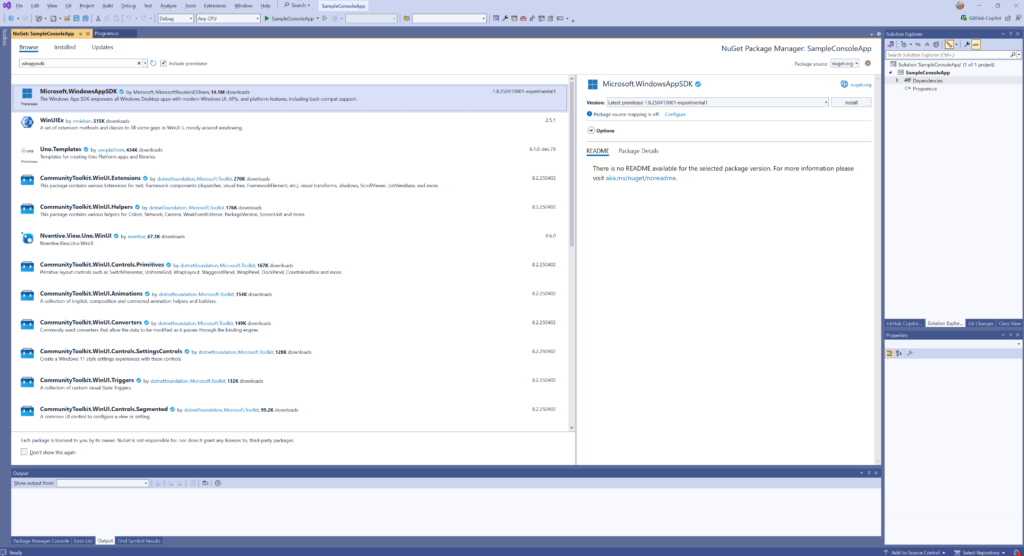
The next step is to add the Windows App SDK Nuget package. In the Solution Explorer, right-click the Dependencies node for the project and select Manage NuGet packages and install the Microsoft.WindowsAppSDK 1.8 Experimental1 package:
Once you have it installed, let's target the Windows version. For that, you must open the csproj file and change the TargetFramework tag to:
<TargetFramework>net9.0-windows10.0.22621.0</TargetFramework>To target the specific platform, add this line to the csproj file:
<Platforms>ARM64</Platforms>You should have something like this in your csproj file:

You can save the file and rebuild it. It should build fine. If you get an error saying that there's no target for that platform, rebuild again and it should work.
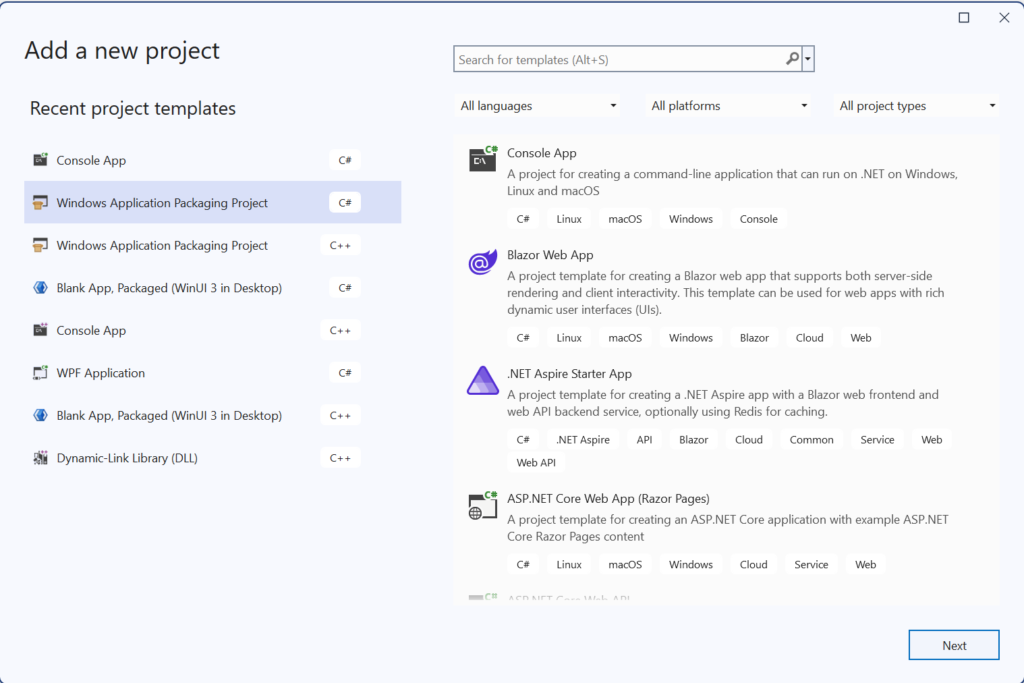
To make the app packaged, we must add a new project to the solution. Right-click the solution and select Add > New project and select Windows Application Packaging Project:
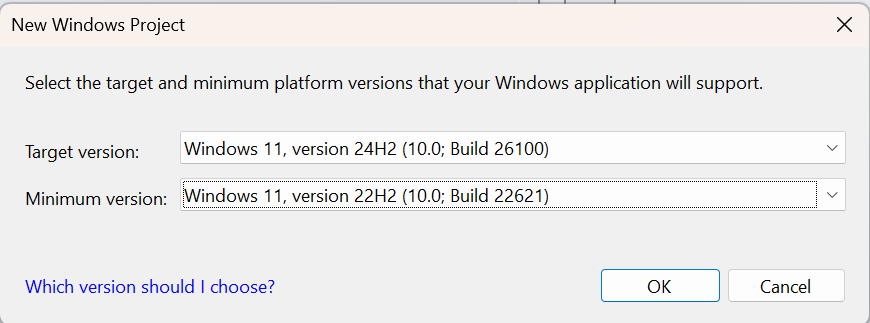
Call it SampleConsole.Package and select the Target version as Windows 11, version 24H2 (10.0; Build 26100) and Minimum version as Windows 11, version 22H2 (10.0; Build 22621):
Once created, set the project as the startup project by right-clicking on it in the Solution Explorer and selecting Set as Startup Project. Then, right-click on the Dependencies node for the project and select Add project reference and add the console project as a reference:

Now, it's time to add the code to our console project. The first step is to make sure that the language model is available on the device you are using. In Program.cs, add this code:
using Microsoft.Windows.AI;
using Microsoft.Windows.AI.Generative;

var readyState = LanguageModel.GetReadyState();
if (readyState is AIFeatureReadyState.NotSupportedOnCurrentSystem or AIFeatureReadyState.DisabledByUser)
{
    Console.WriteLine("Language model is not supported on this device");
    return;
}
This code checks if you are using a supported Copilot+Pc and the language model is not disabled.
The next step is to check if the language model is already downloaded and, if not, download it:
if (readyState == AIFeatureReadyState.EnsureNeeded)
{
    await LanguageModel.EnsureReadyAsync();
}
Once it's downloaded, we can create an instance of the language model and use it to get an answer to our prompt:
using LanguageModel languageModel = await LanguageModel.CreateAsync();
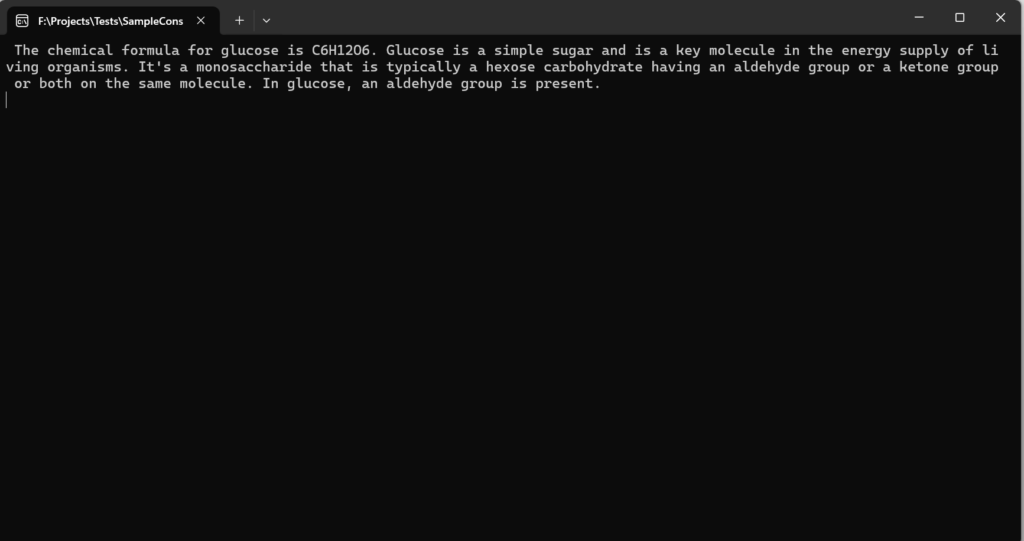
string prompt = "What's the formula for glucose?";
var result = await languageModel.GenerateResponseAsync(prompt);
Console.WriteLine(result.Text);
Console.ReadLine();When we run the program, we get the model's response for the prompt:
The full source code for the program is:
using Microsoft.Windows.AI;
using Microsoft.Windows.AI.Generative;

var readyState = LanguageModel.GetReadyState();
if (readyState is AIFeatureReadyState.NotSupportedOnCurrentSystem or AIFeatureReadyState.DisabledByUser)
{
    Console.WriteLine("Language model is not supported on this device");
    return;
}

if (readyState == AIFeatureReadyState.EnsureNeeded)
{
    await LanguageModel.EnsureReadyAsync();
}

using LanguageModel languageModel = await LanguageModel.CreateAsync();

string prompt = "What's the formula for glucose?";

var result = await languageModel.GenerateResponseAsync(prompt);

Console.WriteLine(result.Text);

Console.ReadLine();
Simple, right? And what about a WPF project? With this knowledge, it's easy to add Phi-Silica to a WPF project.
Creating a WPF Project with Phi-Silica
To create (or update) a WPF project, we must follow the same steps as we did with the console app. Initially, in Visual Studio, create a WPF app. Add the Microsoft.WindowsAppSDK 1.8 Experimental1 NuGet package. Change the TargetFramework and Platforms tags in the csproj file:
<TargetFramework>net9.0-windows10.0.22621.0</TargetFramework>
<Platforms>ARM64</Platforms>
Add a Windows Application Packaging Project to the solution, set the Target version to 22600 and Minimum version to 22621. Set this project as the Startup Project and add the dependency to the WPF project. If you rebuild and run, you should have an empty WPF window:
The next step is to add the code to our WPF app. We will use the new Fluent theme, which I showed in this post. In_App.xaml, add this code to enable the fluent theme:
<ResourceDictionary>
    <ResourceDictionary.MergedDictionaries>
        <ResourceDictionary Source="pack://application:,,,/PresentationFramework.Fluent;component/Themes/Fluent.xaml" />
    </ResourceDictionary.MergedDictionaries>
</ResourceDictionary>
We will add the UI to type a prompt, click a button and get the response in a TextBlock. In MainWindow.xaml, add this code:
<Grid x:Name="MainGrid">
    <Grid.RowDefinitions>
        <RowDefinition Height="*" />
        <RowDefinition Height="Auto" />
        <RowDefinition Height="Auto" />
        <RowDefinition Height="*" />
    </Grid.RowDefinitions>
    <TextBox x:Name="InputTextBox" AcceptsReturn="True"
            AutomationProperties.Name="Prompt input" TextWrapping="Wrap" Margin="10"
            PreviewKeyUp="InputTextBox_PreviewKeyUp" />
    <StackPanel Grid.Row="1" HorizontalAlignment="Right" Orientation="Horizontal">
        <Button x:Name="AskButton" Width="85" Height="30" Margin="10,0"
                Click="AskButton_Click" Content="Ask"
                Style="{StaticResource AccentButtonStyle}" />
        <Button x:Name="StopBtn" Width="85" Height="30" Margin="10,0"
                AutomationProperties.Name="Stop" Click="StopBtn_Click"
                Style="{StaticResource AccentButtonStyle}" Visibility="Collapsed">
            <StackPanel Orientation="Horizontal">
                <TextBlock Text="Stop" />
            </StackPanel>
        </Button>
    </StackPanel>
    <TextBlock Grid.Row="2" Margin="10" Text="Response:" FontWeight="Bold" />
    <ScrollViewer Grid.Row="3" AutomationProperties.Name="Generated Text Scroll Area"
            HorizontalScrollBarVisibility="Disabled" IsTabStop="True"
            VerticalScrollBarVisibility="Auto">
        <TextBlock x:Name="ResponseText" Margin="10,0"
                AutomationProperties.Name="Output" TextWrapping="Wrap" />
    </ScrollViewer>
    <TextBlock x:Name="StatusText" HorizontalAlignment="Stretch"
            VerticalAlignment="Center" Grid.Row="3" Padding="10,3" TextWrapping="Wrap" />
    <Grid x:Name="LoadingGrid" Background="#40000000" Grid.RowSpan="4">
        <TextBlock Text="Wait... Loading Model" FontSize="72"
                HorizontalAlignment="Center" VerticalAlignment="Center" />
    </Grid>
</Grid>
At the bottom, we've added a grid that will cover the UI when the model is loading. Now, we must add the code that loads the model. This is done in the window constructor, when we set up a handler for the Loaded event:
public MainWindow()
{
    InitializeComponent();
    Loaded += (s, e) => InitializePhiSilica();
}
InitializePhiSilica will initialize the model:
private LanguageModel languageModel;

private async void InitializePhiSilica()
{
    try
    {
        var readyState = LanguageModel.GetReadyState();
        if (readyState is AIFeatureReadyState.NotSupportedOnCurrentSystem or AIFeatureReadyState.DisabledByUser)
        {
            LoadingGrid.Visibility = Visibility.Collapsed;
            MessageBox.Show("Phi Silica not available on this system",
                "Error initializing language model", MessageBoxButton.OK, MessageBoxImage.Error);
            Close();
            return;
        }
        if (readyState == AIFeatureReadyState.EnsureNeeded)
        {
            StatusText.Text = "Installing Phi Silica";
            var installTask = LanguageModel.EnsureReadyAsync();

            installTask.Progress = (installResult, progress) => Dispatcher.BeginInvoke(() =>
                            {
                                StatusText.Text = $"Progress: {progress * 100:F1}";
                            });

            var result = await installTask;
            Dispatcher.BeginInvoke(() => StatusText.Text = "Done: " + result.Status.ToString());
        }
        languageModel = await LanguageModel.CreateAsync();
        LoadingGrid.Visibility = Visibility.Collapsed;
    }
    catch (Exception ex)
    {
        LoadingGrid.Visibility = Visibility.Collapsed;
        MessageBox.Show(ex.Message, "Error initializing language model", MessageBoxButton.OK, MessageBoxImage.Error);
    }
}
We have defined a private field languageModel, which will be used to query the model. The method will check if Phi Silica is available on this device and show an error message and close the window if it's not available.
Then, it will check if the model is downloaded and, if not, download it and show the progress in the status bar. Once the model is available, it creates an instance of the LanguageModel and waits for the prompt.
The handler for the Click event for the Ask button is:
private void AskButton_Click(object sender, RoutedEventArgs e)
{
    DoRespond();
}
It will call the DoRespond method, that checks if the prompt text box has some text and, if it has, will query the model:
CancellationTokenSource? cts = null;

private async void DoRespond()
{
    if (languageModel == null || InputTextBox.Text.Length == 0)
    {
        return;
    }
    try
    {
        AskButton.Visibility = Visibility.Collapsed;
        StopBtn.Visibility = Visibility.Visible;
        var text = InputTextBox.Text;
        ResponseText.Text = string.Empty;

        cts = new CancellationTokenSource();
        var asyncOp = languageModel.GenerateResponseAsync(text);
        if (asyncOp != null)
        {
            asyncOp.Progress = (asyncInfo, delta) =>
            {
                Dispatcher.BeginInvoke(() => ResponseText.Text += delta);
                if (cts.IsCancellationRequested)
                {
                    asyncOp?.Cancel();
                }
            };
            await asyncOp;
        }
    }
    catch (Exception ex)
    {
        ResponseText.Text +=
            Environment.NewLine + Environment.NewLine + (ex is TaskCanceledException ?
                "Request canceled" : $"Error in processing: {ex.ToString()}");
    }

    AskButton.Visibility = Visibility.Visible;
    StopBtn.Visibility = Visibility.Collapsed;

    cts?.Dispose();
    cts = null;
}
We declared a CancellationTokenSource to allow the cancellation of the response. If there is some text in the prompt text box, we hide the Ask button and show the Stop button. Then we query the model with var asyncOp = languageModel.GenerateResponseAsync(text);. Note that we are not awaiting the operation yet. We must set the progress, in order to get the response in an asynchronous way. If we don't set the Progress handler, we will get the response only at the end, with the result of await asyncOp. Then we show the Ask button and hide the Stop button.
To cancel the query, we must add the handler to the Click event of the Stop button:
private void StopBtn_Click(object sender, RoutedEventArgs e)
{
    cts?.Cancel();
}
We call the Cancel method of the CancellationTokenSource, which will cancel the async operation and throw a TaskCanceledException that will be captured in the catch clause.
There is just one small thing to add: we want the DoRespond method to be called when the user presses Ctrl+Enter. To do that, we must handle the PreviewKeyUp event of the prompt box:
private void InputTextBox_PreviewKeyUp(object sender, KeyEventArgs e)
{
    if (e.Key == Key.Enter && Keyboard.Modifiers.HasFlag(ModifierKeys.Control) && sender is TextBox textBox)
    {
        DoRespond();
    }
}
With that, we can run the code and query the model in our WPF app:
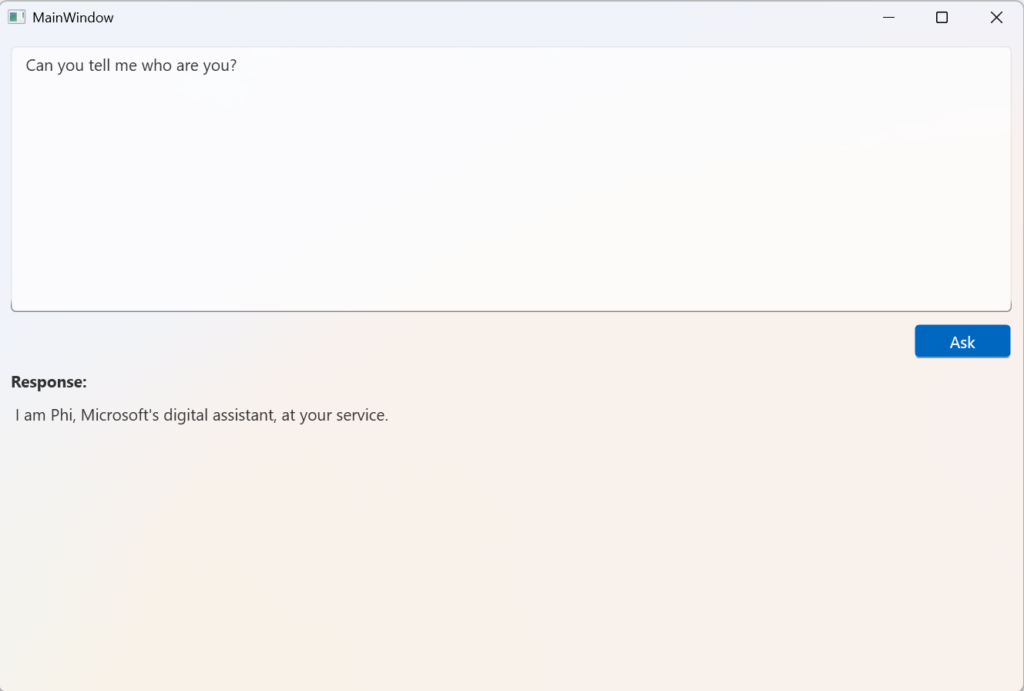
As you can see, it's very easy to implement AI in your apps using the WCR APIs. If you want to use any other model in your apps, the procedure is the same - you just have to add the corresponding APIs for the model.
The full source code for the apps is in https://github.com/bsonnino/WPFWCR
1 thought on “Adding AI in your WPF app”