
In the previous two posts (Light sensor and Compass), I’ve shown how to use the sensors in a UWP app. Working with them is very easy and it can enhance the usability of your app. In this post, we will show how to use another sensor, the Inclinometer.
This sensor is used a lot for games, as it detects the inclination of the device. That way, the user can control the game by tilting the device. Pretty cool, no? It’s note a pure sensor, as you won’t have an inclinometer in your device, but it gets its data from other two sensors, the accelerometer and the gyroscope.
The sensor usage is similar to the other sensors, and it shows three measures, Yaw (the rotation on the Z axis), Pitch (rotation on the X axis) and Roll (rotation on the Y axis):

(source - https://msdn.microsoft.com/en-us/windows/uwp/devices-sensors/sensors)
Playing with a ball in UWP
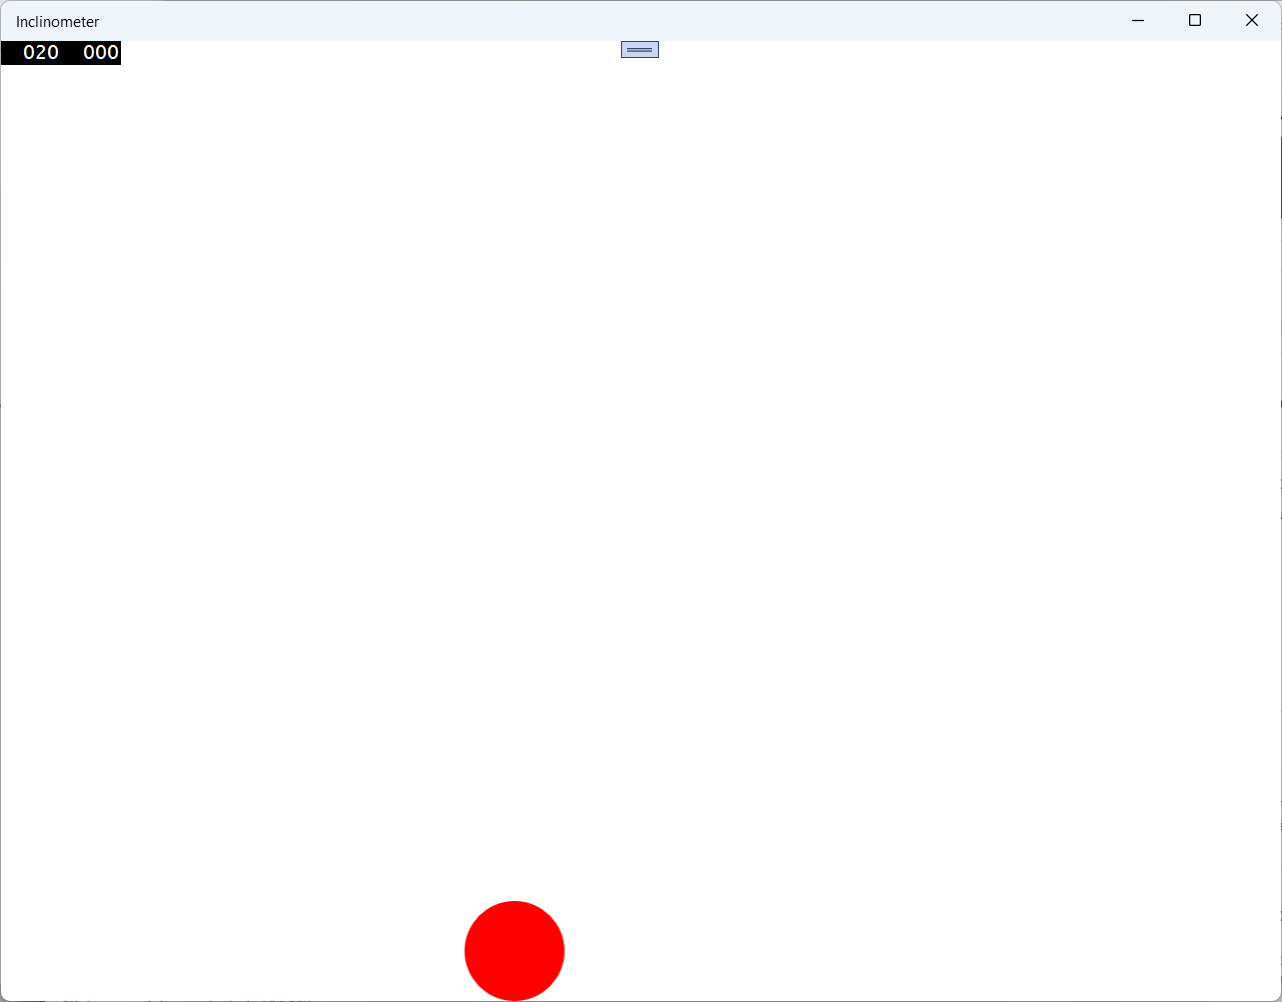
To show the usage f an inclinometer, we will create a project that can be a starting point for a game. We will draw a ball in the window and, depending on how the user tilts the device, the ball will move faster or slower, to the left and to the right.
We will start creating a new UWP blank app. Change the main element in the main page to a Canvas and add a new Ellipse to it:
<Canvas Background="{ThemeResource ApplicationPageBackgroundThemeBrush}">
  <Ellipse Width="80" Height="80" Fill="Red" x:Name="Ball"/>
</Canvas>
In the constructor of the MainPage, we position the ball and add the code to initialize the inclinometer and set its ReadingChanged event handler:
public MainPage()
{
    this.InitializeComponent();
    Loaded += (s, e) =>
    {
        Canvas.SetLeft(Ball, ActualWidth / 2 - 40);
        Canvas.SetTop(Ball, ActualHeight - 80);
        var inclinometer = Inclinometer.GetDefault();
        if (inclinometer == null)
        {
            return;
        }
        inclinometer.ReadingChanged += async (s1, e1) =>
        {
            await Dispatcher.RunAsync(Windows.UI.Core.CoreDispatcherPriority.Normal, () =>
            {
                var position = Canvas.GetLeft(Ball);
                var newPosition = position + e1.Reading.RollDegrees;
                if (newPosition  ActualWidth - 80)
                    newPosition = ActualWidth - 80;
                Canvas.SetLeft(Ball, newPosition);
            });
        };
    };
}
As you can see, this time I’m doing all the initialization in the handler of the Loaded event of the page. That’s because ActualWidth and ActualHeight of the page aren’t set before the Loaded event fires, and if I don’t use this handler, the ball would be placed in the wrong place. As we have a Canvas, we position the ball with the attached properties Left and Top. In the code behind, this is done with the static methods Canvas.SetLeft and Canvas.SetTop.
The next step is to get the Inclinometer sensor with GetDefault and set its ReadingChanged handler. It will get the current position of the ball and will set the new position depending on the Roll (number of degrees of tilt in the Y position). That way, if the user tilts more, the ball will move faster. If he tilts less, it will move slower.
With that code in place, we have our moving ball project complete and can run it. If your device has an inclinometer, you can see the ball moving. If it doesn’t have, you can use a Windows Phone and see the same app running there.
Conclusions
Using the inclinometer is very simple and you can provide your users a different kind of input with it, you just need to get its reading and move the elements in your app according to the tilt of the device.
The source code for this app is in https://github.com/bsonnino/MovingBall