
One of the indirect benefits of being a Microsoft MVP is that many tool or component producers give copies for MVPs for their personal use, so they can use, evaluate and, if they like it, recommend it.
I use many of these tools on a daily basis and like them very much. So nothing more fair than write a post about them and how they help my work.
There is no doubt that the tool I use the most is ReSharper (http://www.jetbrains.com/resharper/), an add-in for Visual Studio to enhance your productivity. When I use Visual Studio, it’s always there, helping me to write code.
Code analysis
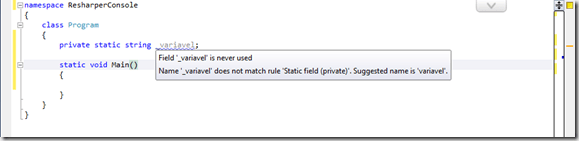
When you open a project, ReSharper will analyze your code and start to give you suggestions to enhance it. When you open a console project, you will see something like this on the editor:
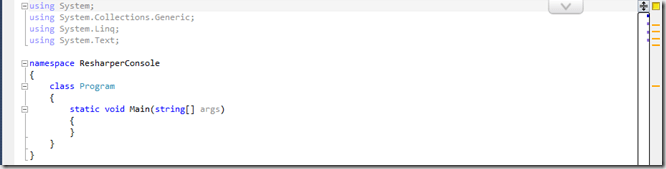
On the right side, a new bar is added with help indicators for your code. The yellow square at the top shows that there are warnings to improve your code. If it’s red, there are compile errors and, if your code is ok, the square turns green. Below the square, there are some bars indicating the points where problems are found. If you hover the mouse over the bars, a tooltip will show the problem.
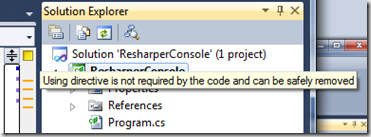
Fixing the error is very simple. You just have to click on the bar and the editor will be positioned on the place of the error. A red bulb will indicate the error and we can click on it to show the available actions. This list can be selected with Alt-Enter. If I could only remember one ReSharper shortcut, this would be the one. It will do many fixes for you, with Alt-Enteryour code will improve a lot!
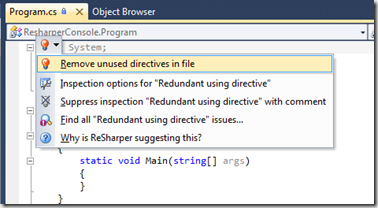
We select the desired action and ReSharper corrects the code (by eliminating the using clauses not needed). To fix next error, we can see that the args parameter in the Main function is in gray. That means that it’s not being used there. When we put the mouse over the args parameter, ReSharper shows a pyramid, indicating that there is a refactoring to be made.
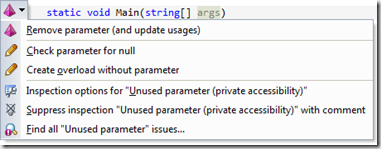
It will remove the unused parameter. Besides this change, it will verify all places where the function is called and change its call. That’s great when we add a parameter and later we verify it is not needed and we want to remove it. If we do that, all places where the function is called will not compile. With this refactoring, our code won’t break anymore.

ReSharper is constantly analyzing our code and checking consistency on variables and methods names. You can tell how do you like to name the fields, properties and methods and it will check the consistency for you.
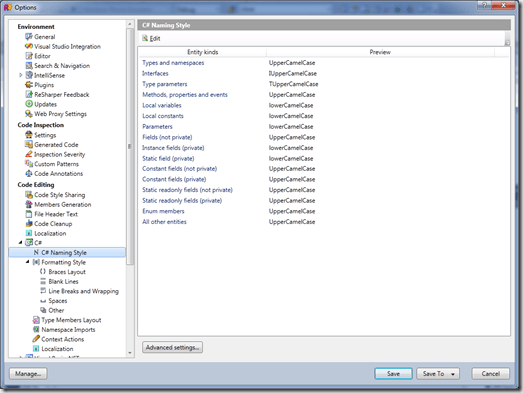
For example, I like to name my private fields using CamelCase, starting with a lowercase character (with no leading underscore). If I put a field using a different naming, ReSharper will tell me and ask to change it. Just press Alt-Enter and it will change the name and all references to this variable.
Code improvement
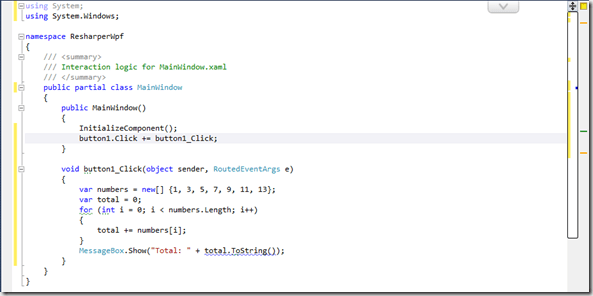
ReSharper also verifies the quality of your code. Yes, I know that your code (like mine) is wonderful, but can it be improved? Take a look on the figure below, where I have a WPF application where I’ve added the event handler of the Click event for a button in code, using button1.Click +=
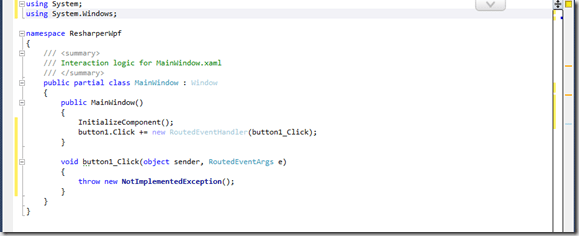
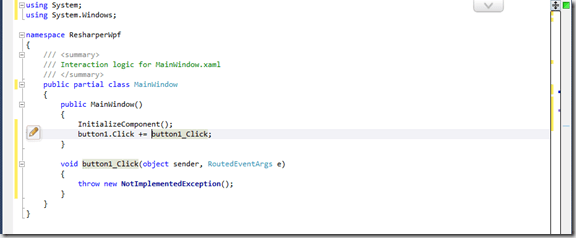
ReSharper shows two warnings and a reminder. The first warning is about MainWindow. It shows that the parent type (Window) has been already declared and is not necessary. We should remember that when we create a WPF window we are creating a partial class, declared in two places: on the XAML and on the code behind. The XAML already tells that MainWindow inherits from Window and we can remove this redundant declaration from the code behind. The second warning is due to the fact that we can eliminate the delegate creation when adding the handler. The reminder is to tell us that we have a “Not Implemented” exception, a clear indication that we must add code there. Pressing Alt-Enter twice, and our code will be changed to:
ReSharper analyses your code, checking for improvements and possible errors. When you enter this code
you can see on the bar on the right a warning and a possible improvement. The warning tells us that ToString is redundant and that we must specify a culture for the conversion. The fact that it’s redundant makes it a candidate for elimination. Alt-Enter and there it goes. The next improvement is in the for, that can be converted to a LINQ expression. Pressing Alt-Enter again we end up with this code:

Other common code improvements are if and returnoptimizations: when we put something like this
if (x == 3) y = 2; else y = 5;
ReSharper optimizes to:
y = x == 3 ? 2 : 5;
Or this code:
if (x == 3) return 2; else return 5;
Here, we have two optimizations: eliminate the else
if (x == 3) return 2; return 5;
or use the ternary operator:
return x == 3 ? 2 : 5;
Refactoring
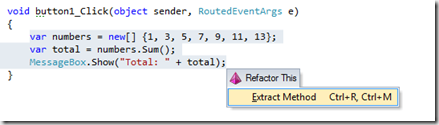
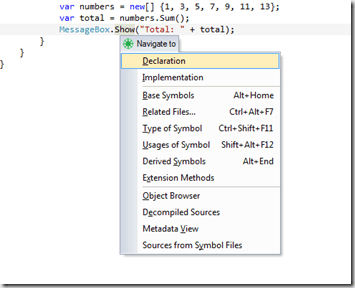
That’s not all that ReSharper can do for you. Its refactoring tools and code creation are fantastic. If we want to extract the code from the event handler to a new method, we can press Ctrl-Shift-R (Refactor this) and ReSharper will show all available refactorings.
We select the extract method refactoring and this screen is shown:
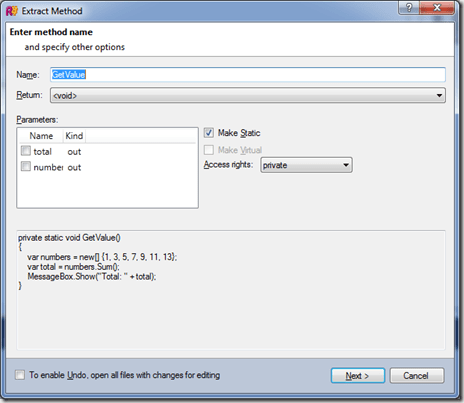
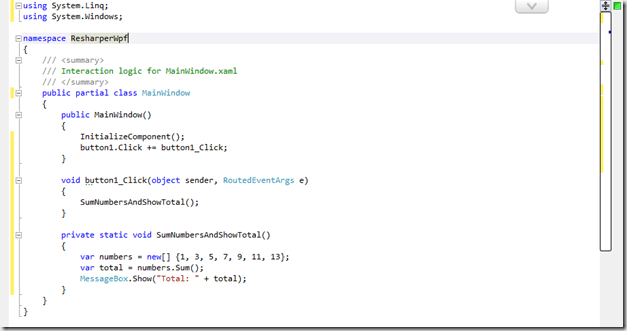
We can indicate the parameters, the function name and its return type. By clicking on Next, we get something like
Code creation
We can also insert code using templates. ReSharper allows to create templates with code for new files or code snippets.
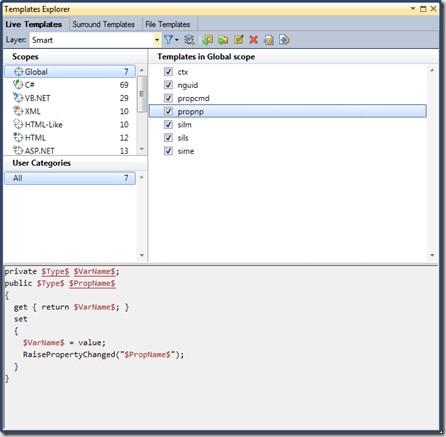
We have three kinds of templates:
- Live templates – code snippets templates, inserted like Visual Studio snippets. To insert them, we must add the snippet name and press
to insert. One other way to insert these snippets is by using Ctrl-E-L. On the figure above, I’ve created the propnpsnippet, that creates a property with a backing field and calls the PropertyChanged handler. - Surround templates, that surround the code with a template, like to surround the code with a try…catch. They can be invoked with Ctrl-E-U.
- File templates – they create new files on our project, like new classes or interfaces. They are invoked with Ctrl-Alt-Ins.
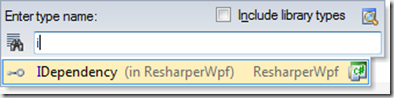
We will create a new class in our project. We press Ctrl-Alt-Ins and create a new class, calling it NewClass. We then press Alt-Ins and insert the constructor for the class. On the constructor parameters, we insert a dependency:
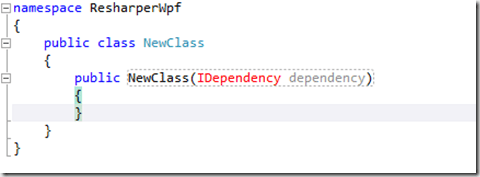
Note that IDependency is in red, because we have not defined this interface. We press Alt-Enter and these options are shown:
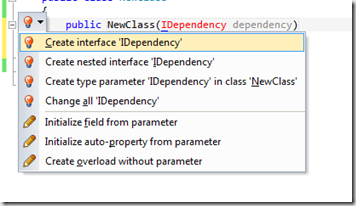
ReSharper has noted that we’ve set the type name starting with ’I’ and suggests to create a new interface. We can create our interface from here. After creating the interface, we press Alt-Enter again in IDependencyin the constructor and we can declare a field to store the dependency:
h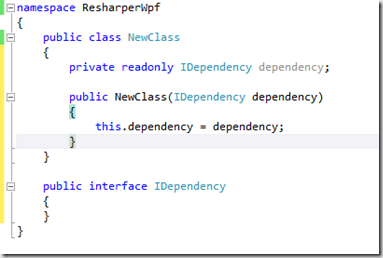
Our interface was created on the same file as the class file. We can go to its declaration and press Alt-Enter. ReSharper offers to move it to a different file. A new IDependency.cs file is created with the interface. Easy, no? It also eases the variables declaration. For example, when we enter code like
total = -1;
on the constructor, we see that total is in red. Pressing Alt-Enterwe have these options:
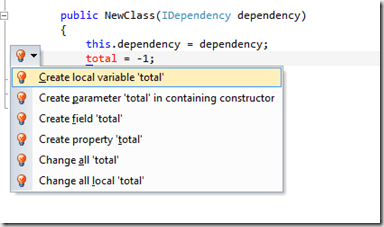
We can create a total field on our code. As we can see, we have many ways to change and improve our code.
XAML help
But that is not all that we get. We can use ReSharper also while editing XAML code. For example, if we create a Converter in code:
public class DebugConverter : IValueConverter
{
    public object Convert(object value, Type targetType, object parameter, CultureInfo culture)
    {
        return value;
    }

    public object ConvertBack(object value, Type targetType, object parameter, CultureInfo culture)
    {
        return value;
    }
}
When we want to use it in XAML, we must follow some steps: namespace, resource declaration, etc. ReSharper can help us for that.
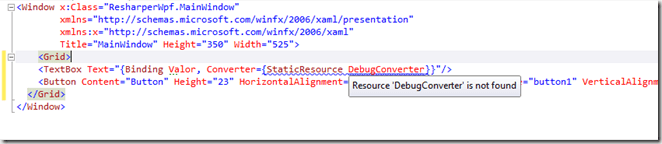
We press Alt-Enter in DebugConverter and select Create resource in type element
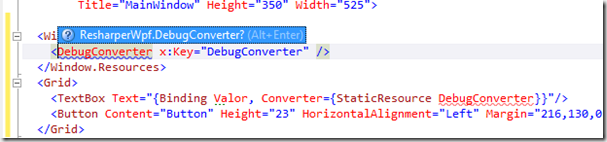
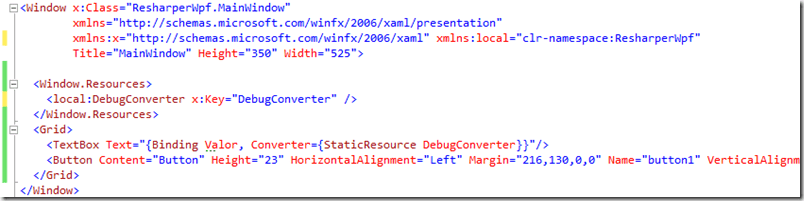
We then press Alt-Enter and the namespace is added to the window declaration and the prefix added to the element. If we don’t like its name, we can rename it with Ctrl-R-R. Everything needed is ready, now. If we have a DataContext associated to the element and it doesn’t have a property named Valor, we can use ReSharper to create this property on the DataContext class, like a ViewModel.
Code navigation
ReSharper has many shortcuts for code navigation. For example, Ctrl-T navigates to a defined type. A screen like this open is opened
We enter part of the name and it shows all types that match with the search. On the same way, we can use Shift-Alt-T to go to a symbol or Ctrl-Shift-T to go to a file. The search is done in all solution’s files. The navigation between members of a class can be done with Alt-`. You can go to the previous or next member with Alt-Up or Alt-Down. If you want, you can even go to a decompiled .net code. ReSharper has a decompiler that decompiles the code and allows navigating to it.
Misc utilities
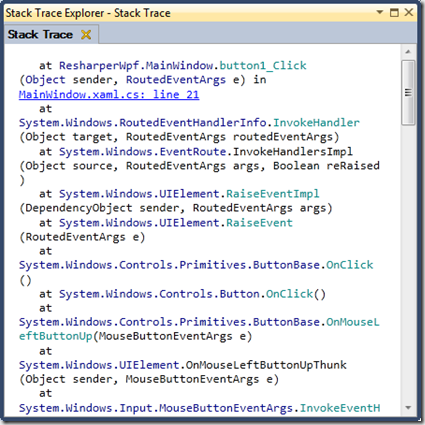
You have many othere goodies in ReSharper. You have a unit test runner, where you can run your unit tests. You may be thinking that Visual Studio already has a test runner, but the one VS has runs only MSTest tests. ReSharper runner works with MSTests, NUnit, QUnit or xUnit. One other interesting functionality is the Explore Stack Trace. You have an exception stack trace that comes from any source. You can copy the stack trace to the clipboard and, in Visual Studio, use Ctrl-E-T. The stack trace is shown with links to your code, so you can go to the place where the exception occurred.
Conclusion
This is just part of the functionality offered by ReSharper, there is much more to explore, but I leave that for you. This is a paid tool, but you can download a 30 days trial version in http://www.jetbrains.com/resharper/download/index.html.
I really think this is an indispensable tool for everyone who develops with Visual Studio, I just have a point against it: it is really addictive and once you get used to using ReSharper, it’s very difficult to develop without it. 😄
1 thought on “ReSharper–Productivity tool for Visual Studio”