When I saw a question from an user in the MSDN forums about animating an user control to give the exit effect while clicking a button, I thought this would be an excellent opportunity to create a series of posts here in the blog, showing many ways to do it.
Although I will put the alternatives here, some can be not so good: this post, putting animation on the code behind, although easy to implement, has these disadvantages:
- The animation code is put on the code behind, a technique I don’t like. I don’t think that the MVVM pattern should have zero code behind, but I don’t like to put code behind, unless is indispensable and strictly related to the view.
- It’s not design friendly – if the designer wants to change the animation, the code should be changed.
- It’s not portable – if you want to create the same animation on other places, the code must be copied or refactored to be accessed from other places.
- It’s not easy to manipulate – everything is on the code. Any changes, like the duration of the animation must be changed in code.
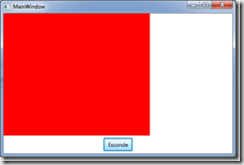
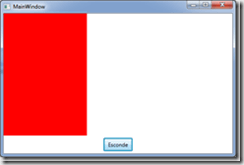
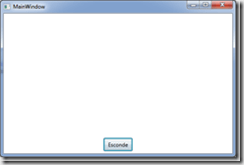
We have the following problem: we have a control in the window and we want to hide it when the button is clicked with an animation, like we see below:


To do that, we should create a transformation for the control, of type RenderTransform and animate it. We can do everything in code this way: at the button click, we create the transform, add it to the control and animate it:
private void Button_Click(object sender, RoutedEventArgs e)
{
// create the transformation and add it to the control
    var translate = new TranslateTransform(0, 0);
    gridLogin.RenderTransform = translate;
// create the animation and start it
    var da = new DoubleAnimation(0, -ActualWidth, new Duration(TimeSpan.FromMilliseconds(1000)));
    translate.BeginAnimation(TranslateTransform.XProperty, da);
}
This code has many shortcomings:
- It can only be applied to our control. To add it to another control, we must copy the code.
- The animation duration is 1 second – the duration is fixed.
- It only animates from right to left.
In this first phase, we can refactor the code and leave it more generic:
public enum AnimationType
{
    Right,
    Left,
    Up,
    Down
}

private void Button_Click(object sender, RoutedEventArgs e)
{
    AnimateControl(gridLogin, TimeSpan.FromMilliseconds(1000), AnimationType.Left);
}

private void AnimateControl(UIElement control, TimeSpan duration, AnimationType type)
{
    double xEnd = 0;
    double yEnd = 0;
    if (type == AnimationType.Left)
        xEnd = -ActualWidth;
    else if (tipo == AnimationType.Right)
        xEnd = ActualWidth;
    else if (tipo == AnimationType.Up)
        yEnd = -ActualHeight;
    else if (tipo == AnimationType.Down)
        yEnd = ActualHeight;
    // create the transformation and add it to the control
    var translate = new TranslateTransform(0, 0);
    control.RenderTransform = translate;
    // create the animation and start it
    if (tipo == AnimationType.Left || tipo == AnimationType.Right)
    {
        var da = new DoubleAnimation(0, xEnd, new Duration(duration));
        translate.BeginAnimation(TranslateTransform.XProperty, da);
    }
    else
    {
        var da = new DoubleAnimation(0, yEnd, new Duration(duration));
        translate.BeginAnimation(TranslateTransform.YProperty, da);
    }
}
Although the code is larger, it is more generic and allows to be reutilized. We can use any control, set the duration and the animation direction. It still isn’t ideal, but it’s better than last code, non reutilizable. On the next posts, we will see other ways to do it. See you then!

2 thoughts on “Animating transitions in WPF/Silverlight–Part I–Code Behind”