You have an old WPF application that you would like to modernize, making its UI more up-to-date and in-line with Windows 11 theming.
There are some ways to do it, and the first thing that comes to mind is to create a Resource Dictionary with the theme and apply it to your app.
This is a challenging task, as you would have to create resources for all controls, including the light and dark themes. It's not a task for everyone.
Another option is to use an available theme on the internet, such as the Material Design in in XAML Toolkit or MahApps. This is much better than designing your own theme but has a drawback: Windows themes are constantly evolving, and some adjustments may be needed as the design changes.
.NET 9.0 introduces something new to WPF: the Fluent theme. Note that .NET 9 is still in preview, so things may change. .NET 9 is expected to be released in November 2024, and the available bits may differ from the final release. Additionally, the current version of Visual Studio doesn't support .NET 9, so you'll need to use the preview version, which you can obtain here
In this article, I will show you how to upgrade your current application to .NET 9 and apply the Fluent theme to achieve a modernized app. I will use the WPF Calculator Demo, that is part of the WPF Samples, available here.
After compiling and running it, you will see something like this:
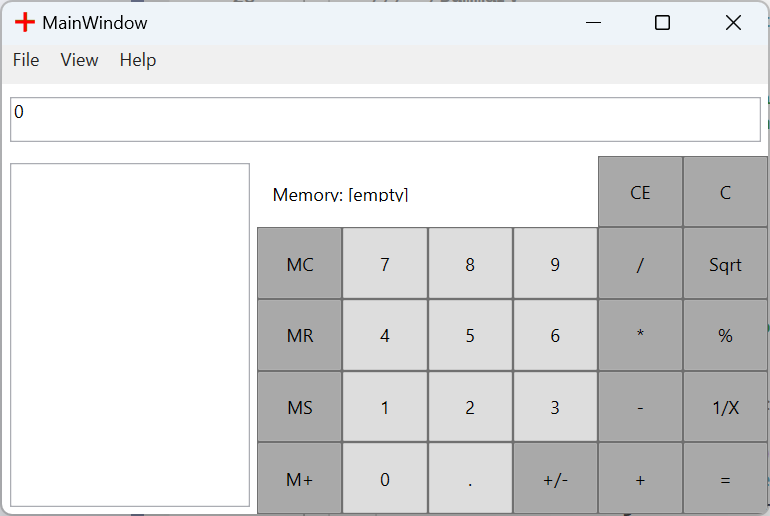
While the calculator's functionality is fine, its UI is somewhat dated and should be upgraded to Windows 11. The first step is to install .NET 9 from here if you haven't done so.
Next, we will use the Upgrade Assistant to update the app to .NET 9. Some time ago, I wrote this article demonstrating how to use the CLI tool to upgrade your app to .NET 6. This method still works and allows you to upgrade to .NET 9. For now, I will use Visual Studio to upgrade the app.
The first step is, in Visual Studio, install the Upgrade Assistant Extension. In Extensions/Manage Extensions, search for Upgrade Assistant:
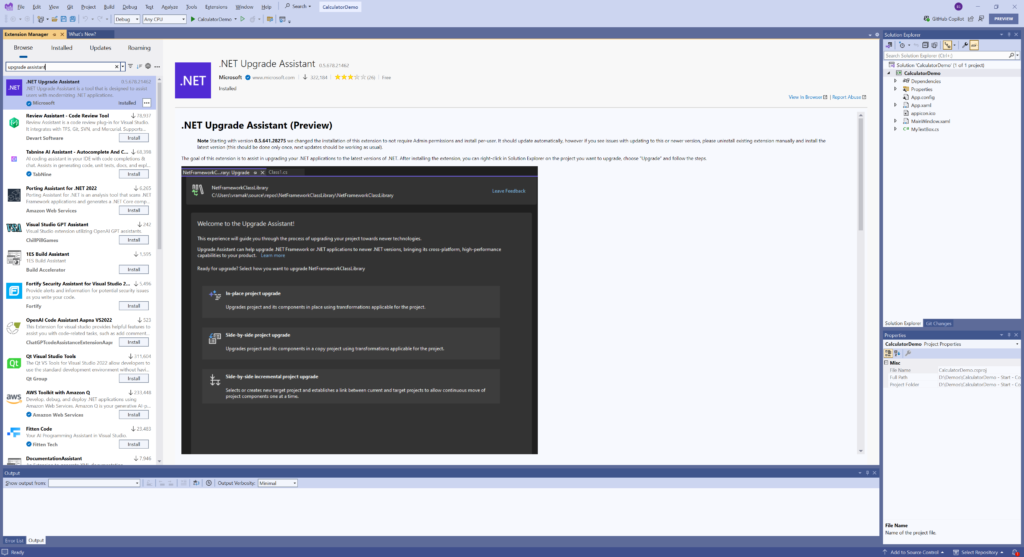
When you do that, you will get a new menu option when you right-click the project file: Upgrade:
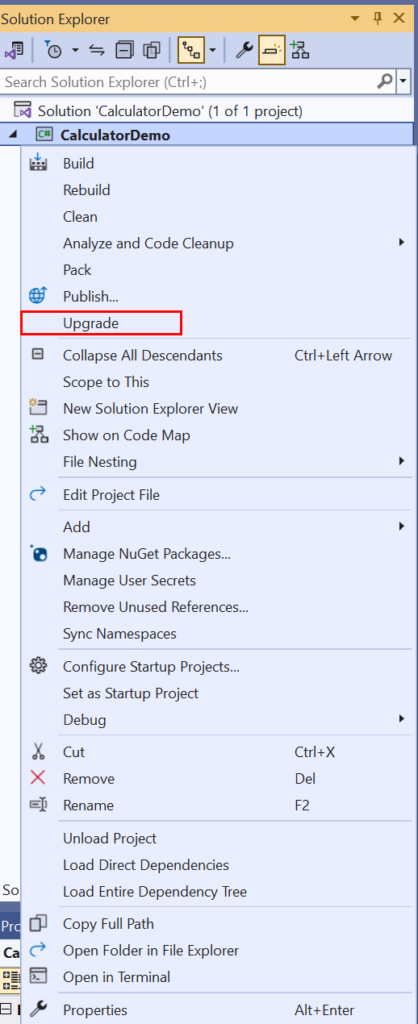
When you select it, it will start to upgrade your app to .NET 9. You will choose the InPlace Upgrade and then you will be able to select the target framework:
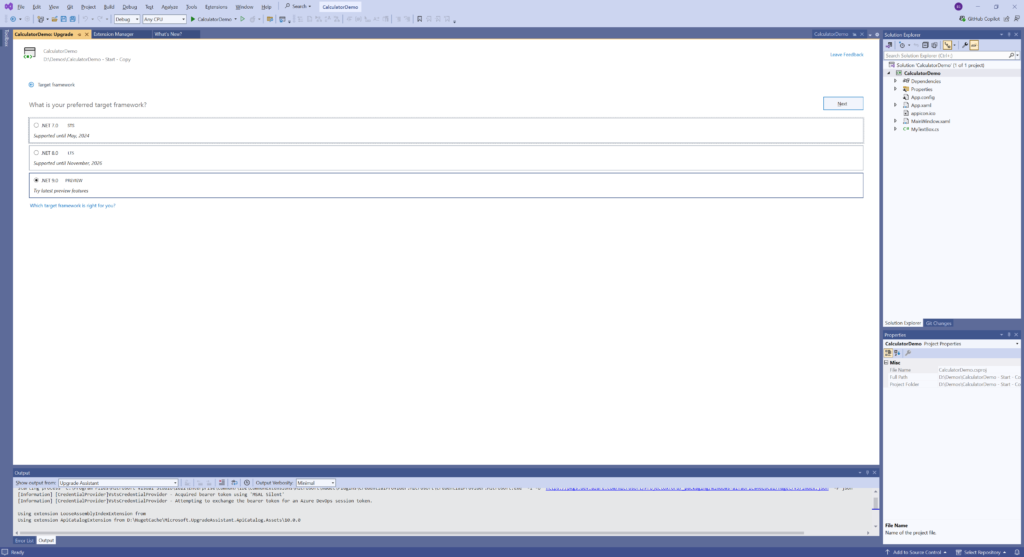
By clicking Next and Upgrade, Visual studio will ask you to save the .sln file and will upgrade your app to .NET 9. You can run the application and will see that nothing has changed.
With the upgrade complete, we can add the theme. To do that, just go to App.xaml and add these lines
<Application.Resources>
    <ResourceDictionary>
        <ResourceDictionary.MergedDictionaries>
            <ResourceDictionary
                    <ResourceDictionary Source="pack://application:,,,/PresentationFramework.Fluent;component/Themes/Fluent.xaml" />
        </ResourceDictionary.MergedDictionaries>
    </ResourceDictionary>
</Application.Resources>
When you run the application again, you will get something like this:
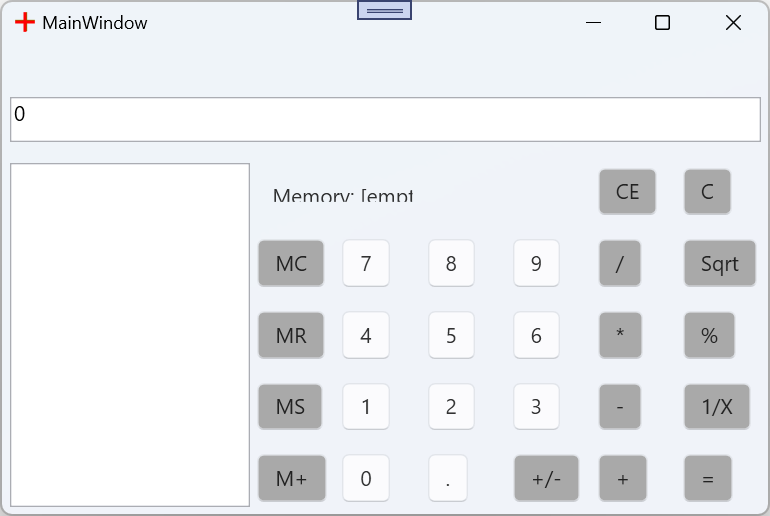
Although the app has the Fluent Design, it has many UI issues, that have to be fixed:
- The menu isn't shown
- The buttons aren't square
- The Memory text is clipped at the bottom and the right
- The text in the result box isn't vertically aligned
We must fix these issues, to have a nice calculator. You can let the app running and make the changes in the code, they will reflect immediately in the UI. I really think that's a life saver.
Let's start with the menu not showing. In the menu declaration in MainWindow.xaml, we have:
<Menu DockPanel.Dock="Top" Height="26">
If we set the height to 45, the menu shows fine.
For the vertical alignment of the text in the TextBox, we just have to add the VerticalContentAlignment property and set it to Center:
<local:MyTextBox Grid.ColumnSpan="9" x:Name="DisplayBox" Height="30" Margin="5" Padding="5" VerticalContentAlignment="Center"/>
The Memory text has two problems: the ColumnSpan is too small and there is a vertical top margin that pushes the text too low. We will fix both with this code:
<TextBlock Name="BMemBox" Grid.Column="3" Grid.Row="1" Margin="10" Grid.ColumnSpan="5">Memory: [empty]</TextBlock>
For the buttons, we could change the style one by one, but I prefer to add a style to all buttons at once, adding a style in the Window Resources:
<Window.Resources>
    <Style TargetType="Button" BasedOn="{StaticResource {x:Type Button}}">
        <Setter Property="HorizontalAlignment" Value="Stretch" />
        <Setter Property="VerticalAlignment" Value="Stretch" />
        <Setter Property="Margin" Value="2" />
    </Style>
</Window.Resources>
We are setting the HorizontalAlignment and VerticalAlignment to Stretch and giving a margin of 2 pixels to them.
That's it! We've successfully modernized our WPF application, with buttons with rounded corners and a more modern UI:
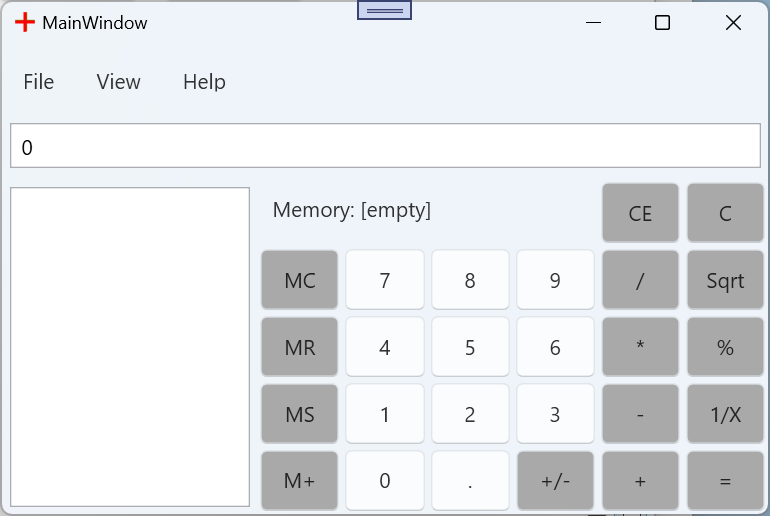
As a bonus, our app changes with the Windows selected theme:

.NET 9 is bring a very welcome addition, the new Fluent theme. To add it, it's just a matter of adding a couple of lines to your App.xaml. There may be a couple of UI fixed to be done, but I think that that's a small price to have your current app modernized.
All the source code for this app is at https://github.com/bsonnino/ModernizeWPF

Good day!
In my case Visual Studio cannot locate the resource : “Resources/Fluent.xaml”.
How can i fix this? I would appreciate your reply, thanks in advance.
Are you using .NET 9 preview? It’s only available in .NET 9
yes, im using .net9 preview
Source=”pack://application:,,,/PresentationFramework.Fluent;component/Themes/Fluent.xaml”
ah found solution, seems the paths is actually changed :
thank you