
Some time ago, I wrote this article about creating a Minimal API CRUD using Entity Framework. That project worked fine, but something was missing: Authentication and Authorization. When dealing with an API that can access sensitive data, it's crucial to restrict access to ensure that only authorized users can access it.
We will take on that project and add authentication and authorization to its endpoints, to secure them.
Authentication and Authorization
First, let's differentiate these two concepts:
Authentication is the process of verifying the identity of a user. The primary goal of authentication is to answer the question, "Who are you?". When the user enters its identification with the use of some kind of credentials, such as usernames, passwords, or more advanced techniques like biometric data (fingerprint, facial recognition, etc.), security tokens, or smart cards, the service compares it with the stored values to validate the user's identity and give access to the system.
Once authenticated, the system must verify if the user is allowed to use the resources and at what level. In other words, the primary goal of authorization is to answer the question, "What are you allowed to do?"
Authorization is based on the user's role, permissions, and privileges within the system. Permissions are defined in access control policies and can be specific to individual users or user groups. For example, some users may have read-only access, while others may have read and write access, and some may have administrative privileges.
We will add both authentication and authorization to our project to safeguard the data.
Minimal APIs support these authentication strategies:
In this article, we will focus on implementing token-based authentication using JWT (JSON Web Tokens). JWTs are a popular choice due to their simplicity, compactness, and ease of use.
Enabling authentication in the project
We will work with the project at https://github.com/bsonnino/CustomerService. Clone the project in your local disk, run it, and open a browser page with the address https://localhost:7191/swagger/index.html (the port number may change). You'll be greeted by the Swagger test page, which lets you test the APIs and see that they're not restricted.

To enable authentication in the project, add the package Microsoft.AspNetCore.Authentication.JwtBearer using the following command:
dotnet add package Microsoft.AspNetCore.Authentication.JwtBearer
and then register the authentication and authorization middlewares with
using Microsoft.EntityFrameworkCore;

var builder = WebApplication.CreateBuilder(args);

builder.Services.AddEndpointsApiExplorer();
builder.Services.AddSwaggerGen();
builder.Services.AddDbContext<CustomerDbContext>();
builder.Services.AddAuthentication().AddJwtBearer();
builder.Services.AddAuthorization();

var app = builder.Build();

app.UseSwagger();
app.UseSwaggerUI();
app.UseAuthentication();
app.UseAuthorization();
Running the program at this stage won't yield any visible changes since we haven't yet secured our endpoints:
- Use the
[Authorize]attribute on the method for the endpoint - Add the
RequireAuthorizationto the endpoint
The first method will be used for the customers endpoint, and the second method will be applied to the customers/{id} endpoint:
app.MapGet("/customers", [Authorize]async (CustomerDbContext context) =>
{
    logger.LogInformation("Getting customers...");
    var customers = await context.Customer.ToListAsync();
    logger.LogInformation("Retrieved {Count} customers", customers.Count);
    return Results.Ok(customers);
});

app.MapGet("/customers/{id}", async (string id, CustomerDbContext context) =>
{
    var customer = await context.Customer.FindAsync(id);
    if (customer == null)
    {
        return Results.NotFound();
    }

    return Results.Ok(customer);
}).RequireAuthorization();
Now, attempting to use any of the endpoints without proper authentication will result in a 401 response (unauthorized):

To authenticate, the call must include a token issued by a central authority, such as an identity server, which we don't currently possess. During development, the dotnet user-jwts tool can be used, invoked with the following command:
dotnet user-jwts create

Executing this command generates a token and stores it in the user secrets. It will also modify the appsettings.Development.json file to enable the toke issuer (ensure this file is present in the project folder to avoid errors):
{
  "Logging": {
    "LogLevel": {
      "Default": "Information",
      "Microsoft.AspNetCore": "Warning"
    }
  },
  "AllowedHosts": "*",
  "Authentication": {
    "Schemes": {
      "Bearer": {
        "ValidAudiences": [
          "http://localhost:30888",
          "https://localhost:44321",
          "https://localhost:7191",
          "http://localhost:5057"
        ],
        "ValidIssuer": "dotnet-user-jwts"
      }
    }
  }
}
By visiting https://jwt.io, you can input the token and view it in decoded form:

At this point, you can run the project and use the following curl command to query the service:
curl -X GET https://localhost:7191/customers -H "accept: */*" -H "Authorization: Bearer <token>"

While effective, this approach can be cumbersome for API testing. Using Swagger for testing would be more convenient. However, upon opening the Swagger page, you'll notice there's no provision for entering the token. This can be easily resolved by adjusting the configuration options for Swagger in the Program.cs file:
builder.Services.AddSwaggerGen(options => {
    options.AddSecurityDefinition("Bearer", new OpenApiSecurityScheme() {
        Name = "Authorization",
            Type = SecuritySchemeType.ApiKey,
            Scheme = "Bearer",
            BearerFormat = "JWT",
            In = ParameterLocation.Header,
            Description = "JWT Authorization header using the Bearer scheme. \r\n\r\n Enter 'Bearer' [space] and then your token in the text input below.\r\n\r\nExample: \"Bearer 1safsfsdfdfd\"",
    });
    options.AddSecurityRequirement(new OpenApiSecurityRequirement {
        {
            new OpenApiSecurityScheme {
                Reference = new OpenApiReference {
                    Type = ReferenceType.SecurityScheme,
                        Id = "Bearer"
                }
            },
            new string[] {}
        }
    });
});
AddSecurityDefinition instructs Swagger to incorporate the authorization feature. This will add an Authorize button at the top and configure the authorization. This configuration specifies the use of the Bearer scheme in the header, using JWT format.
AddSecurityRequirement defines the security prerequisites for your API endpoints. In this case, we are telling that Swagger needs to add the Bearer scheme to each call. When you run the program again, you can see the Authorize button. Clicking on it, you can add your token:

Subsequently, the token will be automatically added to the headers, preventing any further 401 errors:

Enabling authorization
Up to this point, we've implemented authentication (verifying the user's claimed identity), but we haven't addressed authorization. For instance, while any authenticated user can access the customer list or view an individual customer, only Admin users should be able to modify data. To achieve this, we can modify the RequireAuthorization method by adding specific parameters:
app.MapPost("/customers", async (Customer customer, CustomerDbContext context) =>
{
    context.Customer.Add(customer);
    await context.SaveChangesAsync();
    return Results.Created($"/customers/{customer.Id}", customer);
}).RequireAuthorization(new AuthorizeAttribute() { Roles = "Admin" });
However, if you run the program now—despite having the previous token—the attempt to add a new customer will fail, as the token lacks the Admin role:

To address this, we need to create a new token with the Admin role:

Using this token, we now can create a new user:

More complex authorization requirements
Sometimes, more elaborated policies are necessary, which demand more than just the role. For example, we might stipulate that only a token with the can_delete_user claim is authorized to delete a customer. For that, we have to add a new policy in the AddAuthorization method:
builder.Services.AddAuthorization(options => {
    options.AddPolicy("DeleteUser", policy => policy.RequireClaim("can_delete_user", "true"));
});
And include this requirement within the MapDelete call:
app.MapDelete("/customers/{id}", async (string id, CustomerDbContext context) =>
{
    var currentCustomer = await context.Customer.FindAsync(id);

    if (currentCustomer == null)
    {
        return Results.NotFound();
    }

    context.Customer.Remove(currentCustomer);
    await context.SaveChangesAsync();
    return Results.NoContent();
}).RequireAuthorization(new AuthorizeAttribute() { Policy = "DeleteUser" });
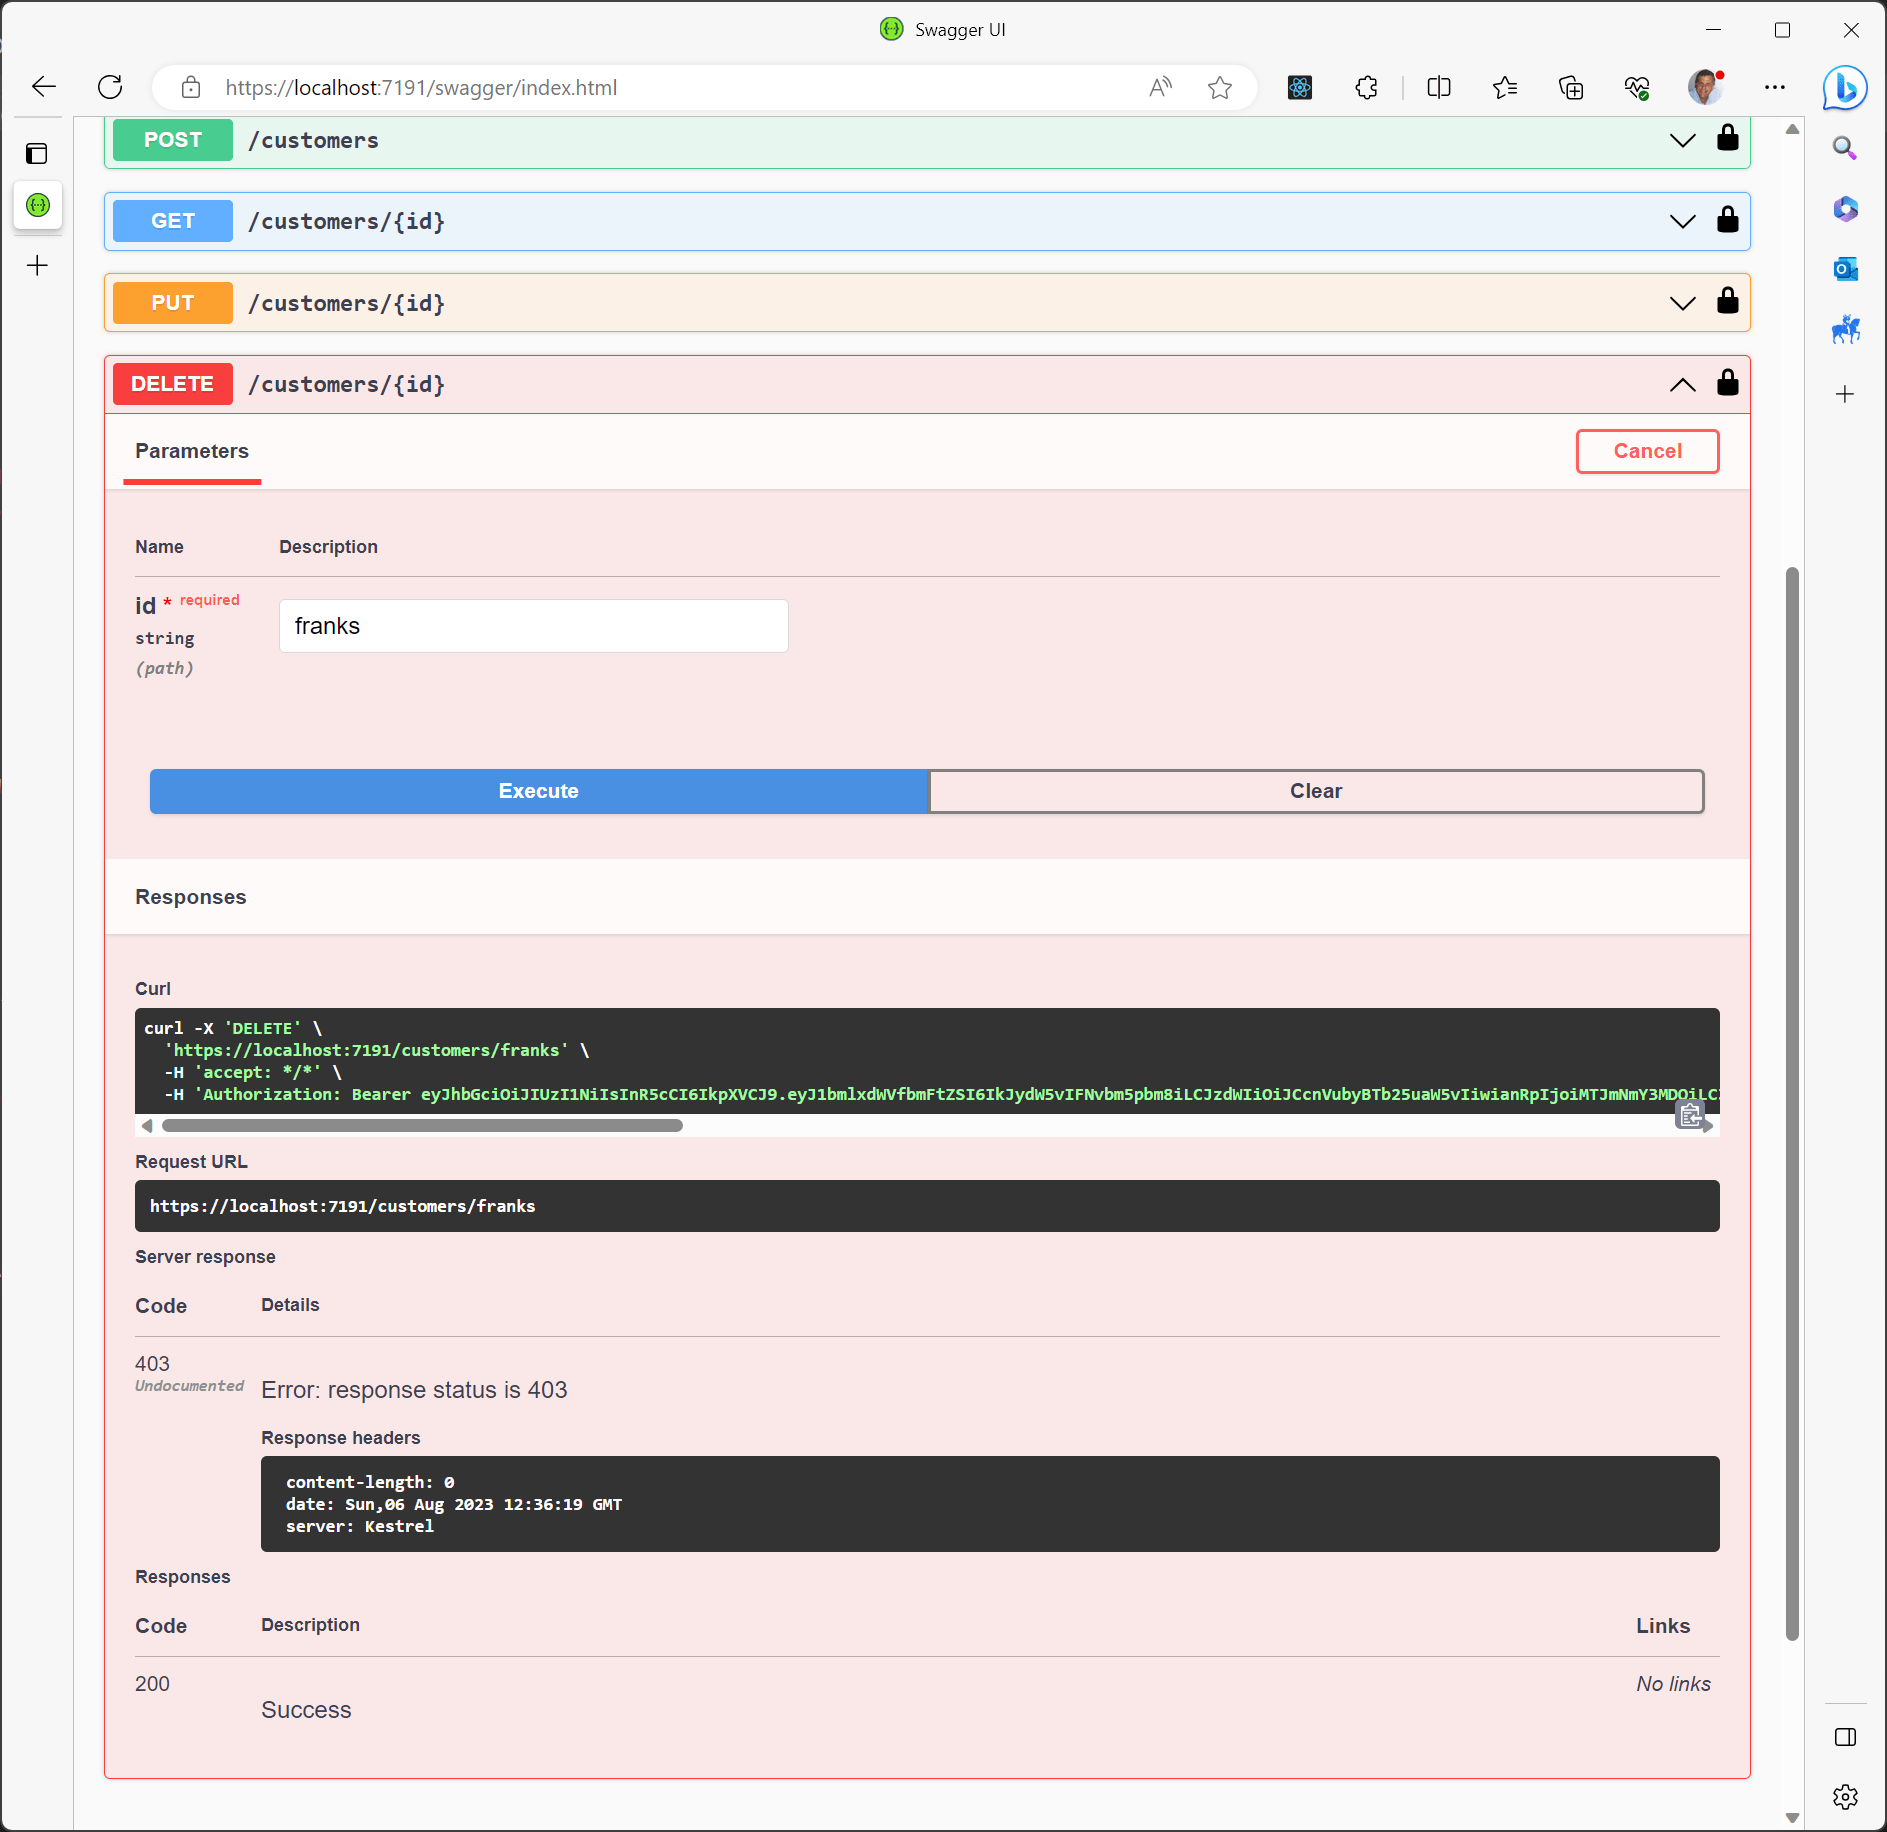
As a result, we're unable to delete the user even with the Admin role:
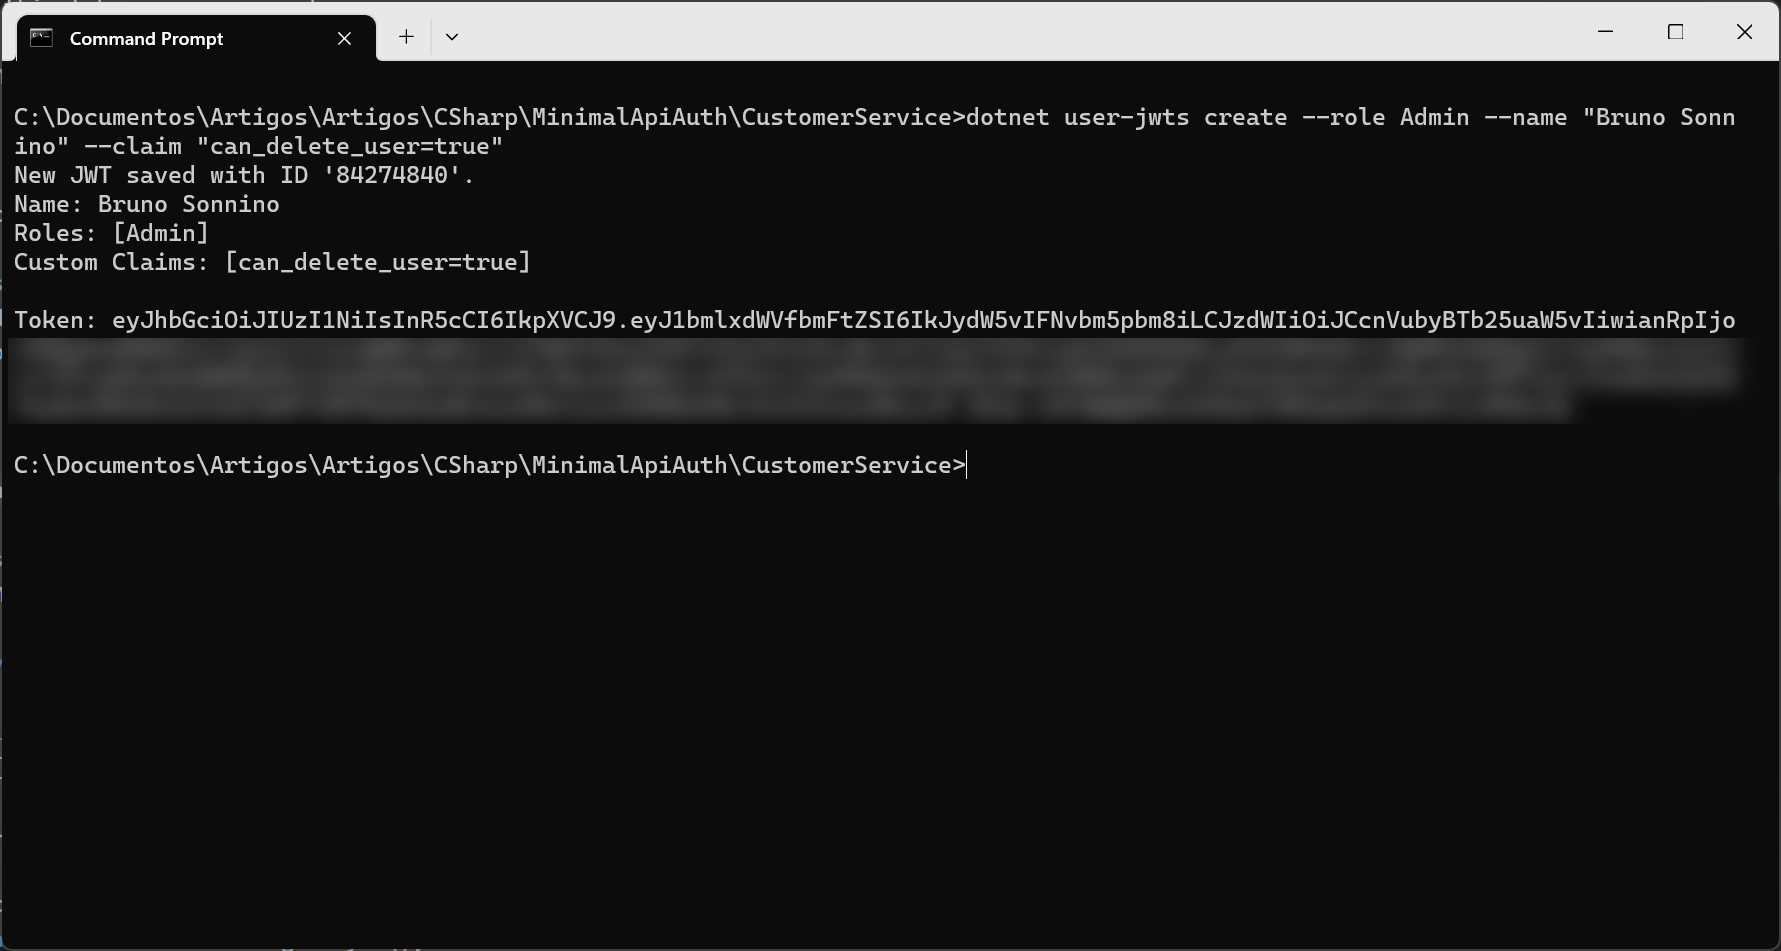
This issue can be resolved by obtaining a new token:
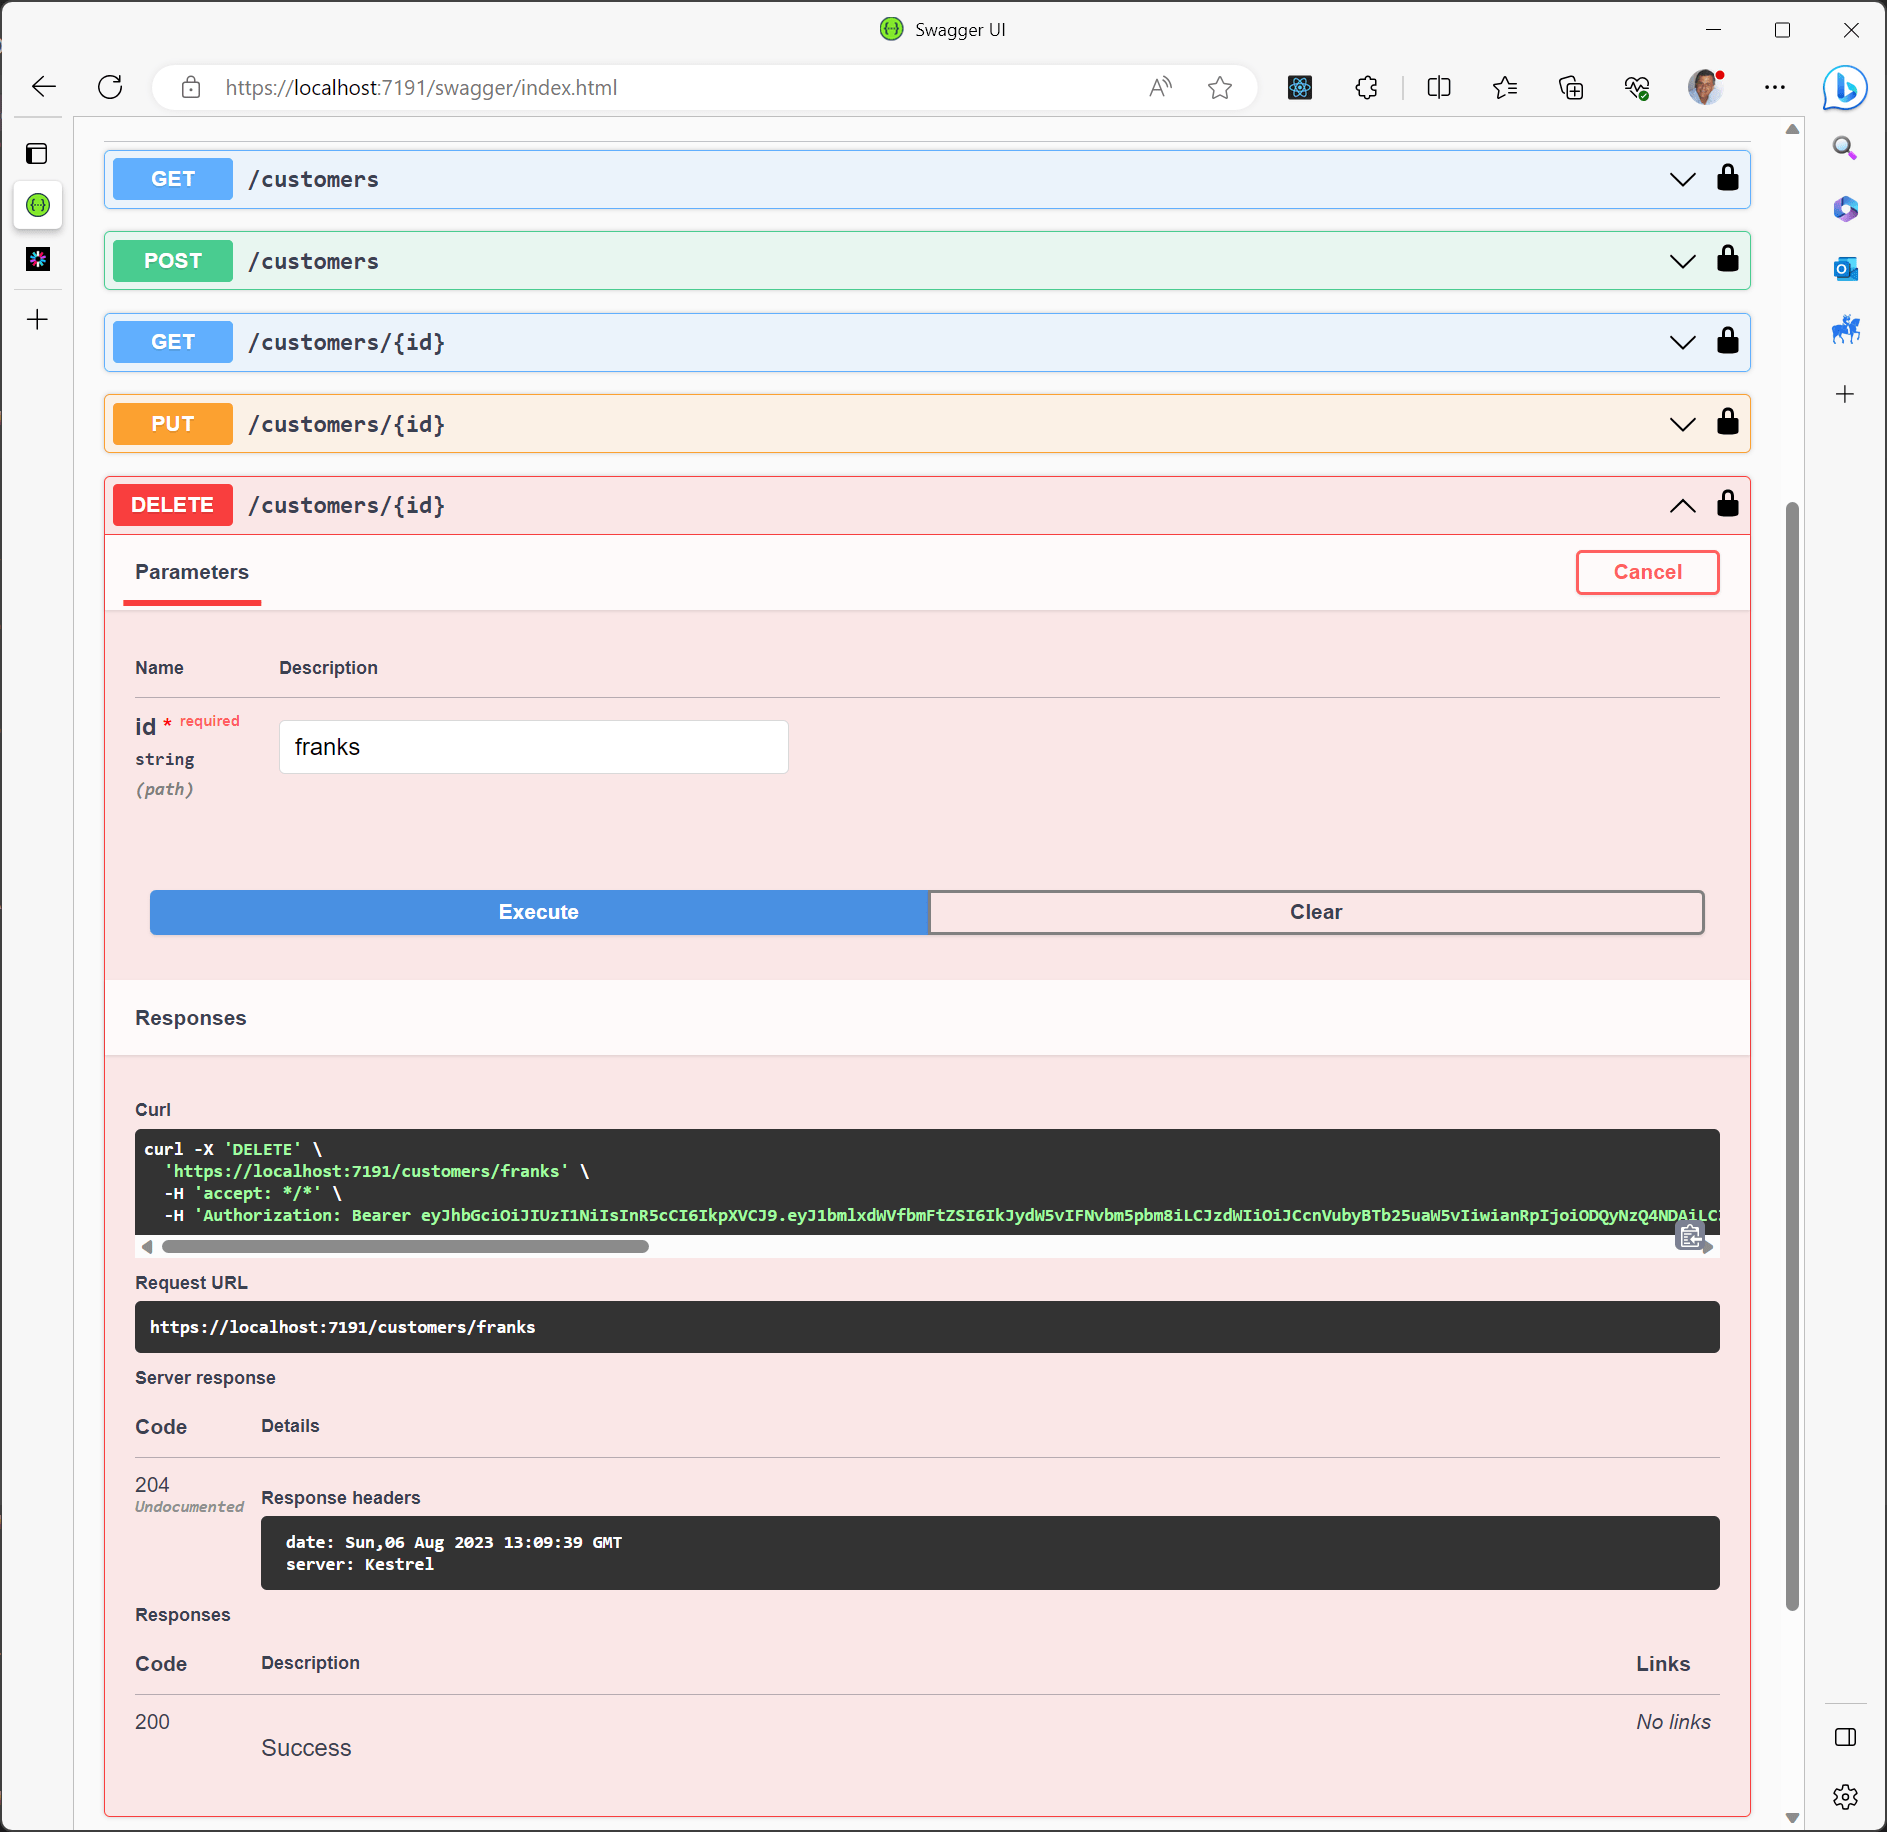
Armed with this new token, we can now proceed to delete the user:
By combining policy requirements with role requirements, intricate scenarios for various operations can be established and effortlessly applied to our endpoints.
Conclusion
In summary, integrating authentication and authorization into our minimal APIs is a relatively straightforward process, and the effectiveness can be tested using the generated tokens. In a production environment, these tokens would be substituted by an Authentication Server, which identifies users and generates tokens for API usage.
All the code for this article is at https://github.com/bsonnino/CustomerAuth
This is very well explained!