
In the last post I showed how to transform your Asp.Net Core MVC app into a PWA, thus allowing to install it and access the OS features. We can go a step further and transform it into a native app, using Electron. You may ask “Electron, what’s it ? I’ve never heard of it”. You may never heard of it, but I’m sure that you’ve already used it: VS Code, Teams and Slack are some examples of Electron apps: they are apps developed with web technologies and packaged with the Electron shell.
The two types of applications, although similar, are completely different. A PWA is an app provided by the browser and has the features that are available on the used browser – for example, if you install it from Chrome, it will have the features offered by Chrome (which may not be the same offered by Edge). An Electron app is a native app and is independent of the browser (as a matter of fact, an Electron app creates its own chromium window). It offers full OS interaction and is a real desktop application.
It also have its downsides: the app size is larger, as it will have all the support needed to create a desktop application and you will have to install it like a desktop application. Which one you should choose? It depends on what do you want – if you want a lightweight app with easy install with mostly web features, the a PWA is a way to go. If, on the other side, you want a desktop app that accesses the full OS and does not depend on the installed browser, then Electron is for you.
We will create a new Dotnet 6 Web App and convert it to an Electron app. For that, we will use Electron.NET, a wrapper around the full Electron, which provides a toolset for transforming your ASP.NET apps into an Electron app.
The first step is to create the app in the command line. Open Windows Terminal and type:
dotnet new mvc -o MvcElectron
This will create the app in the MvcElectron folder. Change to that folder and then install the Electron.NET NuGet package, with this command:
dotnet add package electronnet.api
Once you’ve installed it, we must tell to use Electron in the app. Open VS Code (using the command Code .), and, in Program.cs, add:
using ElectronNET.API;

var builder = WebApplication.CreateBuilder(args);

builder.WebHost.UseElectron(args);
Then, in the end of the file we’ll create the main Electron window:
if (HybridSupport.IsElectronActive)
{
    CreateElectronWindow();
}

app.Run();

async void CreateElectronWindow()
{
    var window = await Electron.WindowManager.CreateWindowAsync();
    window.OnClosed += () => Electron.App.Quit();
}
Then, we must install the Electron CLI with
dotnet tool install ElectronNET.CLI -g
Once we do that, we can use the tool using the electronizecommand. We will initialize the project with
electronize init
You should open a command line in the project’s folder. This command will add a manifest and will add it to your project file. Once you do that, you will be able to run it with
electronize start
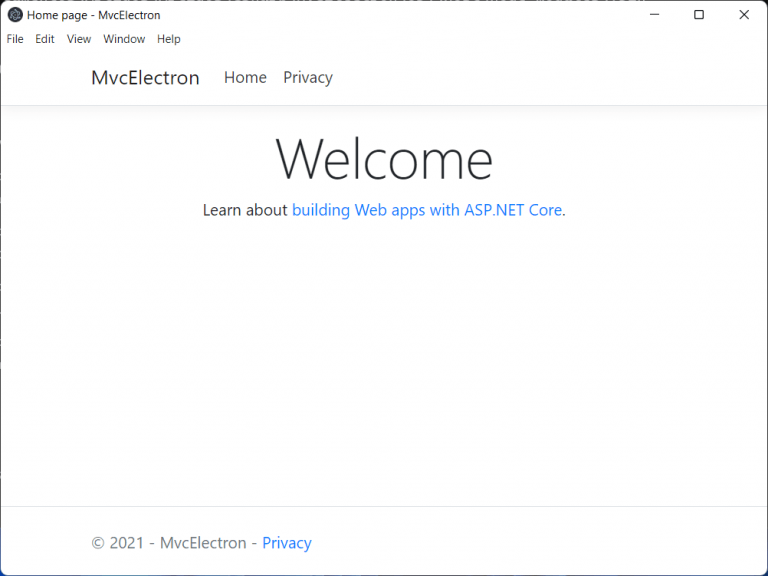
This is a native app, with an icon and a full menu. You can notice that, in the View menu, you can open the developer tools for the web app. This app is not dependent on any browser, thus you can have any installed browser and it will run the same. The application is built for the OS where you ran the commands: if you are developing on Windows, it’s a Windows app. If you are developing on a Mac or on Linux, it will be a Mac or a Linux app.
Now, let’s customize it. The first customization is to change the window size. The window size is an option that you will pass when creating the main window. In Program.cs, add this code:
async void CreateElectronWindow()
{
    var options = new BrowserWindowOptions
    {
        Width = 1024,
        Height = 1024
    };
    var window = await Electron.WindowManager.CreateWindowAsync(options);
    window.OnClosed += () => Electron.App.Quit();
}
To use this code, you must add ElectronNET.API.Entities to the usings. After you save and restart the app, you will see that the window has the new size.
The next customization is the app menu. Unfortunately, there is no way to add a single menu option to the main menu, you should replace the entire menu. We create the menu before creating the window:
if (HybridSupport.IsElectronActive)
{
    CreateMenu();
    CreateElectronWindow();
}
The CreateMenu function is:
void CreateMenu()
{
    var fileMenu = new MenuItem[]
    {
        new MenuItem { Label = "Home",
                                Click = () => Electron.WindowManager.BrowserWindows.First().LoadURL($"http://localhost:{BridgeSettings.WebPort}/") },
        new MenuItem { Label = "Privacy",
                                Click = () => Electron.WindowManager.BrowserWindows.First().LoadURL($"http://localhost:{BridgeSettings.WebPort}/Privacy") },
        new MenuItem { Type = MenuType.separator },
        new MenuItem { Role = MenuRole.quit }
    };

    var viewMenu = new MenuItem[]
    {
        new MenuItem { Role = MenuRole.reload },
        new MenuItem { Role = MenuRole.forcereload },
        new MenuItem { Role = MenuRole.toggledevtools },
        new MenuItem { Type = MenuType.separator },
        new MenuItem { Role = MenuRole.resetzoom },
        new MenuItem { Role = MenuRole.zoomin },
        new MenuItem { Role = MenuRole.zoomout },
        new MenuItem { Type = MenuType.separator },
        new MenuItem { Role = MenuRole.togglefullscreen }
    };

    var menu = new MenuItem[]
    {
        new MenuItem { Label = "File", Type = MenuType.submenu, Submenu = fileMenu },
        new MenuItem { Label = "View", Type = MenuType.submenu, Submenu = viewMenu }
    };

    Electron.Menu.SetApplicationMenu(menu);
}
As you can see, we added the two pages in the File menu and recreated the View menu. That way, we don’t need the menu and the footer in the main web page. In _Layout.cshtml, you can remove the header and the footer. That way, we are only using the main menu for changing pages.
We can go further and access the computer’s files. But before that, we’ll setup the watch feature, that will watch for any file changes and will reload the app automatically. For that you must start the app with
electronize start /watch
That way, every change will be detected and the app will be updated with no need to restart. In order to run the Dotnet 6 app in watch mode, a small change must be made in the file Properties\launchsettings.json: change the launch profile to use the port used by Electron:
"MvcElectron": {
    "commandName": "Project",
    "dotnetRunMessages": true,
    "launchBrowser": true,
    "applicationUrl": "http://localhost:8001",
    "environmentVariables": {
        "ASPNETCORE_ENVIRONMENT": "Development"
    }
},
Once you do that, you can launch the app in watch mode. Now we can start making our changes in the main page.
We’ll get the 15 larger files in My Documents folder and display them in the page. For that, in the folder Models, create a new file FilesViewModel.cs and add this code:
namespace MvcElectron.Models;

public class FilesViewModel
{
    public List Files => new DirectoryInfo(Path)
        .GetFiles()
        .OrderByDescending(f => f.Length)
        .Take(15)
        .ToList();

    public string Path => Environment.GetFolderPath(Environment.SpecialFolder.MyDocuments);
}
In the HomeController.cs file, we must pass the ViewModel to the view:
public IActionResult Index()
{
    return View(new FilesViewModel());
}
We must change the page Index.cshtml with this code:
@model FilesViewModel
@{
    ViewData["Title"] = "Files list";
}

<div>
    <h3>Files List @Model?.Path</h3>
    <table class="table table-sm table-striped">
        <thead class="thead-dark">
            <tr>
                <th scope="col" class="col-sm-4">Name</th>
                <th scope="col" class="col-sm-3">Size</th>
                <th scope="col" class="col-sm-4">Last Write</th>
                <th scope="col" class="col-sm-1"></th>
            </tr>
        </thead>
        <tbody>
            @foreach (var item in Model?.Files ?? new List<FileInfo>())
            {
                <tr class="align-middle">
                    <td scope="col" class="col-sm-4">@item.Name</td>
                    <td scope="col" class="col-sm-3">@item.Length</td>
                    <td scope="col" class="col-sm-4">@item.LastWriteTime</td>
                    <td scope="col" class="col-sm-1">
                        <button type="button" class="btn btn-primary" onclick="location.href='@Url.Action("DeleteFile","Home", new {fileName=item.Name})'">
                            <svg xmlns="http://www.w3.org/2000/svg" width="16" height="16" fill="currentColor"
                            class="bi bi-trash" viewBox="0 0 16 16">
                                <path d="M5.5 5.5A.5.5 0 0 1 6 6v6a.5.5 0 0 1-1 0V6a.5.5 0 0 1 .5-.5zm2.5 0a.5.5 0 0 1 .5.5v6a.5.5 0 0 1-1 0
                                V6a.5.5 0 0 1 .5-.5zm3 .5a.5.5 0 0 0-1 0v6a.5.5 0 0 0 1 0V6z" />
                                <path fill-rule="evenodd" d="M14.5 3a1 1 0 0 1-1 1H13v9a2 2 0 0 1-2 2H5a2 2 0 0 1-2-2V4h-.5a1 1 0 0 1-1-1V2a1 1 0 0 1 1-1
                                H6a1 1 0 0 1 1-1h2a1 1 0 0 1 1 1h3.5a1 1 0 0 1 1 1v1zM4.118 4 4 4.059V13a1 1 0 0 0 1 1h6a1 1 0 0 0 1-1
                                V4.059L11.882 4H4.118zM2.5 3V2h11v1h-11z" />
                            </svg>
                        </button>
                    </td>
                </tr>
            }
        </tbody>
    </table>
</div>
It will show the files in a table, ordered (the largest come first):

To delete a file, we must add a new action to the Home controller:
public IActionResult DeleteFile(string fileName)
{
    var viewModel = new FilesViewModel();
    viewModel.DeleteFile(fileName);
    return RedirectToAction("Index");
}
The FilesViewModel class must be changed to delete the file:
namespace MvcElectron.Models;

public class FilesViewModel
{
    public List<FileInfo> Files { get; private set; }

    public FilesViewModel()
    {
        Files = GetFiles();
    }

    private List<FileInfo> GetFiles()
    {
        return new DirectoryInfo(Path)
        .GetFiles()
        .OrderByDescending(f => f.Length)
        .Take(15)
        .ToList();
    }

    public string Path => Environment.GetFolderPath(Environment.SpecialFolder.MyDocuments);

    public void DeleteFile(string fileName)
    {
        var filePath = Path + "\\\\" + fileName;
        if (System.IO.File.Exists(filePath))
        {
            System.IO.File.Delete(filePath);
        }
        Files = GetFiles();
    }
}
Once you do that, you can click on the button to delete a file and the files list is refreshed. There is only one thing to do, now: generate an executable, so we can distribute the file. To do that, we need to use the command:
electronize build /target win
With that, Electron will build a package for Windows (if you need other platforms, you should change the target). It will generate an install file (the target file is pointed in the output), that can be installed and, then, you can run the program.
As you can see, you can transform your Asp.Net MVC app into a native file that can access the computer’s resources as any native app. This is a multi-platform app, you can generate it for Windows, Linux or Mac, with no change at all.
The full code for the app is at https://github.com/bsonnino/MvcElectron