
Times have changed and Microsoft is not the same: Edge, the new Microsoft browser has been remodeled and now it's using the Chromium engine, an open source browser engine developed by Google.
With that, it has also changed the way you can develop browser apps - you will be able to use the same browser engine Microsoft uses in its browser to develop your browser apps. In order to do that, you will have to use the new WebView control. The new WebView control is not tied to a specific Windows version or development platform: You can use it in any Windows version, from 7 to 10 or use it in a Win32, .NET (core or full framework) or UWP app.
This article will show how to use it and interact with it in a WPF app. We will develop a program that will search in the Microsoft docs site, so you will be able to easily search there for information.
Introduction
Using the new WebView2 control in a .NET app is very simple, it's just a matter of adding a NuGet package and you're already setup. In Visual Studio, create a new WPF app. Right click the dependencies node in the Solution Explorer and select "Manage NuGet Packages" , the select the Microsoft.Web.WebView2 package. Then, in MainWindow.xaml, add the main UI:
<Grid>
    <Grid.RowDefinitions>
        <RowDefinition Height="40"/>
        <RowDefinition Height="*"/>
    </Grid.RowDefinitions>
    <StackPanel Orientation="Horizontal">
        <TextBlock Text="Search Text" Margin="5" VerticalAlignment="Center"/>
        <TextBox Text="" x:Name="SearchText" Margin="5" VerticalAlignment="Center"
                 Width="400" Height="30" VerticalContentAlignment="Center"/>
        <Button Content="Find" Width="65" Height="30" Margin="5" Click="ButtonBase_OnClick"/>
    </StackPanel>
    <wpf:WebView2 x:Name="WebView" Grid.Row="1" Source="" />
</Grid>
You will have to add the wpf namespace to the xaml:
xmlns:wpf="clr-namespace:Microsoft.Web.WebView2.Wpf;assembly=Microsoft.Web.WebView2.Wpf"
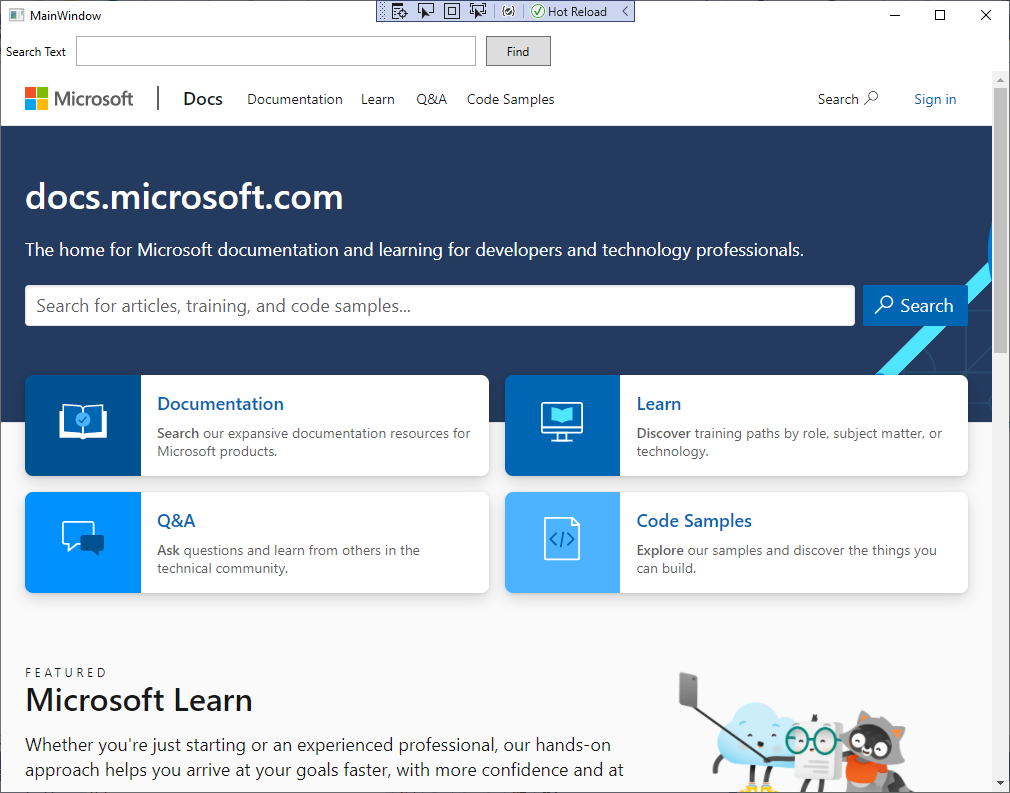
As you can see, we are adding a textbox for the text to search and a button to activate the search. In the WebView control, we left the Source property blank, as we don't want to go to a specific site. If we wanted to start with some page, we would have to fill this property. For example, if you fill the Source property with https://docs.microsoft.com you would have something like this:
Navigating with the WebView
As you can see, it's very easy to add a browser to your app, but we want to add more than a simple browsing experience. We want to make our app a custom way of browsing. To do that, we will use the following button click event handler:
private void ButtonBase_OnClick(object sender, RoutedEventArgs e)
{
    if (string.IsNullOrWhiteSpace(SearchText.Text))
        return;
    var searchAddress =
        $"https://docs.microsoft.com/en-us/search/?terms={HttpUtility.UrlEncode(SearchText.Text)}";
    WebView?.CoreWebView2?.Navigate(searchAddress);
}
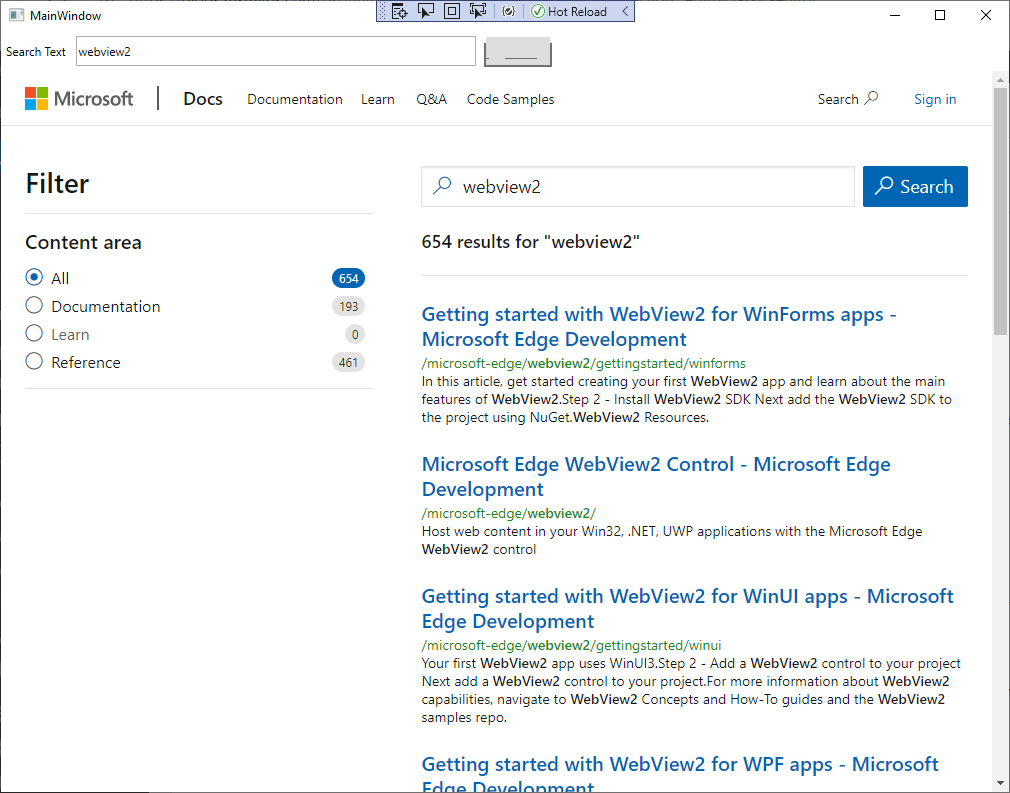
We'll take the text the user will want to search, create an URL for searching in the Microsoft docs website and then navigate to it. Once we do that, we can search the docs, just by typing the wanted text and clicking the button:
We can also add back and forward navigation by adding these two buttons:
<StackPanel Orientation="Horizontal" Grid.Row="0" HorizontalAlignment="Right" TextElement.FontFamily="Segoe MDL2 Assets">
<Button Content="&#xE0A6;" Width="30" Height="30" Margin="5" ToolTip="Back" Click="GoBackClick"/>
<Button Content="&#xE0AB;" Width="30" Height="30" Margin="5" ToolTip="Forward" Click="GoForwardClick"/>
</StackPanel>
The click event handler that will allow the browser to navigate to the previous or next page in history is:
private void GoBackClick(object sender, RoutedEventArgs e)
{
    if (WebView.CanGoBack)
        WebView.GoBack();
}

private void GoForwardClick(object sender, RoutedEventArgs e)
{
    if (WebView.CanGoForward)
        WebView.GoForward();
}
Once you have this code in place, you are able to use the two buttons to navigate in the browser history.
Customizing the page
One thing that bothers me in this app is the fact that we have several items in the page that don't belong to our search: the top bar, the footer bar, the search box, and so on. Wouldn't it be nice to clean these items from the page when we are showing it? Well, there is a way to do that, but we'll have to resort to JavaScript to do that: when the page is loaded, we'll inject a JavaScript script in the page that will remove the parts we don't want. For that, we must create this code:
async void InitializeAsync()
{
    await WebView.EnsureCoreWebView2Async(null);
    WebView.CoreWebView2.DOMContentLoaded += CoreWebView2_DOMContentLoaded;
}

private async void CoreWebView2_DOMContentLoaded(object sender, CoreWebView2DOMContentLoadedEventArgs e)
{

    await WebView.ExecuteScriptAsync(
        @"
window.onload = () => {
  var rss = document.querySelector('[data-bi-name=""search-rss-link""]');
  console.log(rss);
  if (rss)
    rss.style.display = 'none';
  var form = document.getElementById('facet-search-form');
  console.log(form);
  if (form)
    form.style.display = 'none';
  var container = document.getElementById('left-container');
  console.log(container);
  if (container)
    container.style.display = 'none';
  var hiddenClasses = ['header-holder', 'footerContainer'];
  var divs = document.getElementsByTagName('div');
  for( var i = 0; i < divs.length; i++) {
    if (hiddenClasses.some(r=> divs[i].classList.contains(r))){
      divs[i].style.display = 'none';
    }
  }
}");
}
We have two parts in this code: initially, we ensure that the CoreWebView2 component is created and then we set a DomContentLoaded event handler, that will be called when the HTML content is loaded in the browser. In the event handler, we will inject the script and execute it with ExecuteScriptAsync. That is enough to remove the parts we don't want from the page. The JavaScript code will retrieve the parts we want to hide and set their display style to none. This code is called from the constructor of the main window:
public MainWindow()
{
    InitializeComponent();
    InitializeAsync();
}
You can also see the console.log commands in the code. You can debug the JavaScript code when browsing by using the F12 key. The developer window will open in a separate window:
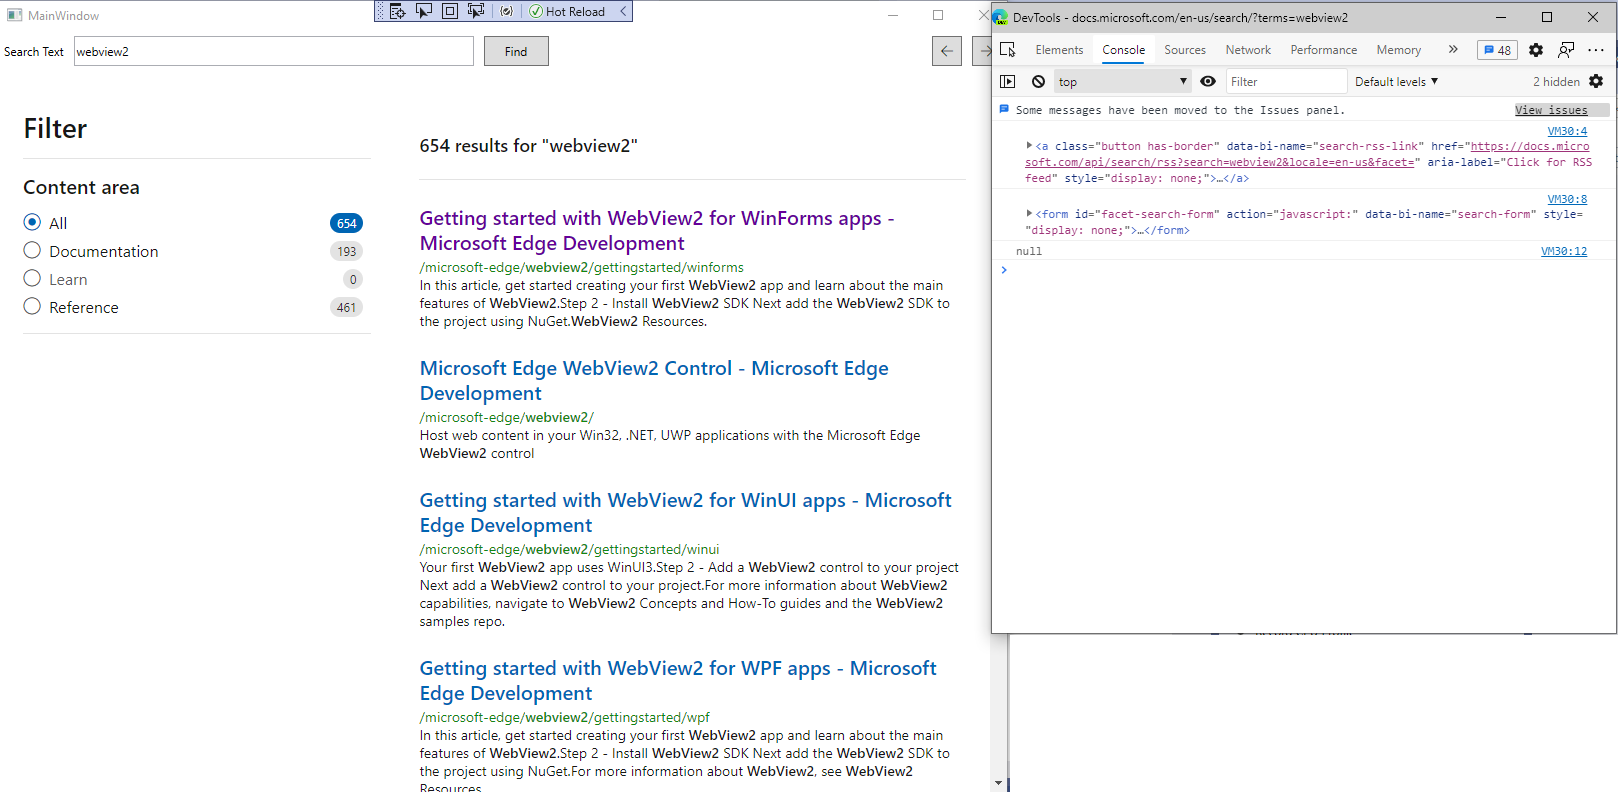
As you can see from the image, the top bar was removed, we now have a cleaner page. You can use the same technique to remove the context menu or add other functionality to the browser. Now we will get some extra info from the page.
Communicating between the app and the browser
When we are browsing the results page, we can get something from it. We can copy the results to the clipboard, so we can use them later. To do that we must use the communication between the app and the WebView. This is done by a messaging process. The app can send a message to the WebView, using something like
WebView?.CoreWebView2?.PostWebMessageAsString("message");
The WebView will receive the message and can process it by adding an event listener like in
window.chrome.webview.addEventListener('message', event => {
  if (event.data === 'message') {
    // process message
  }
});
When we want to send messages in the other direction, from the WebView to the app, we can send it from JavaScript, using
window.chrome.webview.postMessage(message);
It will be received by the app with an event handler like
WebView.CoreWebView2.WebMessageReceived += (s, args) =>
{
  data = args.WebMessageAsJson;
  // Process data
}
That way, we can have full communication between the app and the WebView and we can add the functionality we want: copy the results from the results page to the clipboard. The first step is to add the button to copy the results in MainWindow.xaml:
<StackPanel Orientation="Horizontal">
    <TextBlock Text="Search Text" Margin="5" VerticalAlignment="Center"/>
    <TextBox Text="" x:Name="SearchText" Margin="5" VerticalAlignment="Center"
             Width="400" Height="30" VerticalContentAlignment="Center"/>
    <Button Content="Find" Width="65" Height="30" Margin="5" Click="ButtonBase_OnClick"/>
    <Button Content="Copy" Width="65" Height="30" Margin="5" Click="CopyClick"/>
</StackPanel>
The click event handler will send a message to the WebView:
private void CopyClick(object sender, RoutedEventArgs e)
{
    WebView?.CoreWebView2?.PostWebMessageAsString("copy");
}
We must inject some code in the web page to receive and process the message, this is done by using the AddScriptToExecuteOnDocumentCreatedAsyncmethod to inject the code when the page is loaded, in the InitializeAsync method:
async void InitializeAsync()
{

    await WebView.EnsureCoreWebView2Async(null);
    WebView.CoreWebView2.DOMContentLoaded += CoreWebView2_DOMContentLoaded;
    await WebView.CoreWebView2.AddScriptToExecuteOnDocumentCreatedAsync(@"
window.chrome.webview.addEventListener('message', event => {
  if (event.data === 'copy') {
    var results = [...document.querySelectorAll('[data-bi-name=""result""]')].map(a => {
            let aElement = a.querySelector('a');
            return {
                title: aElement.innerText,
                link: aElement.getAttribute('href')
            };
        });
    if (results.length >= 1){
      window.chrome.webview.postMessage(results);
    }
    else {
      alert('There are no results in the page');
    }
  }
});");
    WebView.CoreWebView2.WebMessageReceived += DataReceived;
}
The JavaScript code will add the event listener, that will get all results in the page using the querySelectorAll method, and then it will map it to an array of objects that have the title and link of the result, then will send this array to the app with postMessage. In the case that there are no results in the page, an alert message is shown. The code also sets the event handler for the WebMessageReceived event:
void DataReceived(object sender, CoreWebView2WebMessageReceivedEventArgs args)
{
    var data = args.WebMessageAsJson;
    Clipboard.SetText(data);
    MessageBox.Show("Results copied to the clipboard");
}
The handler will get the sent data with the **args.WebMessageAsJson,**then it will send it to the clipboard as text, where it can be copied to any program. Now, when you run the program, do a search and click the Copy button, you will have something like this in the clipboard:
[
    {
        "title": "Getting started with WebView2 for WinForms apps - Microsoft Edge Development",
        "link": "https://docs.microsoft.com/en-us/microsoft-edge/webview2/gettingstarted/winforms"
    },
    {
        "title": "Microsoft Edge WebView2 Control - Microsoft Edge Development",
        "link": "https://docs.microsoft.com/en-us/microsoft-edge/webview2/"
    },
    {
        "title": "Getting started with WebView2 for WinUI apps - Microsoft Edge Development",
        "link": "https://docs.microsoft.com/en-us/microsoft-edge/webview2/gettingstarted/winui"
    },
    {
        "title": "Getting started with WebView2 for WPF apps - Microsoft Edge Development",
        "link": "https://docs.microsoft.com/en-us/microsoft-edge/webview2/gettingstarted/wpf"
    },
    {
        "title": "Versioning of Microsoft Edge WebView2 - Microsoft Edge Development",
        "link": "https://docs.microsoft.com/en-us/microsoft-edge/webview2/concepts/versioning"
    },
    {
        "title": "Distribution of Microsoft Edge WebView2 apps - Microsoft Edge Development",
        "link": "https://docs.microsoft.com/en-us/microsoft-edge/webview2/concepts/distribution"
    },
    {
        "title": "Getting started with WebView2 for Win32 apps - Microsoft Edge Development",
        "link": "https://docs.microsoft.com/en-us/microsoft-edge/webview2/gettingstarted/win32"
    },
    {
        "title": "Release Notes for Microsoft Edge WebView2 for Win32, WPF, and WinForms - Microsoft Edge Development",
        "link": "https://docs.microsoft.com/en-us/microsoft-edge/webview2/releasenotes"
    },
    {
        "title": "Use JavaScript in WebView2 apps - Microsoft Edge Development",
        "link": "https://docs.microsoft.com/en-us/microsoft-edge/webview2/howto/js"
    },
    {
        "title": "Microsoft Edge WebView2 API Reference - Microsoft Edge Development",
        "link": "https://docs.microsoft.com/en-us/microsoft-edge/webview2/webview2-api-reference"
    }
]
Now we have an app that can browse to a page and interact with it.
Conclusion
There are many uses to this feature and the new Chromium WebView is a welcome addition to our toolbox, we can interact with the web page, retrieving and sending data to it.
The full source code for this article is at https://github.com/bsonnino/WebViewWpf