
Introduction
Learning a new programming language is always hard. You have to read the documentation, stop, go to the IDE of your choice, start a new project, compile and run the program and see the results. Stop. Restart. After some time, you have no more patience for the process and start to skip some steps (maybe I don't need to run this sample here...) until the point that you try to find an easier way, but most of the time there is no easier way.
Well, now there is an easier way. The dotnet team has created a new tool, called dotnet try that allows you to have documentation mixed with a code sample window, where you can try the code while reading the documentation. Cool, no?
Starting with dotnet try
To use this tool, you must install dotnet core in your machine and then install dotnet try with:
dotnet tool install -g dotnet-try
Once you do that, you can use the tool with dotnet try. But, the better way to start is to use the tool's own demo with dotnet try demo. This will load the tutorial, create a server and open the browser with the tutorial:
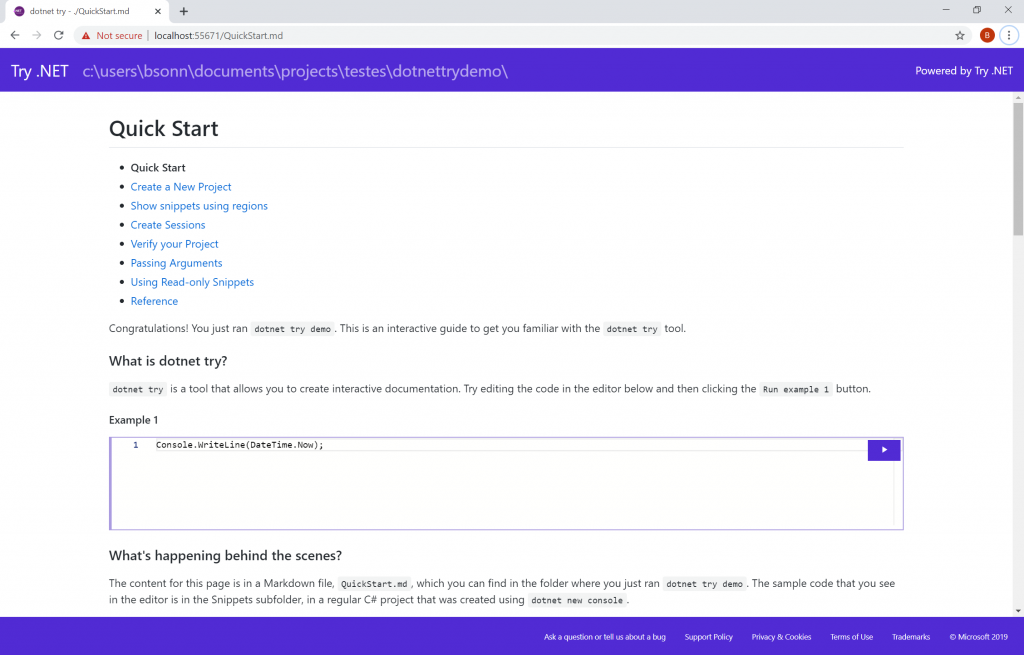
There you can see the documentation side-by-side with the code. You can change the code and click on the arrow key and look at the results. Nice! You can follow the tutorial and learn how to create your documentation easily. Or you can continue reading and I will tell you how to use it (sorry, no dotnet try here 😃).
If you want to learn something about .NET, you can run the samples. Just clone the dotnet/try-samples repository, change to the cloned folder and type dotnet try to open it.
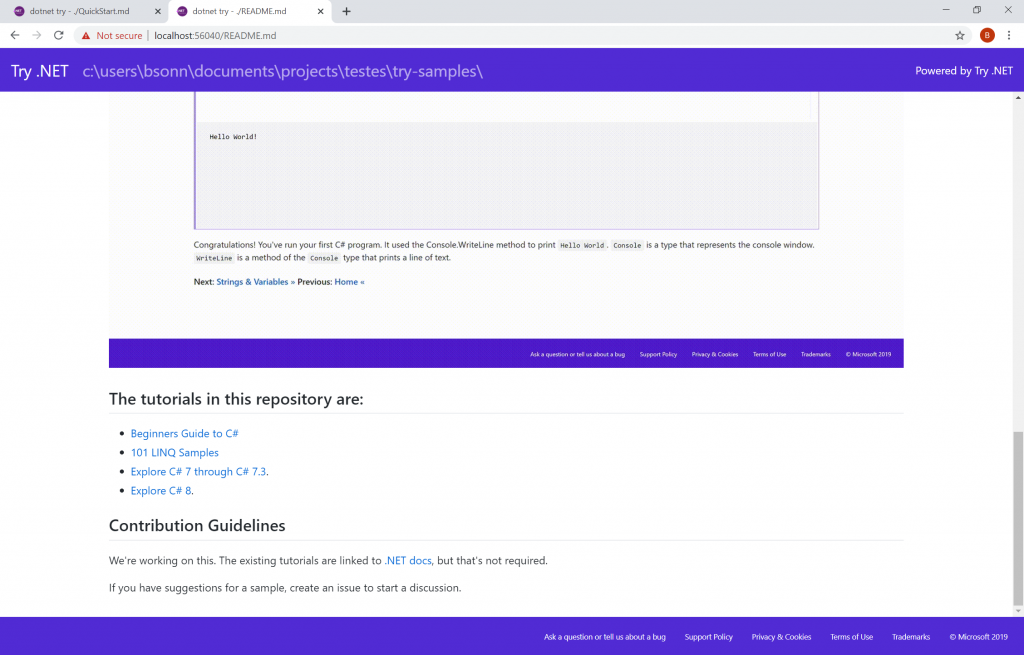
There you can see some tutorials:
- Beginner's guide
- 101 Linq Samples
- C# 7
- C# 8
With that, you can start playing with the tools. I recommend checking the Linq samples, there is always something to learn about Linq, and the new features in C#7 and 8.
Once you've played with the tool, it's the time to create your own documentation.
Creating documentation for your code
All documentation is based on the MarkDown language. It's a very simple way to create your documentation, If you don't know how to use the MarkDown language, you can learn it here.
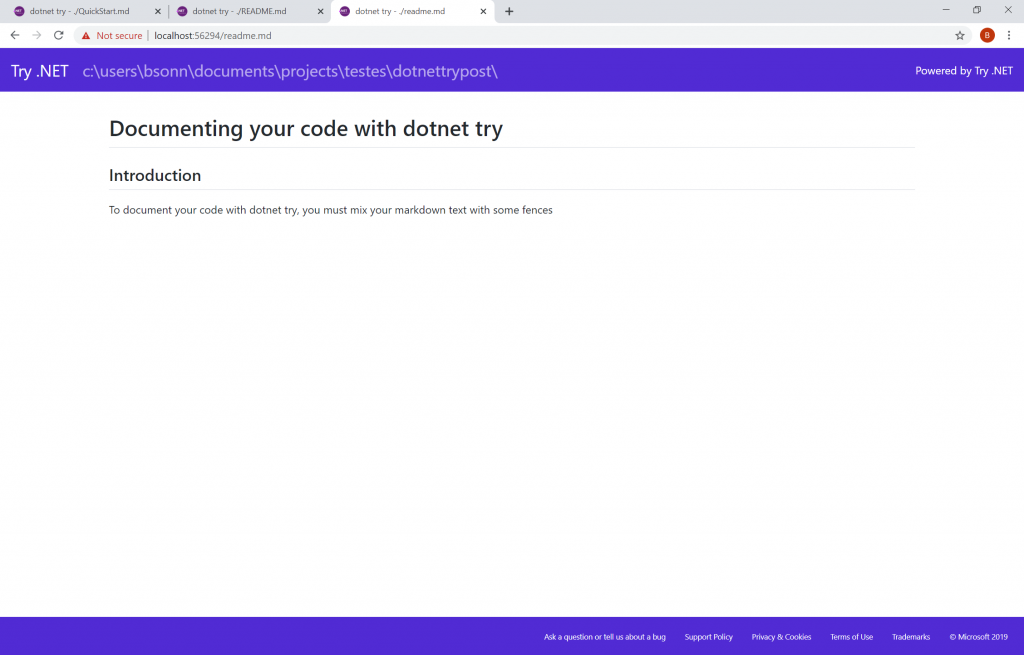
Create a new folder and, in this folder, create a readme.md file and add this code:
# Documenting your code with **dotnet try**
## Introduction
To document your code with dotnet try, you must mix your markdown text with some fences
Once you save it and run dotnet try, you can see something like this in the browser:
Now you can start adding code. To add the code window, we must add a code fence, a block of code delimited by triple backticks. You can add code directly to the code fence with something like this:
```
using System;

namespace dotnettrypost
{
    class Program
    {
        static void Main(string[] args)
        {
            #region HelloWorld
            Console.WriteLine("Hello World!");
            #endregion
        }
    }
}
```
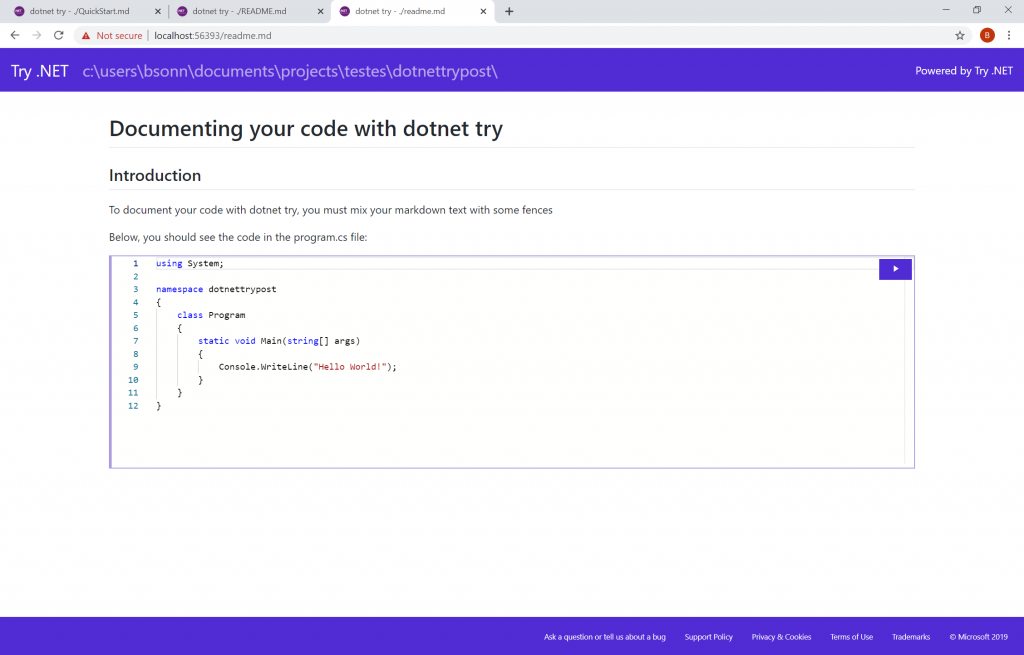
This is great, but can pose a problem: if you need to change something in your code, you must also change the markdown file, and this is less than optimum, as at some point you will forget to update both places. But there is a better way: you can use the source code as the only source of truth and you don't have to update both places - when you change the source code, the code in the page changes accordingly. To do this, you can create a console app with
dotnet new console
This creates a simple project that writes Hello World in the console. It's pretty simple, but fits our needs. Now, we will document it. You can add the following code at the end of the readme.md file to show the contents of the program in editable form:
Below, you should see the code in the program.cs file:
```cs --source-file ./Program.cs --project ./dotnettrypost.csproj
```
In this code fence, you must add the name of the file and the project. If you run dotnet try again, you will see something like this:
You can click the arrow to run the code, the first time, it will take a little bit to compile the code, but the other times, it will be faster. You can change the code and see the results:
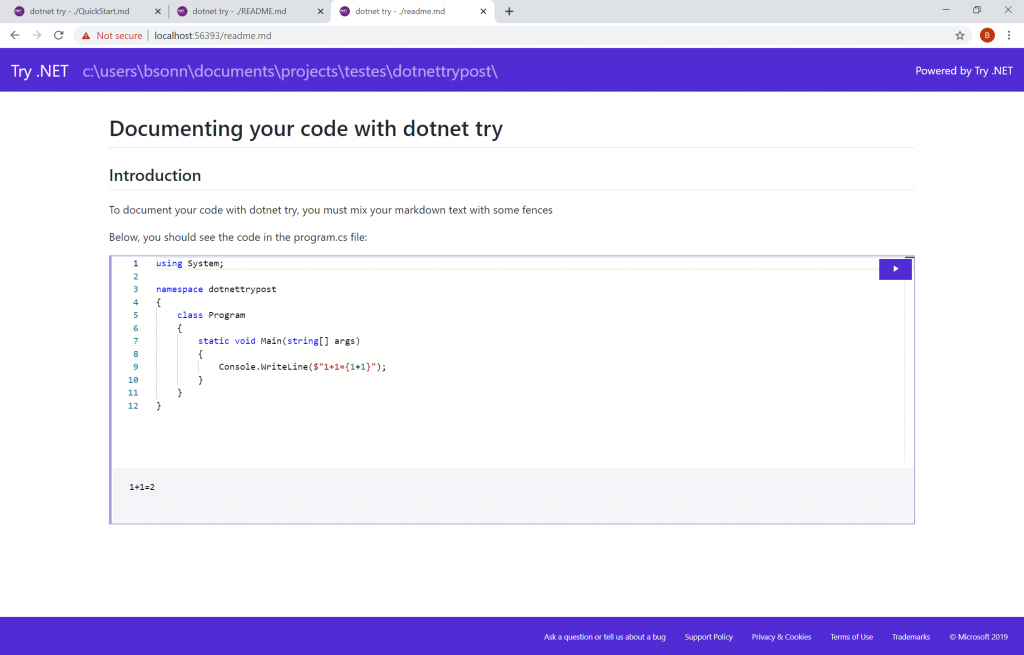
You have here a safe environment, where you can try changes in the code. If you make a mistake, the window will point it, so you can fix it.
As you can see, the code for the entire file is shown, but sometimes that's not what you want. Sometimes you just want to show a code snippet from the file. To do that, you must create regions in your code. In the command prompt, type code . to open Visual Studio Code (you must have it installed. If you don't have it installed, go to https://code.visualstudio.com/download). Then add a region to your code:
using System;

namespace dotnettrypost
{
    class Program
    {
        static void Main(string[] args)
        {
            #region HelloWorld
            Console.WriteLine("Hello World!");
            #endregion
        }
    }
}
Save the file and then edit the Readme.md file to change the code fence:
```
cs --source-file ./Program.cs --project ./dotnettrypost.csproj --region HelloWorld
```
When you save the file and refresh the page, you will see something like this:
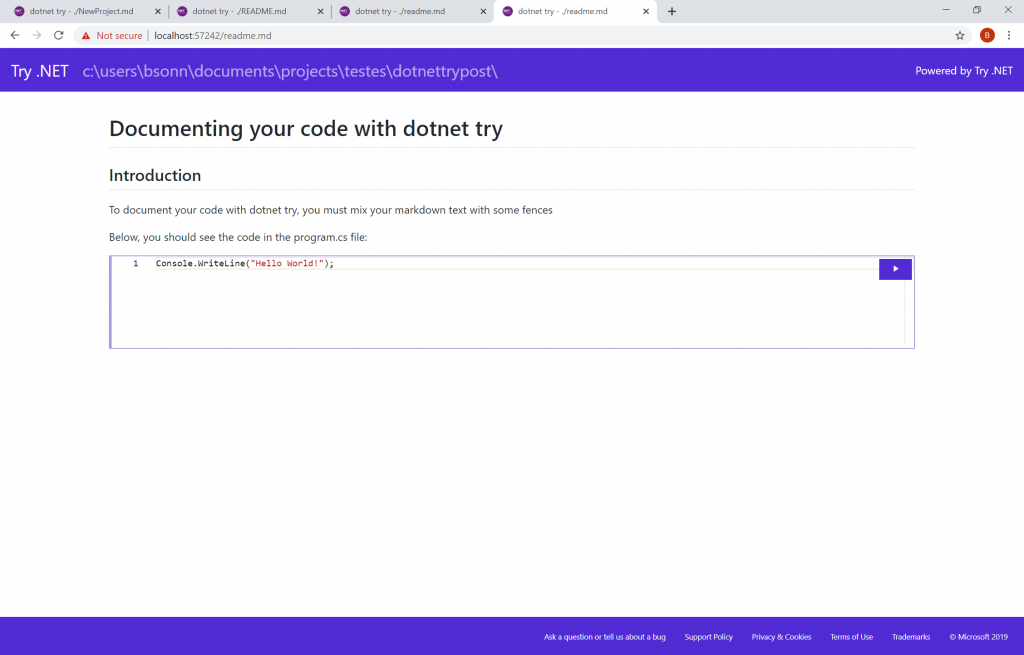
Creating regions in your code and referencing them in the code fence allows you to separate the code you want in the code window. That way, a single file can provide code for many code windows.
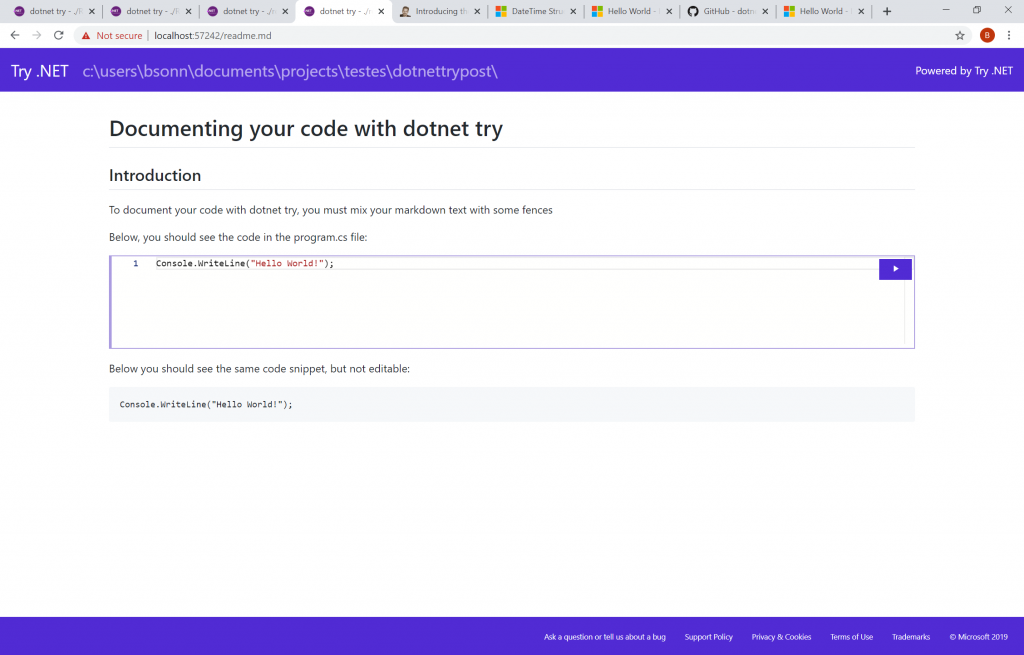
If you don't want to have a runnable window, but still synchronized with the code, you can use the editable parameter:
```cs --source-file ./Program.cs --project ./dotnettrypost.csproj --region HelloWorld --editable false
```
When you are running the code, even if you aren't showing the full code, everything in the program is executed. For example, if you change the source code to:
using System;
namespace dotnettrypost
{
    class Program
    {
        static void Main(string[] args)
        {
            #region HelloWorld
            Console.WriteLine("Hello World!");
            #endregion
            Console.WriteLine("This won't be shown in the snippet but will be shown when you run");
        }
    }
}
You will see the same code snippet but when you run it you will see something like this:
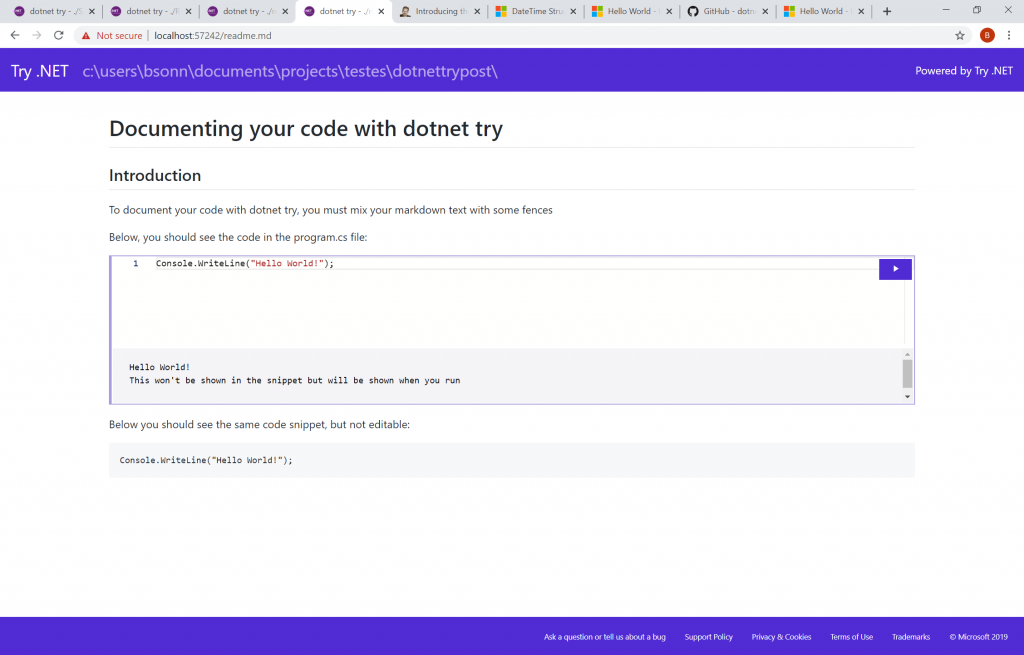
If you don't want this, you need to do some special treatment in your code: you must make each snippet of code run alone. You can do that by processing the parameters passed to the program:
using System;

namespace dotnettrypost
{
    class Program
    {
        static void Main(string[] args)
        {
            for (var i = 0; i < args.Length; i++)
                if (args[i] == "--region")
                {
                    if (args[i + 1] == "HelloWorld")
                        HelloWorld();
                    else if (args[i + 1] == "ByeBye")
                        ByeBye();
                }
        }

        private static void HelloWorld()
        {
            #region HelloWorld
            Console.WriteLine("Hello World!");
            #endregion
        }

        private static void ByeBye()
        {
            #region ByeBye
            Console.WriteLine("ByeBye!");
            #endregion
        }
    }
}
Now, when you run the code, it will run only the code for the HelloWorld snippet. As you can see there are a lot of options to show and run code in the web page. I see many ways to improve documentation and experimentation of new APIs. And you, don't this bring you new ideas?
All the source code for this project is at https://github.com/bsonnino/dotnettry
1 thought on “Learning and documenting .NET with dotnet try”