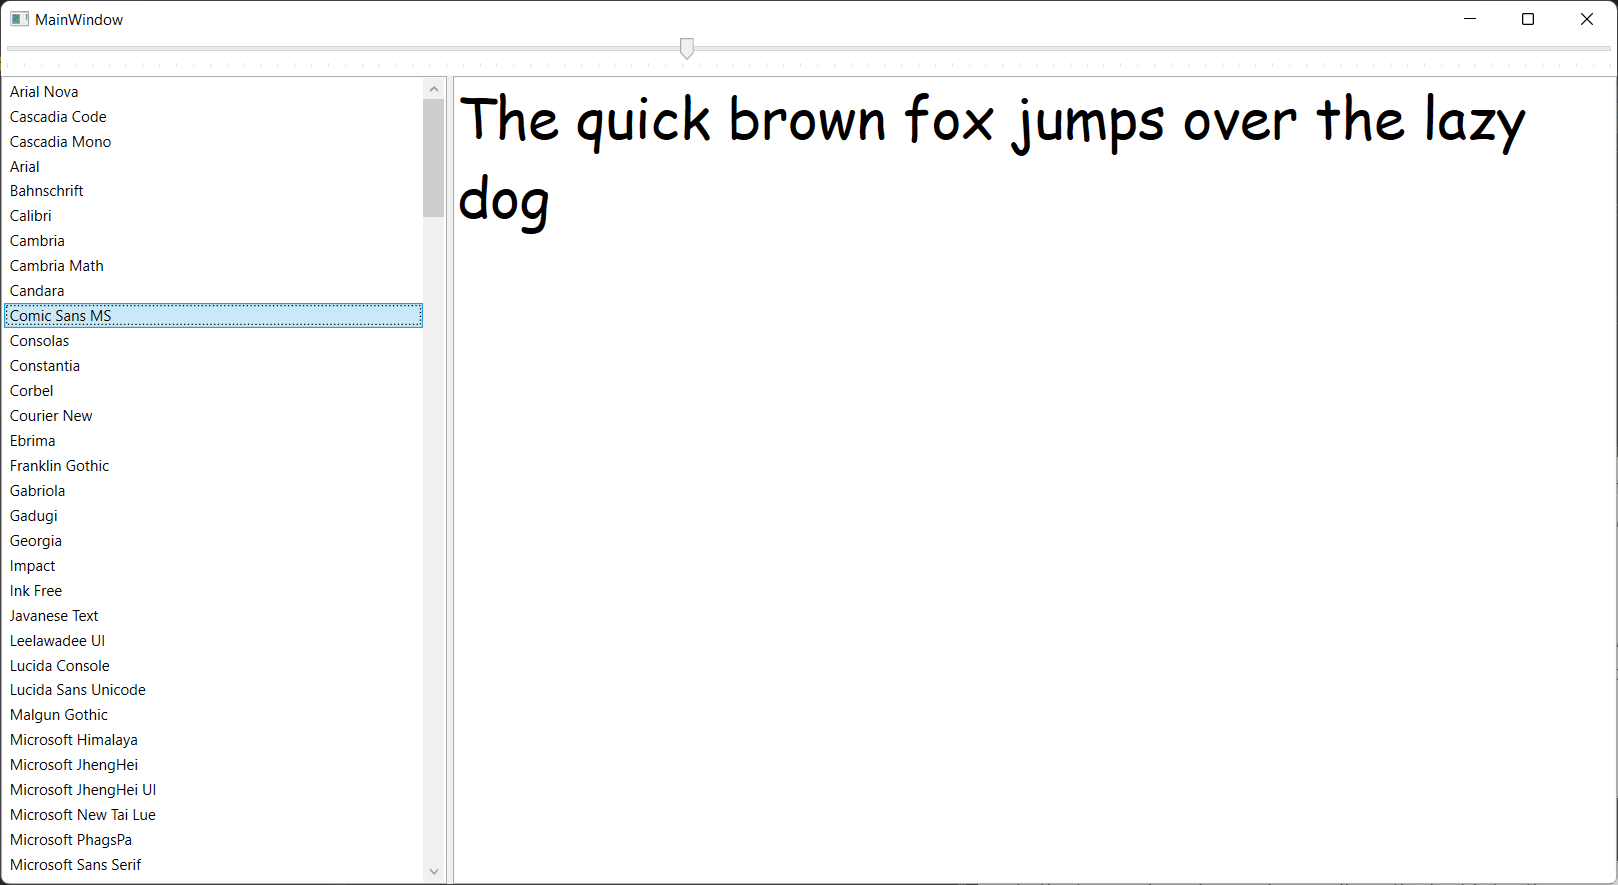
There are some times when we want to check all installed fonts in the system and test a phrase to check how does it show in the display at some size.
There are many utilities for that, but it’s always better (and most satisfying) to build your own. And, even better, you can do it in WPF with no need of writing code, just use the builtin data binding features in the markup.
To do it, just open a terminal window, and type
dotnet new wpf -o FontsList
That will create a new WPF application in the FontsList folder. Now, you can change to the FontsList folder and type code . to open VS Code in the current folder.
Once you do that, you can edit the MainWindow.xaml file and add this code:
    <Window x:Class="FontsList.MainWindow"
        xmlns="http://schemas.microsoft.com/winfx/2006/xaml/presentation"
        xmlns:x="http://schemas.microsoft.com/winfx/2006/xaml"
        xmlns:d="http://schemas.microsoft.com/expression/blend/2008"
        xmlns:mc="http://schemas.openxmlformats.org/markup-compatibility/2006"
        xmlns:local="clr-namespace:FontsList" mc:Ignorable="d" Title="MainWindow" Height="450" Width="800">
        <Grid>
            <Grid.RowDefinitions>
                <RowDefinition Height="40"/>
                <RowDefinition Height="*"/>
            </Grid.RowDefinitions>
            <Slider Minimum="5" Maximum="100" TickPlacement="BottomRight" x:Name="FontSlider" Value="48" />
            <Grid Grid.Row="1">
                <Grid.ColumnDefinitions>
                    <ColumnDefinition Width="0.5*"/>
                    <ColumnDefinition Width="0.5*"/>
                </Grid.ColumnDefinitions>
                <ListBox HorizontalAlignment="Stretch" x:Name="Listbox" Margin="0,0,5,0"
                    VerticalAlignment="Stretch" ItemsSource="{Binding Source={x:Static Fonts.SystemFontFamilies}}"
                    IsSynchronizedWithCurrentItem="True"/>
                <GridSplitter HorizontalAlignment="Right" VerticalAlignment="Stretch" Width="5"/>
                <TextBox HorizontalAlignment="Stretch" VerticalAlignment="Stretch"
                    FontFamily="{Binding Path=SelectedItem, ElementName=Listbox, Mode=Default}"
                    FontSize="{Binding Path=Value, ElementName=FontSlider}" Grid.Column="1"
                    Text="The quick brown fox jumps over the lazy dog" TextWrapping="Wrap"/>
            </Grid>
        </Grid>
    </Window>
We are adding a grid with two rows. In the first row, we add the font size slider, that will be used to change the font size of the preview. In the second row, we will add another grid, with two columns: the font list and the preview.
The font list gets its items from the Windows class Fonts.SystemFontFamilies. The preview is a textbox there you can type the text you want to preview, with the FontFamily bound to the selected item of the listbox (the font you’ve selected) and the FontSize bound to the size slider.
Now we’re ready to run. No extra code is needed. Just type
dotnet run
In the terminal window and you will see the font list with a preview in the selected size:

Nice, no? Now you have your own fonts list in WPF with no code. It even has a splitter in the fonts grid, if you want to change the size of the font list and preview.
All the source code for this project is at https://github.com/bsonnino/FontsList
