
Visual Studio Code is a free, multi-platform IDE and has multiple features, like multi-language support, syntax, highlighting, Git integration, among others. It’s open source and can be downloaded here.
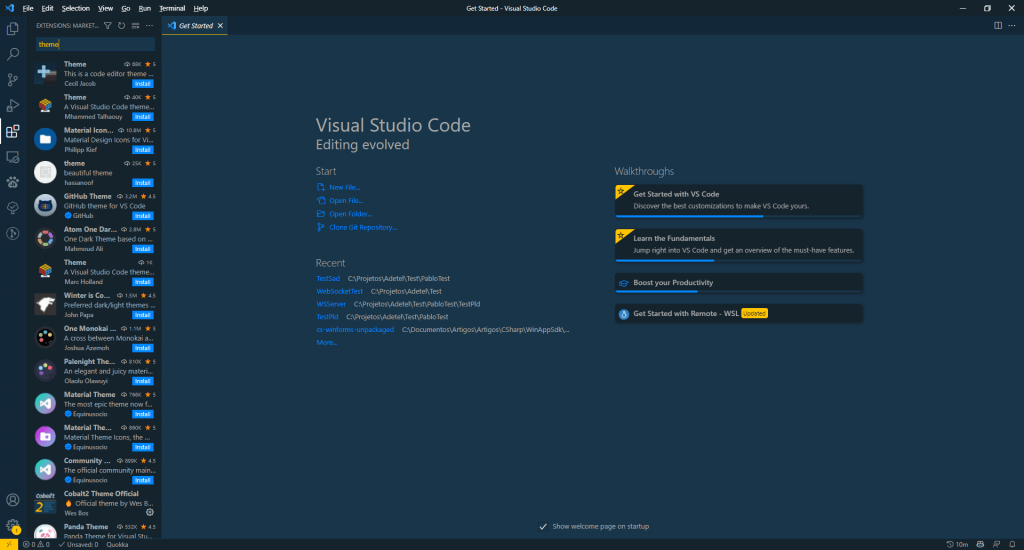
One thing that contributes to its success is the fact that anyone can develop an extension for it and add new features to it. In fact, there are thousands of different extensions and, most it’s almost sure that, if you are searching something to do with it, there is an available extension to do it: themes, formatters, highlighters, code editors, or even an integrated interface to work with your favorite tool. You just have to open the extension manager, search what you want and install it.
Although Visual Studio Code has the same name of its older brother, it’s an entirely different code base: while Visual Studio is a .NET application, Windows-only (there is Visual Studio for Mac, based on MonoDevelop and Xamarin Studio, which is another code base), Visual Studio Code is based on the Monaco Editor, a code editor for the web, written in Typescript and it’s a multi-platform Electron app.
The extensions for VS Code are completely different from the Visual Studio ones: they are written in TypeScript (or JavaScript) and run only in VS Code, you cannot install them in Visual Studio.
To develop an extension to VS Code, you must have Node.js and Git installed and install Yeoman and the [VS Code Extension Generator]https://www.npmjs.com/package/generator-code):
npm install -g yo generator-code
Then, we can create our extension with
yo code
The code generator will ask questions to direct you to generate the correct extension:
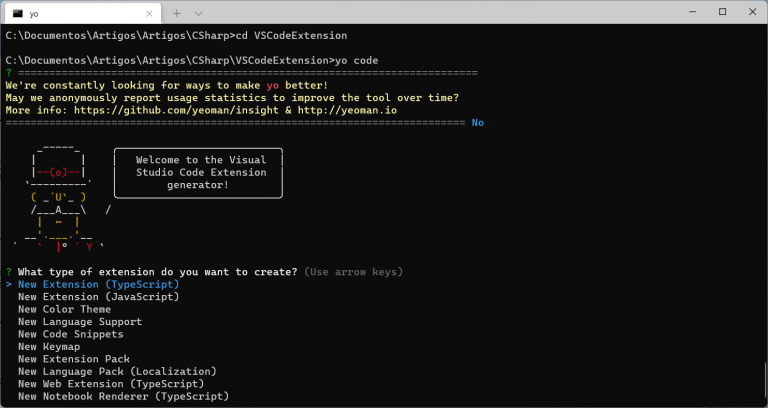
You can choose:
- What type of extension do you want to create? New Extension (TypeScript)
- What's the name of your extension? SortLines
- What's the identifier of your extension? sortlines
- What's the description of your extension? Sorts Selected Lines
- Initialize a git repository? Yes
- Bundle the source code with webpack? No
- Which package manager to use? npm
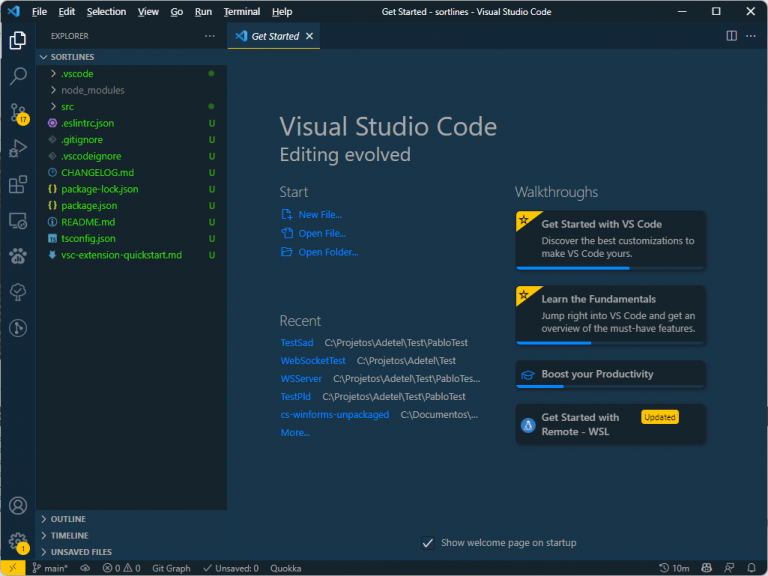
The last question allows you to open the new extension with VS Code:
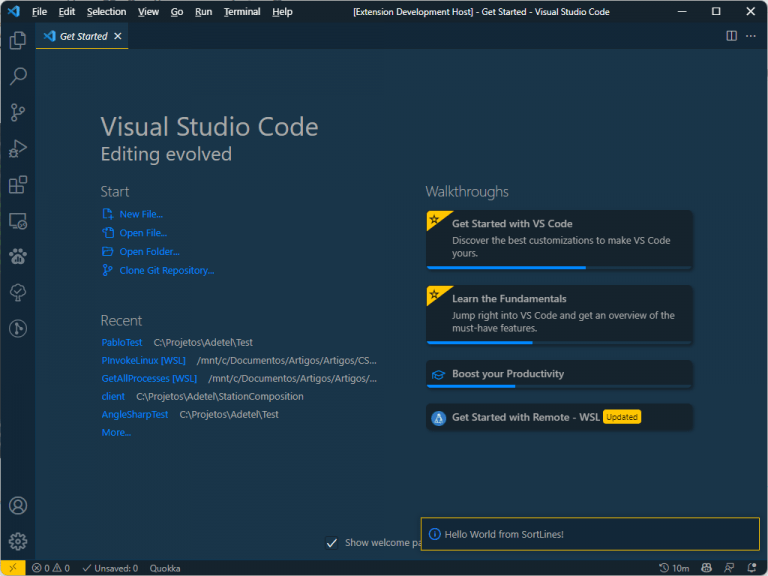
You can press F5 to compile the extension and open a new instance of VS Code, where you can type Shift+Ctrl+P and type Hello World and the extension will show a message:
Two files are important in the extension: package.json and src\extension.ts. Package.json is the extension manifest, where you will say how your extension will be presented to the world: its name, which commands it implements and information for the marketplace: icon, license, colors, etc. Our extension has this information:
"name": "sortlines",
"displayName": "SortLines",
"description": "Sorts Selected Lines",
"version": "0.0.1",
"engines": {
  "vscode": "^1.64.0"
},
"categories": [
  "Other"
],
"activationEvents": [
  "onCommand:sortlines.helloWorld"
],
"main": "./out/extension.js",
"contributes": {
  "commands": [
    {
      "command": "sortlines.helloWorld",
      "title": "Hello World"
    }
  ]
},
You can recognize the name, displayName and description from your answers when you created the extension. The categories property shows the categories in which your extension fits. In our case, we will stay with Other.
The activationEvents property shows how the extension will be activated. In our case, it will be with the command sortlines.helloWorld. If we were creating a different extension, like an extension for a HTML parser, we could use the onLanguage event.
The main property indicates the entry point for your extension. As we are using TypeScript and it will be transpiled to JavaScript, we are indicating the js file in the out directory. The contributes property indicates where the extension will contribute with VS Code. Our extension will add a command in the command palette, but if the extension would add a new language support to VS Code, we could use the languages property.
The command will have the command identifier and the command title, that will appear in the command palette.
The main code is at src\extension.ts, where we will program what our extension will do. Its basic structure is this:
// The module 'vscode' contains the VS Code extensibility API
// Import the module and reference it with the alias vscode in your code below
import \* as vscode from 'vscode';

// this method is called when your extension is activated
// your extension is activated the very first time the command is executed
export function activate(context: vscode.ExtensionContext) {

  // Use the console to output diagnostic information (console.log) and errors (console.error)
  // This line of code will only be executed once when your extension is activated
  console.log('Congratulations, your extension "sortlines" is now active!');

  // The command has been defined in the package.json file
  // Now provide the implementation of the command with registerCommand
  // The commandId parameter must match the command field in package.json
  let disposable = vscode.commands.registerCommand('sortlines.helloWorld', () => {
    // The code you place here will be executed every time your command is executed
    // Display a message box to the user
    vscode.window.showInformationMessage('Hello World from SortLines!');
  });

  context.subscriptions.push(disposable);
}

// this method is called when your extension is deactivated
export function deactivate() {}
It declares two methods, activate, called when the extension is being activated and deactivate, called when the extension is deactivated, You use this method when there is some cleanup to be done. If there is no cleanup necessary, you can remove this method.
Let’s start changing the extension for our needs. Initially, let’s change the package.json file to set our new title and add the commands we need:
"activationEvents": [
    "onCommand:sortlines.sortDescending",
    "onCommand:sortlines.sortAscending"
],
"main": "./out/extension.js",
"contributes": {
    "commands": [{
            "command": "sortlines.sortDescending",
            "title": "Sort Lines: Sort Descending"
        },
        {
            "command": "sortlines.sortAscending",
            "title": "Sort Lines: Sort Ascending"
        }
    ]
},
We are defining two commands: sortDescending and sortAscending. Now we must declare them in the code:
// this method is called when your extension is activated
// your extension is activated the very first time the command is executed
export function activate(context: vscode.ExtensionContext) {

  // Use the console to output diagnostic information (console.log) and errors (console.error)
  // This line of code will only be executed once when your extension is activated
  console.log('Congratulations, your extension "sortlines" is now active!');

  // The command has been defined in the package.json file
  // Now provide the implementation of the command with registerCommand
  // The commandId parameter must match the command field in package.json
  registerCommand(context, 'sortlines.sortDescending', () => {
    vscode.window.showInformationMessage('You are sorting the lines descending!');
  });
  registerCommand(context, 'sortlines.sortAscending', () => {
    vscode.window.showInformationMessage('You are sorting the lines ascending!');
  });
}

function registerCommand(context: vscode.ExtensionContext, command: string , func : () => void) {
  const disposable = vscode.commands.registerCommand(command, func);

  context.subscriptions.push(disposable);
}
I have refactored the code and created a new function, registerCommand, that will register the command and the callback function that will be invoked when the command is invoked. For now, we will only show the information messages. If you run the extension and open the command palette in the new instance of VS Code, you will see something like:

Selecting one of the options will show the information message. Now, let’s create the code to sort the selected lines in the editor:
// The module 'vscode' contains the VS Code extensibility API
// Import the module and reference it with the alias vscode in your code below
import \* as vscode from 'vscode';

// this method is called when your extension is activated
// your extension is activated the very first time the command is executed
export function activate(context: vscode.ExtensionContext) {
  registerCommand(context, 'sortlines.sortDescending', () => sortSelection(true));
  registerCommand(context, 'sortlines.sortAscending', () => sortSelection(false));
}

function sortSelection(isDescending: boolean) {
  //get the active text editor
  const editor = vscode.window.activeTextEditor;
  if (!editor) {
    return;
  }
  //get the selection start and end
  const selection = editor.selection;
  const start = selection.start;
  const end = selection.end;
  // the new selection will extend
  // from start of the first selected line
  // to the end of the last selected line
  const newSelection = new vscode.Selection(start.line, 0, end.line + 1, 0);
  // get the selected text
  const text = editor.document.getText(newSelection);
  // split the text into lines
  const lines = text.split('\\r\\n');
  // sort the lines
  lines.sort((a, b) => isDescending ? b.localeCompare(a) : a.localeCompare(b));
  // replace the text with the sorted lines
  editor.edit((editBuilder) => {
    editBuilder.replace(newSelection, lines.join('\\n'));
  });
  // set the new selection
  editor.selection = newSelection;
}

function registerCommand(context: vscode.ExtensionContext, command: string, func: () => void) {
  const disposable = vscode.commands.registerCommand(command, func);
  context.subscriptions.push(disposable);
}
For that, we will use the VS Code Api. We will create a sortSelection function, that will get the current selection, extend it to get the full first and last lines, sort them and replace the text with the sorted lines. The first step is to get the active editor with window.activeTextEditor, then get the current selection and extend it from the first character of the first selected line to the first character of the line just after the last selected line. Then, we sort the lines and replace the selected lines with the sorted lines and set the new selection.
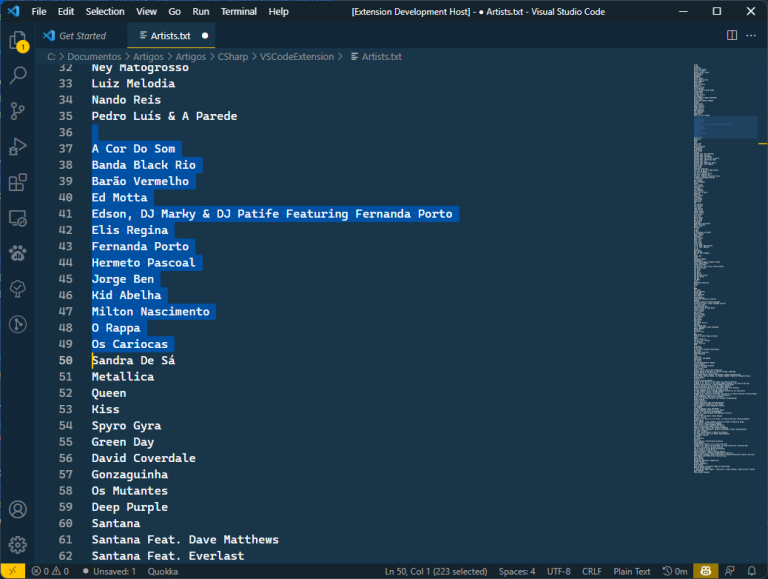
When you run this extension and select some lines in your editor (the sample code has a list of artists obtained from the Chinook database, so you can try it), if you press Shift+Ctrl+P and select the sort, your selected lines will be sorted:
You can see that it works fine, except for one small glitch: if you sort the lines in the ascending order (that doesn’t happen in descending order), a blank line will be inserted in the first line of the selection, and that’s not what we want. That gives us the opportunity of testing another feature of the development of an extension for VS Code: debugging. Let’s debug the extension and check what’s happening:
We can set a break point in the line where the lines will be sorted, select some lines of text in the debugged editor and select the sort ascending. The debugger will stop in that line and we can see what’s happening, by analyzing the lines variable:
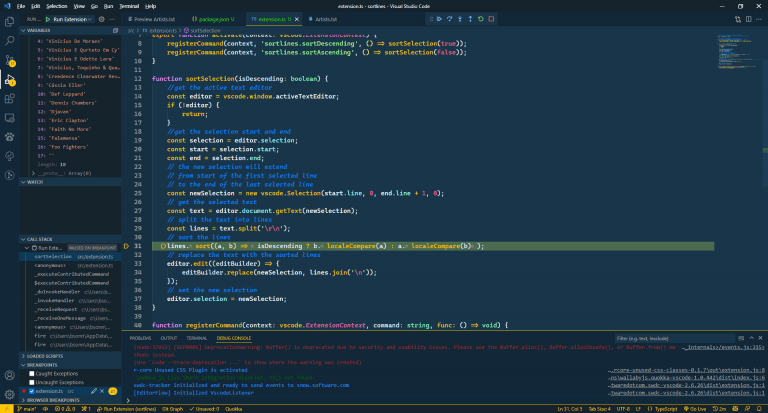
There is an extra line in the lines variable due to the last line, that will be sorted and will come first in the selection. And why that doesn’t happen in the descending order ? The empty line will come last and it will add only the last new line character, which will separate the last line of the selection and the next line, not selected.
That’s an easy fix: we can use the trim method to remove the trailing newline and the last line won’t be created when splitting the text:
const lines = text.trim().split('\\r\\n');
Now, we can run the extension and see that things work fine. There is one last thing to do here: add two keybindings to our extension: we will use Ctrl+K Ctrl+A for the sort ascending and Ctrl+K Ctrl+D for sort descending. For that, we will go to the Contributes section in the package.json file:
"contributes": {
    "commands": [{
            "command": "sortlines.sortDescending",
            "title": "Sort Lines: Sort Descending"
        },
        {
            "command": "sortlines.sortAscending",
            "title": "Sort Lines: Sort Ascending"
        }
    ],
    "keybindings": [{
            "command": "sortlines.sortDescending",
            "key": "ctrl+K ctrl+D",
            "when": "editorHasSelection"
        },
        {
            "command": "sortlines.sortAscending",
            "key": "ctrl+K ctrl+A",
            "when": "editorHasSelection"
        }
    ]
},
We set the command, the keybinding and when the command will be enabled (in this case, we will only enable the keybinding when there is selected text in the editor. Now, if you run the extension, select some text and press Ctrl+K Ctrl+D or Ctrl+K Ctrl+A, you will have the lines sorted.
Our extension is ready and the last step is to install it in VS Code (you can also upload it to the Marketplace, so it will be available for everyone). For that, you need to install the vsce tool. This tool allows you to package the extension, creating a VSIX file that can be installed locally or shared with other users, or publish the extension to the marketplace, so anyone can use it. You can install the tool with
npm install -g vsce
Once installed, you can use the publish or package commands to do what you want with the extension. For now, we’ll just package our extension, so you need to open a terminal window (you can do it in VS Code with Ctrl+`), change to your extension folder and type
vsce package
When you do that, you get an error:
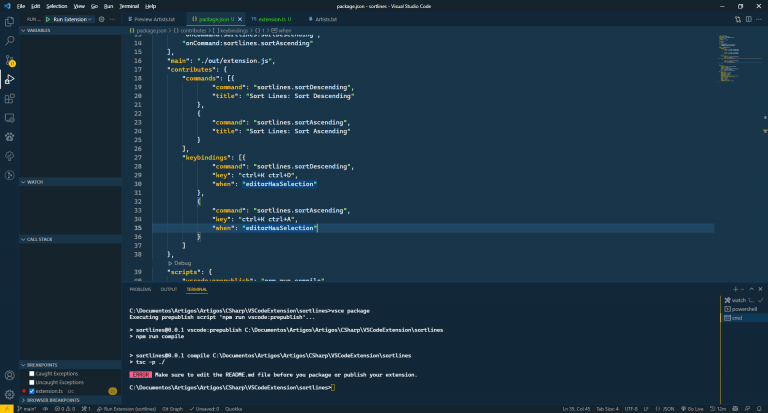
You must edit your readme file to show what your extension will do. This is a markdown file, where you will put the features of your extension.
Once you have edited your readme file, you can package your extension and a VSIX file will be created. You can then go to the Extensions tab, select the “…” icon and select “Install from VSIX”. You’ll have the extension installed in your VS Code. You can distribute the extension to other members of your team by sharing the VSIX file. If you want to publish your extension, you can do it by using the publish command.
As you can see, creating an extension for VS Code is relatively easy, and that’s why there are so many extensions for it
All the source code for this extension is at https://github.com/bsonnino/VSCodeExtension