
Recently I bought a Fitbit Sense watch, it has tons of sensors to measure your health and fitness, I really enjoy its features.
One extra thing that I like is that Fitbit provides an SDK to create new apps and clock faces for your watch, you can use it for the Ionic, Versa and Sense devices and customize your watch, adding the features you want. This SDK is Javascript based, so you must use Javascript to create your apps. But you are not completely tied to Javascript, you can use Typescript and have all the features the language provides to create your apps. In this article, we'll see how to use Typescript to create a simple clock face.
Setting up your workspace
The Fitbit SDK is mostly web based. You must have a user account, have the Fitbit mobile app installed in your phone and have a device associated with your account (this is needed in order to upload the app to the store). Once you have this set up, you can open Fitbit Studio and start developing your app. To show the result of your app, you must download and install the Fitbit Simulator from here (this is the Windows version, but you can download the Mac version from here).
When you use Fitbit Studio, you must use JavaScript to develop. This is not what we want. We will use what Fitbit calls the CLI (Command Line Interface), to create an app in your local machine. For that, you must have Visual Studio Code installed (you can use another editor that supports JavaScript/TypeScript, if you want) and Node.js.
With this setup, you can start developing your app. In the command line, type:
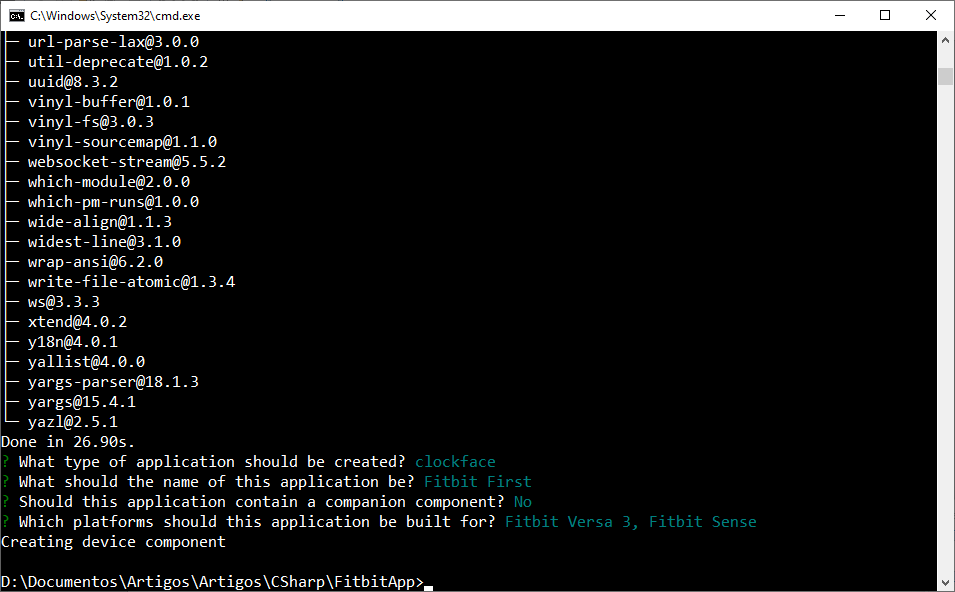
npx create-fitbit-app fitbit-first
You will have to select if the application is an app or a clockface, its name, if it has a companion component and the device it will run:
Once it runs, you can change to the folder created by the creator and start code with
code .
You will have something like this:
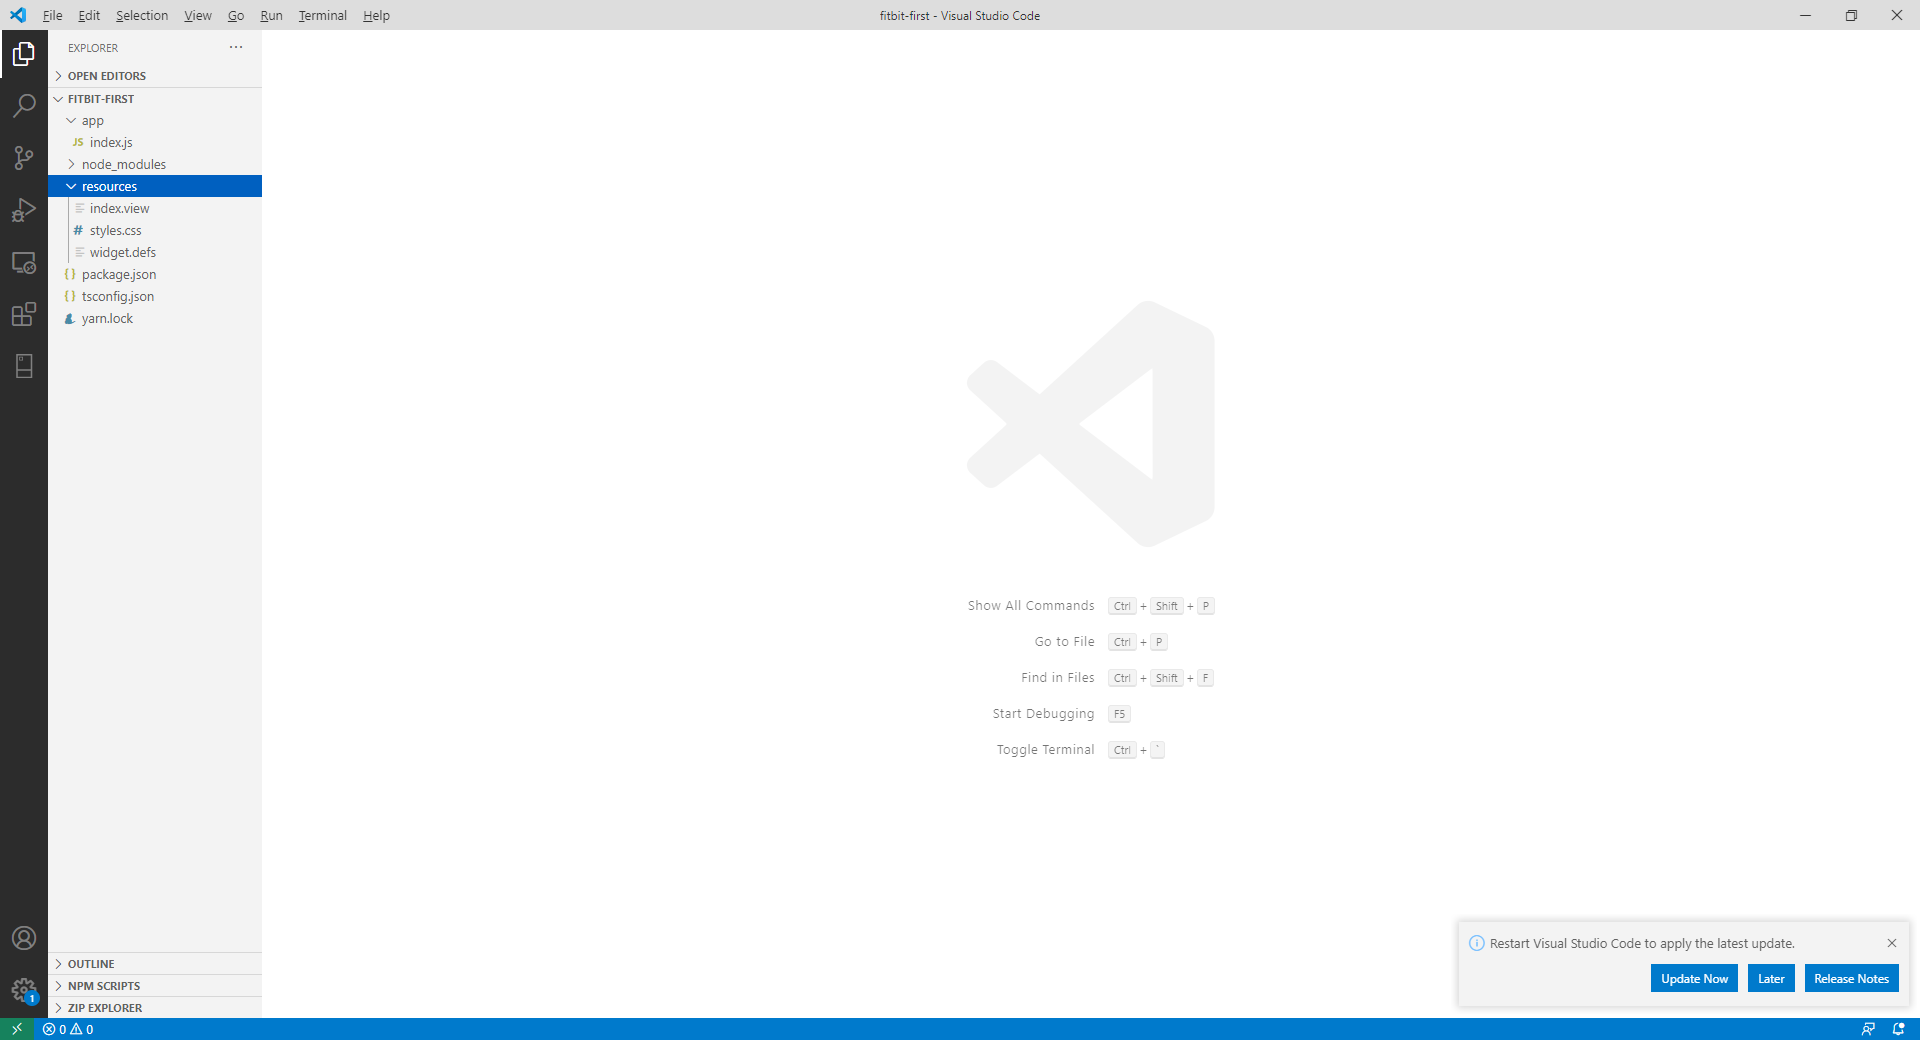
This is the basic structure of the Fitbit app:
- In the app folder, you have theindex.js file, the entry point for the app
- In the resources folder, you have the index.view, with an svg file with the main display. You have also the styles.css with the css styles for the view
- If you take a look at the main folder, you will see a tsconfig.json file. This is a good indication that TypeScript is already installed for the app.
So, as you can see, you can start to use TypeScript immediately, but you won't have intellisense. For that, you will have to install the types for the SDK. you can do that by opening a terminal in VS Code and running this command:
npx fitbit-sdk-types
With that, you are ready to go. You can rename the main file to index.ts and start running the project. You must start the simulator and run the application. In the terminal, open the Fitbit shell with
npx fitbit
You will see the Fitbit prompt, fitbit$, where you can type commands. You can use the build command to build the app and the install command to install the app on the simulator. Alternatively, you can use the build-install or bi to build and install the app on the simulator. When you do that, you will see Hello World! in the console and a white face in the simulator.
Let's start with our clock face. We will create a simple digital clock, that will display the time and date. The first step is to create the UI, in the index.view file. We will add two text elements for the time and the date:
<svg>
  <text id="time" fill="fb-blue" x="50%" y="50%"
    font-size="80" font-family="System-Regular"
    text-anchor="middle" >XX:XX</text>
  <text id="date" fill="fb-light-gray" x="50%" y="80%"
    font-size="50" font-family="System-Regular"
    text-anchor="middle" >xxx 99</text>
</svg>
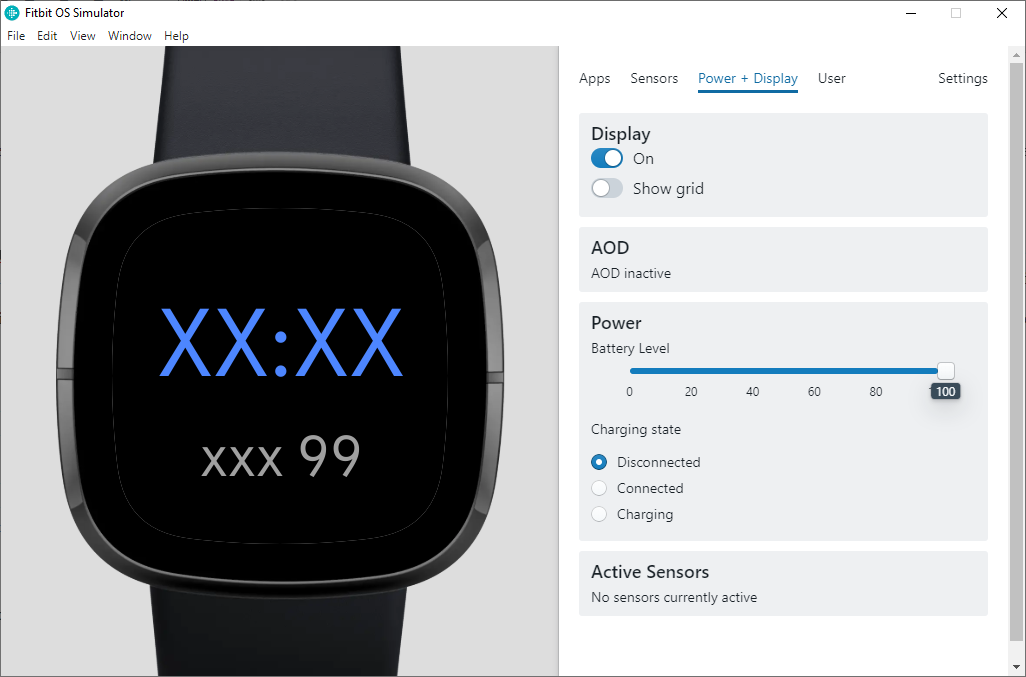
Running this code you will see a black background with two pieces of text:
Now we can start adding the code. Add a new class and name it Clock.ts:
import clock from "clock";

export class Clock {
    public clockCallback: (text: string) => void;

    constructor() {
        clock.granularity = "minutes";
        // Update the clock every tick event
        clock.addEventListener("tick", this.updateClock);
    }

    private updateClock = () => {
        if (!this.clockCallback)
            return;
        const date = new Date();
        const hours = date.getHours();
        const minutes = date.getMinutes();
        const zeroPad = ((n: number) => (n < 10) ? "0" + n : n);
        const time = ${zeroPad(hours)}:${zeroPad(minutes)};
        this.clockCallback(time);
    }
}

export default Clock;
In this class, we will set the granularity of the clock to minutes, and add a listener to update the clock on every tick. It will create a string with the current time and pass it to the callback. The callback is set in the main file, after creating a new instance of the clock:
import Clock from "./Clock";
import document from "document";

const timeElement = document.getElementById("time") as TextElement;
const clock = new Clock();
clock.clockCallback = (t) => timeElement.text = t;
With this code, when you run the program, you will see the current time in the simulator:

This is only a 24 hours clock and doesn't respect the user preferences. We must use the user preferences to set a 12 hour clock:
import clock from "clock";
import {preferences } from "user-settings";

export class Clock {
    public clockCallback: (text: string) => void;

    constructor() {
        clock.granularity = "minutes";

        // Update the clock every tick event
        clock.addEventListener("tick", this.updateClock);
    }

    private updateClock = () => {
        if (!this.clockCallback)
            return;
        const date = new Date();
        let hours = date.getHours();
        const minutes = date.getMinutes();
        let amPm = "";
        const zeroPad = ((n: number) => (n < 10) ? "0" + n : n);
        const twelveHour = preferences.clockDisplay === "12h";
        if (twelveHour)  {
            amPm = hours > 12 ? "."  : "" ;
            hours = hours % 12 || 12;
          }
        const time = ${zeroPad(hours)}:${zeroPad(minutes)}${amPm};
        this.clockCallback(time);
    }
}

export default Clock;
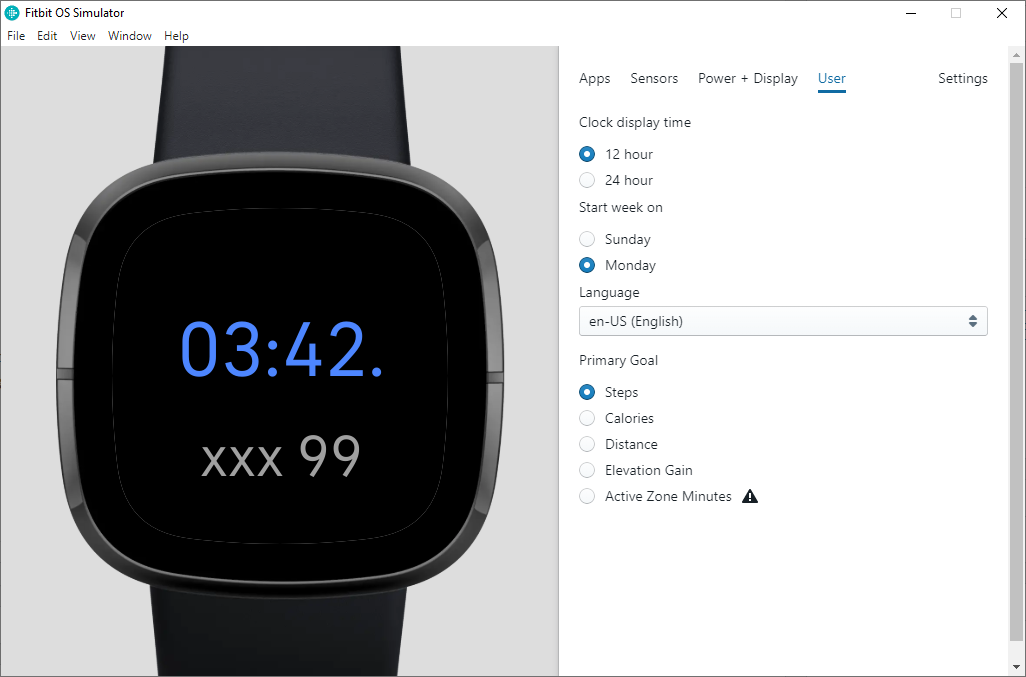
We will user the preferences from the user settings to retrieve the time display settings, if the user selects a 12 hours display, we will add a "." after the time to indicate PM. The rest of the code remains the same and, when you run the code, you can see the effect of the user settings in the simulator by going to the User tab and selecting 12 or 24 hours:
Now, we just need to add the date to the display. For that, you must create a new class and name it DateDisplay.ts:
import clock from "clock";

export class DateDisplay {
    private months = ["JAN", "FEB", "MAR", "APR", "MAY", "JUN", "JUL", "AUG", "SEP", "OCT", "NOV", "DEC"];

    public dateCallback: (text: string) => void;

    constructor() {
        clock.addEventListener("tick", this.updateDate);
    }

    private updateDate = () => {
        if (!this.dateCallback)
            return;
        const currDate = new Date();
        const day = currDate.getDay();
        const month = currDate.getMonth();
        const date = ${this.months[month]} ${day};
        this.dateCallback(date);
    }
}

export default DateDisplay;
The code is very similar to the clock. It adds a listener to the tick event and generates a string composed of the month and the day of the current date, then it passes it to the callback, that is subscribed in index.ts:
import Clock from "./Clock";
import DateDisplay from "./DateDisplay"
import document from "document";

const timeElement = document.getElementById("time") as TextElement;
const dateElement = document.getElementById("date") as TextElement;

const clock = new Clock();
clock.clockCallback = (t) => timeElement.text = t;
const dateDisplay = new DateDisplay();
dateDisplay.dateCallback = (d) => dateElement.text = d;
When you run the app, you have the time and date in the display:

Our clock face is ready. It's a very simple one and doesn't use the sensor data available in the smartwatch, but it's enough to get the feeling on what does it take to develop a clock face for the Fitbit using Typescript and VS Code. You can use the environment you are used to and have all the benefits of using Typescript, and still be able to use all the features available in the Fitbit SDK.
If you want to know more, you can go to https://dev.fitbit.com/getting-started. There are a lot of resources, tutorials and samples to learn how to create your customized clock face.
The full source code for this article is at https://github.com/bsonnino/FitbitApp