Until some time ago, creating an app to the Windows Store was only possible by creating an UWP (Universal Windows Platform) app and submitting it to the Windows Store. This was somewhat limiting because you had to know the technology and create a special new app using this platform.
With the introduction of the Desktop Bridge, Microsoft gave the developers the opportunity to submit their current Windows apps to the store, no matter which language they were programmed. And, besides that, you can also improve your app to use the new features and APIs introduced in Windows 10. That way, you can modernize your applications without having to learn a completely new technology.
Why add your app to the store?
There are a lot of advantages of adding your app to the store:
- Discoverabilty – your app will be listed in a worldwide directory and can be discovered by people you never would have reached
- Easy install and uninstall – installation and uninstalling Windows apps has always been a nightmare: you need admin rights, every installation program is different from the other, you need to create install scripts and, the worst, uninstalling the app always leave traces behind that will clutter your machine. With the store, install and uninstall are always a breeze
- Security – apps downloaded from the store are guaranteed to be safe: no viruses or harm to your machine. The apps run in a sandbox and will not do anything harmful
- Monetization – you don’t have to worry to sell your app. You can use several ways to monetize it: put a price to download it, in-app purchases, ads or even use a subscription-based app. You don’t have to setup a special platform to sell your app.
To add your app to the store you need to do special preparations and submit it there and wait for approval. It’s not as straightforward as posting an executable in the web, but the extra work is worth the benefits. The latest versions of Rad Studio make this procedure easier and Delphi Rio 10.3 bring a new component, TWindowsStore, that will ease the task of managing trial versions and in-app purchases.
This article will show how to package an app and send it to the Windows Store, so it can be installed and downloaded from there.
Packaging the app to the store
For this article, we will be using a financial calculator app, that has four tabs, to calculate payments for an installment payment, the rate used for an installment payment, the future value of an investment and the present value of an investment:

The user will fill the first three boxes of the page and the fourth will be calculated automatically. The first step is to add it to the store. We will not do anything right now, just add it there, so it can be installed and uninstalled easily. Even if you don’t want to add your app to the store, it’s interesting to do these steps, so you have an easy and safe way to distribute and install your app.
For this app, I’ve chosen to add a new feature, introduced in Delphi 10.3: inline variables and type inference. If you look at the calculation for the Present Value, you will see this:
procedure TForm1.CalculatePV;
begin
  try
    var FutureValue := StrToFloat(FvPresentValue.Text);
    var InterestRate := StrToFloat(IRPresentValue.Text)/100.0;
    var NumPeriods := StrToInt(NpPresentValue.Text);
    var PresentValue := FutureValue/Power((1+InterestRate),NumPeriods);
    PvPresentValue.Text := FormatFloat('0.00',PresentValue);
  except
    On EConvertError do
      PvPresentValue.Text := '';
  end;
end;
You will notice two things in this code:
- There is no Variable definition section (var) in the method. All variables are defined inline, as they are needed
- The variables have not an explicit type. Their type is inferred from the expression that follows it. That doesn’t mean that these variables have no type, like in Javascript or VB. It just means that the types are inferred by the compiler. FutureValue is an Extended variable, and if you try to assign it to something else (a string, for example), you will get a compiler error.
You may say that these two features can obfuscate your code and make it unreadable, but my experience with C#, that have had these features for a long time, is that it simplifies your code and make it easier to maintain. Anyway, it’s your call: if you want to keep using the old notation, it’s up to you. I really liked these ones.
But let’s go back to the subject of the article, creating a Windows Store app from this app. This is not new in Delphi 10.3, you can create a Windows Store app since Delphi Berlin. The first step is to install a Windows SDK, that can be downloaded and installed from .
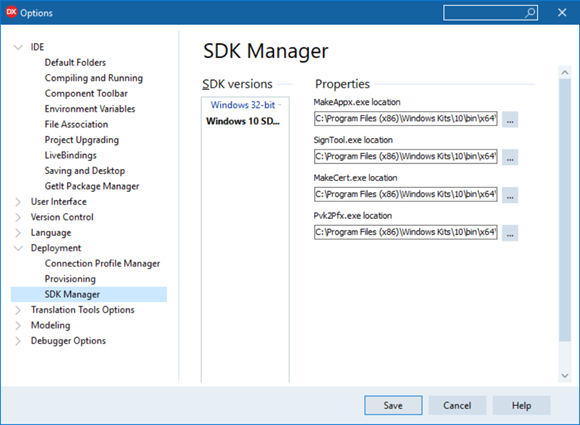
Once you have it installed, you must go to the SDK Manager, in Tools/Options/Deployment/SDK Manager and check if the SDK is setup and all the paths are ok:
The next step is to create a certificate. Your apps must be signed with this certificate to go to the store. You don’t need to have a certificate issued by a Certified Issuer, you can use a self-signed certificate. To create one, go to Provisioning in the options dialog and select the certificate you want to use:
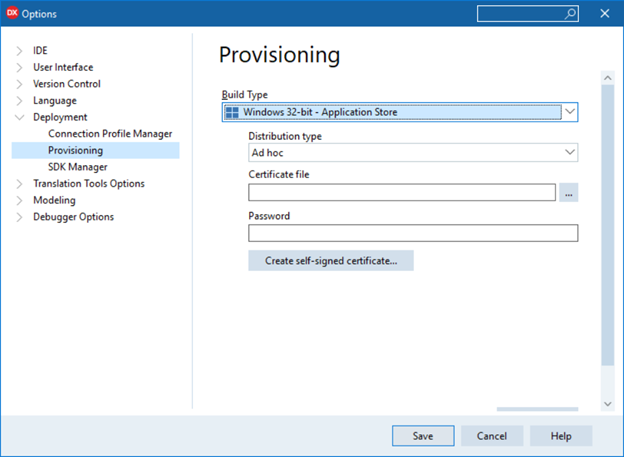
The distribution type indicates how you will distribute your app: Ad Hoc will make an appx file that can distributed to your users and is used to install the app without going to the store. Store will create a package for the store. If you want to distribute the app Ad Hoc, you need to create a certificate, by clicking the “Create self-signed certificate” button.
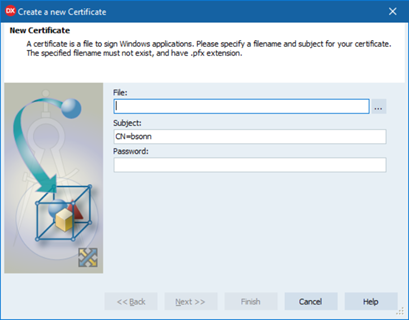
Just select a file name and a password and it will be created. Then, you can use it for creating your apps for the store.
Once you have created the certificate, you can compile the app. For distribution without the store, you can select the Ad Hoc distribution, with the certificate you’ve just created. Build your app and Delphi will show a message box like this one:
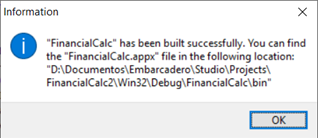
You can go to the location where the appx file is located and double click on it. A dialog like this will be shown:
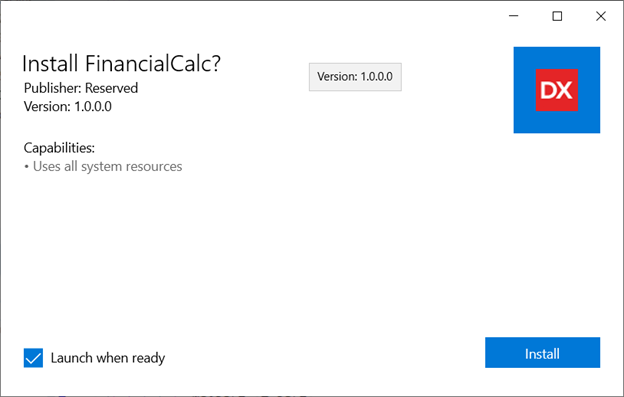
If you click in the Install button, the app will be installed and launched.
This is a Windows 10 app and it has the same features as any other Windows 10 app: you can uninstall it easily, pin it to the Start Menu, and so on. But, for this app, the only way to install it is to distribute the appx file and double click on it. We want more than that. We want to distribute it to the store.
Distributing the app in the store
To distribute the app in the store, you must create a submission for it. The first thing to do is to create a developer account in the Windows Dev Center. This account costs a one-time fee of $19.00 and the instructions to create it are at .
When you have the account created, you can create your app submission. In the dashboard, click on the “Create New App” button. That will take you to the screen where you must reserve the name for your app. This name must be unique, and the availability of the name will be checked.
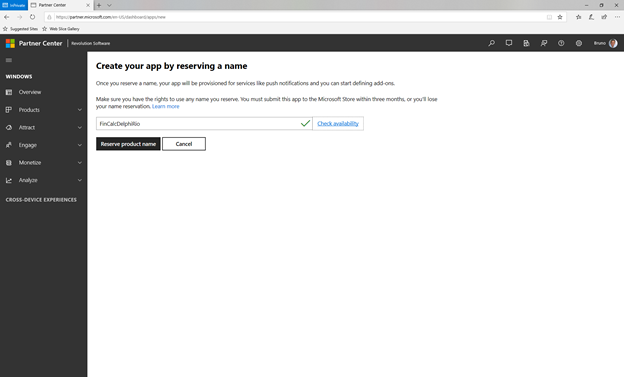
Once you click on the “Reserve product name” button, you will be directed to the screen to create the submission:
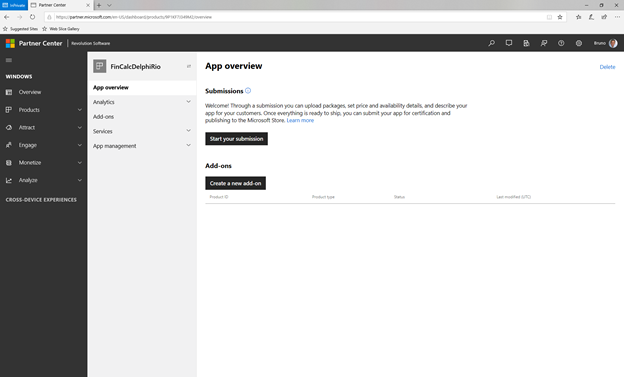
The next step is to create the submission, by clicking the “Start your submission” button:
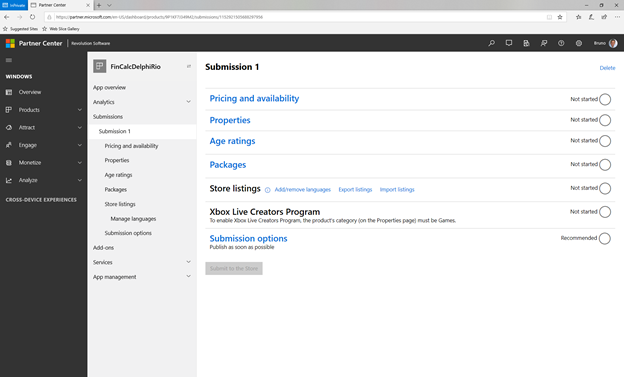
You must walk through the options, setting the way you want to distribute the app:
- Pricing and availability sets the markets, price and visibility for your app (you may make it public, or private). You can also set a free trial and sale price
- Properties will set the category of your app and what kind of hardware is required/recommended
- Age ratings will set what kind of app you are sending to the store and the age rating for you
- Packages is where you send the package for the app. You must check the Windows Desktop box, as this is a Windows Desktop app and send the correct appx file.
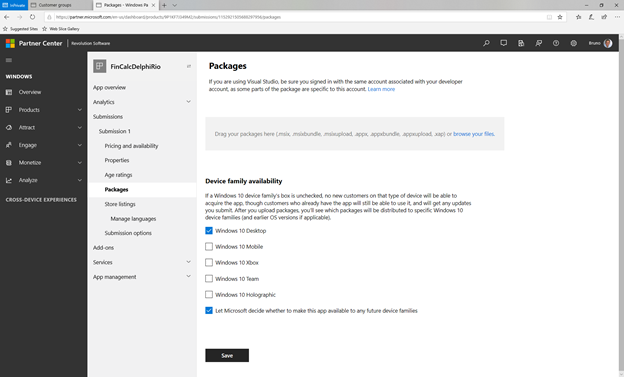
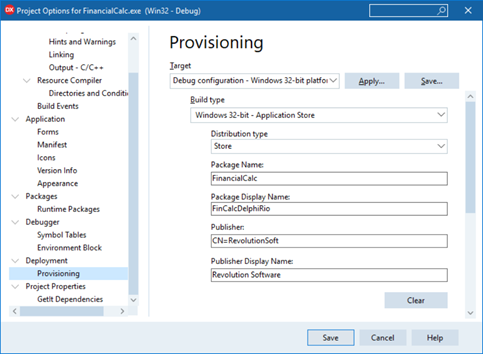
You must build your app with the Distribution type to Store, set the Package Display Name to the one you reserved in the store and set the publisher display name to the one you created the account in the dev center:
Then you can drag the generated appx file to the package place in the store. The package will be validated and, if something is wrong, it will be pointed to you:
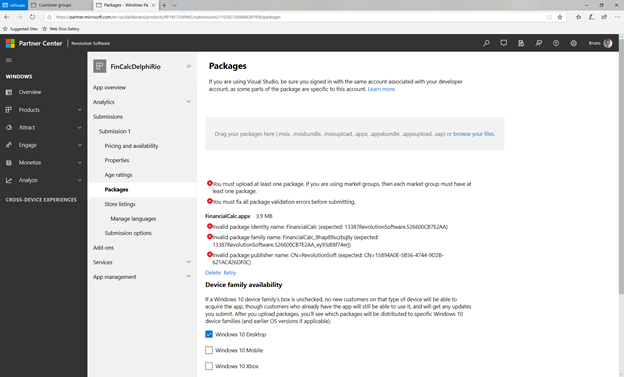
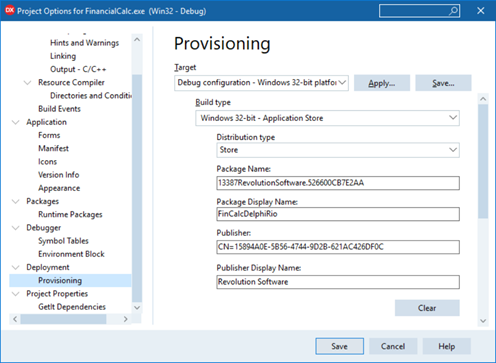
You must fix these things and rebuild the package:
Once everything is ok, you can save the package submission, and then set all the other options: the descriptions, screenshots and data for submission. Then you can check if everything is ok and submit to the store:
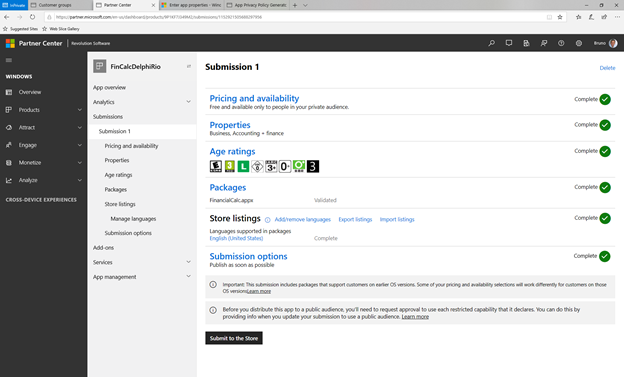
As the app needs full trust, the certification process will take some days. When it passes the certification, your app is available in the store and can be downloaded from there.

At this point, anyone with a Windows 10 machine will be able to download and install the app from the store.
In another article, I will show how to use the TWindowsStore component to manage trial versions and In-App purchases, so you can sell and get money from your app.
The source code for this article is at https://github.com/bsonnino/FinCalc

How do I get my APP to run at login?
You can take a look at this: https://www.addictivetips.com/windows-tips/run-uwp-apps-on-startup-on-windows-10/
Note that the Distribution Type “Store” is only available at Project/Options to select, not at the Tools/Options one, since its settings are project specific
Thanks for noting it