
Introduction
Every journey begins with the first step. But, sometimes, the first step is the hardest to give. Once you started, things fly and everything becomes easier. Starting a new project is always difficult: you don’t have a clear view of the parts and don’t know how to add them to your project in a way they interact seamlessly.
This is worse when you are using a new technology like UWP: what do I add to my project, what are the best practices and so on. To help us on this task and give us a starting point, the Windows team has created the Windows Template Studio, a new Visual Studio template that will help us to create a full UWP project, using only the parts we want.
In this article, we will create a UWP project to manipulate customer data with a master/detail view and use the MVVM pattern with the MVVM Light Framework.
Installing the template
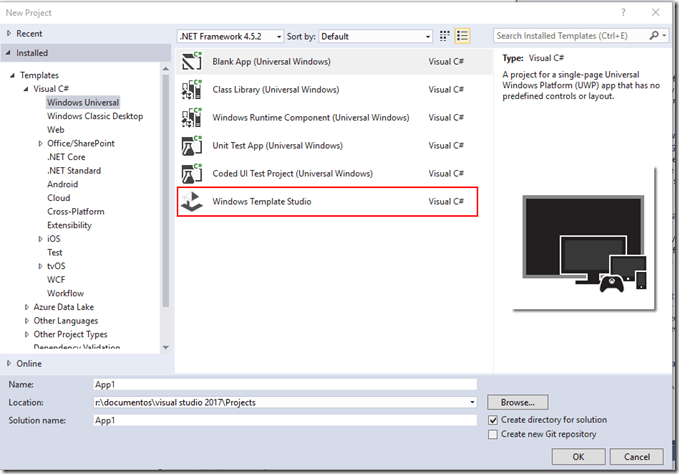
The installation of the template is very simple: in Visual Studio 2017, go to Tools/Extensions and Updates and search for Windows Template Studio:

Once you install the template, a new option appears when you select File/New Project under Windows Universal:
Creating the project
Once you select this option and give the project name, a new screen will open:
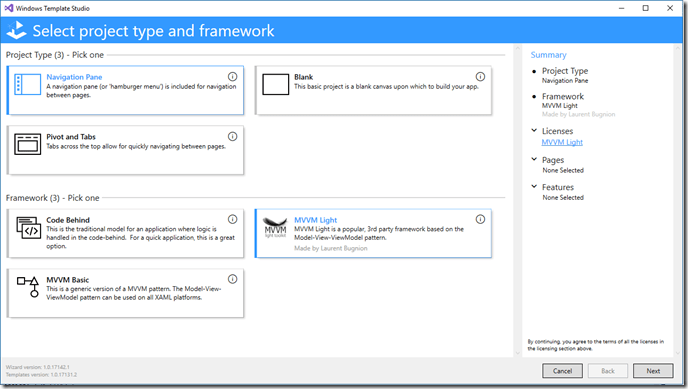
In this screen, you can select the kind of the project you want. We will check the Navigation Pane and the MVVM Light Framework and then click in the Next button. Then we select the pages and features.
Select the Master/Detail page and name it Customer. Also select the Settings page:
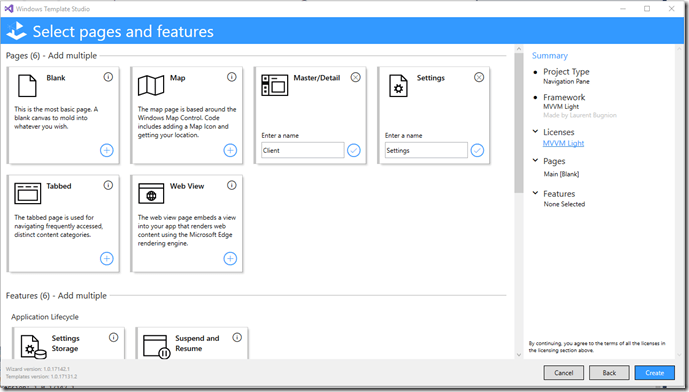
Under the Features, select the Settings Storage, the Live Tile and the Toast Notifications, then click on Create. The new project will be created.
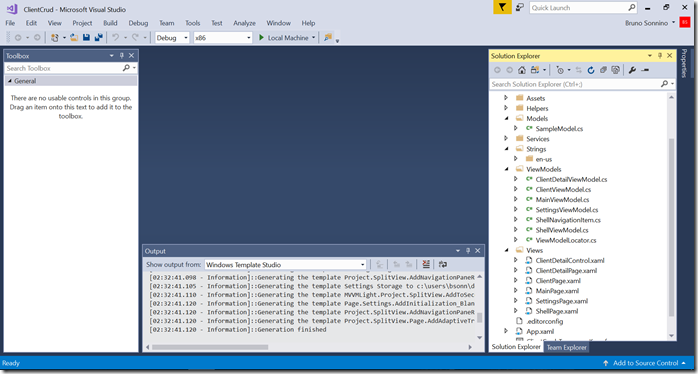
As you can see, a full project has been created, separated by folders, with all the needed files for the selected options. This project also is localized, if you want to translate it, you just need to add the localized resources. If you run the project, you will have a page with a hamburger menu and two options:
https://blog.revolution.com.br/wp-content/uploads/2023/05/image-5.png
The project has some sample data and all the code to handle navigation, settings (including setting a dark theme), toast notifications and live tiles.
Now it’s time to customize the project for our needs.
Customizing the project
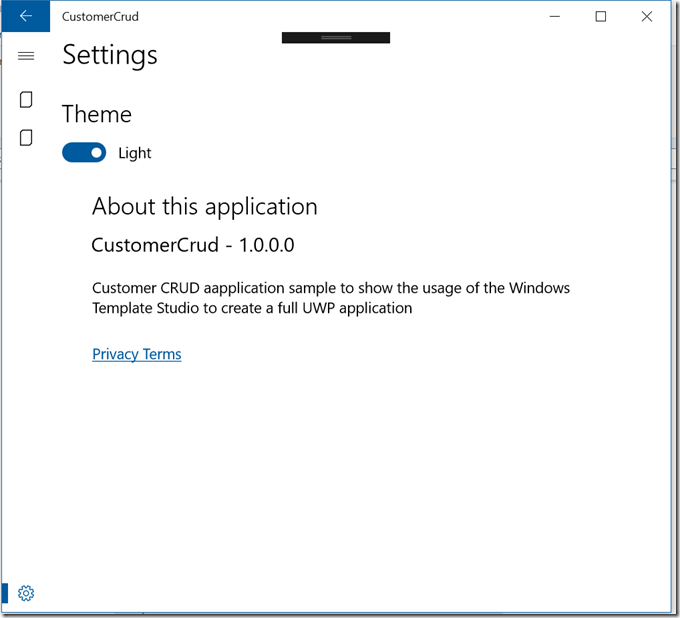
The first step in customizing our app is to set its description in the settings page. If you open SettingsPage.xaml you will see it uses the x:Uid tag to localize strings.
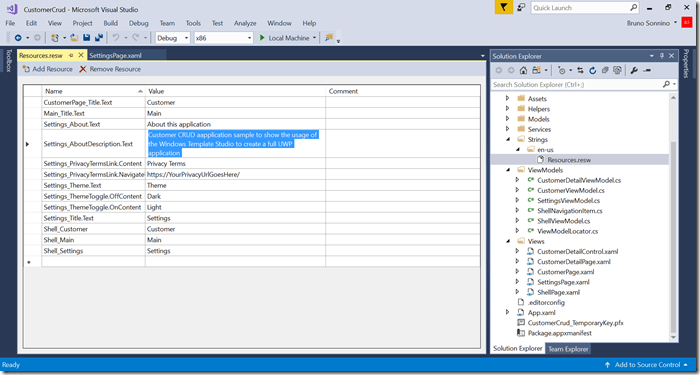
To modify the description we need to open the Resources.resw file under Strings\en-US and edit the description:
I’ve also changed some margins in the text StackPanel in the page:
After changing that and running the application again, you can see the new description in the settings page:
Now, let’s customize the app for our needs. We don’t need the main page, so let’s remove it. You can also remove MainViewModel.cs. Removing these files, you must go to ViewModelLocator.cs and remove the references to the main viewmodel:
If you build the project now you will get many errors due to the removal of the main page. Let’s fix them:
The first one is in App.xaml.cs, for the activation of the window:
We have to change the reference to CustomerViewModel:
The second one is in ShellViewModel.cs, where the items in the NavBar are populated:
We remove that reference and, while changing that, we also change the Customer’s icon (you can see the reference in the comments):
Now, when we run the app, the main page is not there anymore and the customer page has a new symbol in the NavBar:
Adding data to the app
We need some customer data, so I added a json file with the customers (this file should be added to the project as Content and Copy if newer):
If you take a look at the Models folder you will see that the template has added a sample model:
We don’t want that, so we can remove it and add our model, Customer.cs:
When we do that, a lot of code will break, as it is dependent of SampleModel. The first place is in CustomerDetailViewModel, where there is an Item property:
We change that to:
The second place to change is in CustomerViewModel, where we change all references from SampleModel to Customer. There is also a property SampleItems that we will use the Rename refactoring (CTRL+R+R) to rename it to Customers.
In CustomerViewModel, there is a reference to SampleModelService, the service used to serve data to the ViewModel, we have to change it to read data from our json file and rename it to CustomerService (by now, we will make it a read-only service, we will change that later):
We are using the Json.cs helper class to read the data and return the list of customers.
The next step is to change the references in the views. Change all references of SampleModel in CustomerDetailControl.xaml.cs and CustomerDetailPage.xaml.cs. Then, we must change the views to point to the Customer properties. The first change is in the MasterViewItemTemplate in CustomerPage.xaml:
Then we must replace the data in CustomDetailControl.xaml to show the customer data (there is even a comment in the file for that):
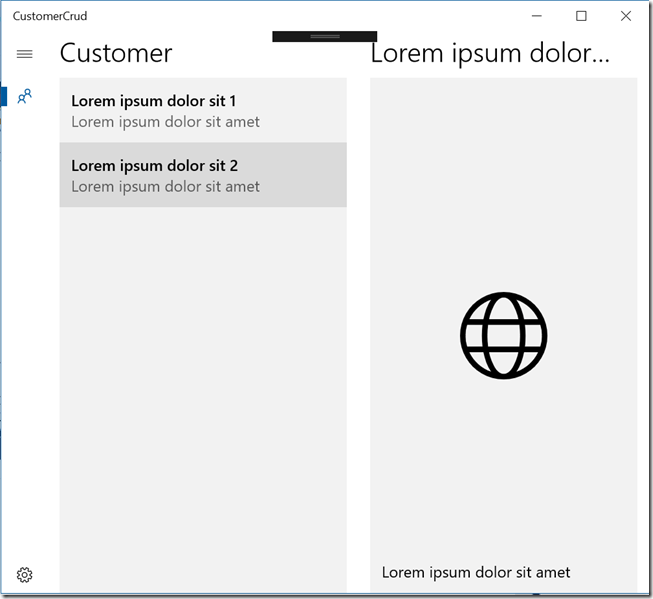
Now, if you run the app, you will see the customer data:

Adding, updating and deleting customers
Until now, the data is read-only, we can’t update it. To allow updating the data, we need to save the file in the isolated storage; the actual file is located in the installation folder and it’s read-only. To copy the file to the isolated storage, we must change the Customer Service:
We are using the SettingsStorageExtensions helper class to load the data from the isolated storage. If there is no data, we load the customers from the installation file. We also created a SaveDataAsync method to save the data.
Now we must create some buttons to allow adding, deleting and saving customers. In CustomerPage.xaml we will add the buttons for these actions:
We must add the three commands in CustomerViewModel:
Now, when you run the program, you will see three icons at the top of the customer list and you are able to create update and delete customers. If you click the Save button, the data will be saved and will be available in the next run.
Saving and Loading the current state
One thing that is nice in an application is that the current state is saved when the app is closed. We want to save the selected customer when the app is closed and restore it when it is reopened. To do that, we will save the id of the selected customer to the application settings, using the SettingsStorageExtensions class:
When the data is loaded, the id of the last selected customer is retrieved from the storage settings. This information is saved every time the selected customer changes. That way, when the user opens the app, the last selected customer is shown in the screen.
Working with toasts and tiles
You should have noticed that every time you run the project, a toast notification is shown. As we selected to add the Toast Notifications to the project, these were added and we can customize them. The sample toast is called from DefaultLaunchActivationHandler.cs:
We will remove this call and add it at the end of the load process, to show how many customers were loaded and after saving the customer file, to show how many customers were saved. Before that, we must change the sample toast (in ToastNotificationsService.Samples.cs) to show a custom message:
Then we can change the methods to load and save data in CustomerViewModel.cs to show the toast:
Now, when you run the app, every time the data is loaded or saved, a toast is shown with the number of customers in the file. You can even capture the click of the OK button in the HandleInternalAsync method in ToastNotificationsService.
One final change should be made in our app: it is still showing a default tile.We will change that to reflect the number of customers in the file. The sample tile is shown in the StartupAsync method in ActivationService.cs.
We will change the SampleUpdate in LiveTileService.Samples.cs to show a custom message:
With that change, we can change CustomerViewModel to update the live tile every time the customer file is loaded or saved:
Conclusions
As you can see, we went from 0 to a full UWP app, using the MVVM pattern, toast and live tiles, using best practices. The Windows Template Studio gives us a good starting point for it: just select what you want and a sample project is created, where you can fully customize it. In this case, I used a json file, but CustomerService could get its data from an external service with minimal changes. There is a lot of room to improve this app, but the basis is there, it’s not impossible to create a LOB app using UWP.
The full project source is in https://github.com/bsonnino/CustomerCrud
Great, thanks; but a question: How can I use the ShareSourceData and ShareSourceItem clases?. I can’t found any documentation about this.
Thanks
These classes are created to ease data sharing between applications. The comment in DataShareExtensions.cs shows how to use them:
// TODO WTS: Share Source Feature
// This extension, in conjuntion with the ShareSourceData class and ShareSourceItem, eases the development
// and helps to maximize the target applications for your shared data.
//
// Please, refer to https://docs.microsoft.com/windows/uwp/app-to-app/share-data for further details.
//
// To start sharing data from your pages / views you will need to follow these steps:
//
// – Step 1. Setup a DataTransferManager object in your page / view and add a DataRequested event handler
// (i.e. OnDataRequested) to be called whenever the user invokes share.
//
// – Step 2. Within the OnDataRequested event handler create a ShareSourceData instance and add the data you want to share.
//
// – Step 3. Call the SetData extension method before leaving the event handler (i.e. args.Request.SetData(shareSourceData))
//
// – Step 4. Call the DataTransferManager.ShowShareUI method from your command or handler to start the sharing action
//
// Other considerations:
// – You can also register to the DataPackage ShareComplete event handler (args.Request.Data.ShareCompleted) to run code when the sharing operation ends.
// Be sure to unregister the ShareComplete event handler when done.