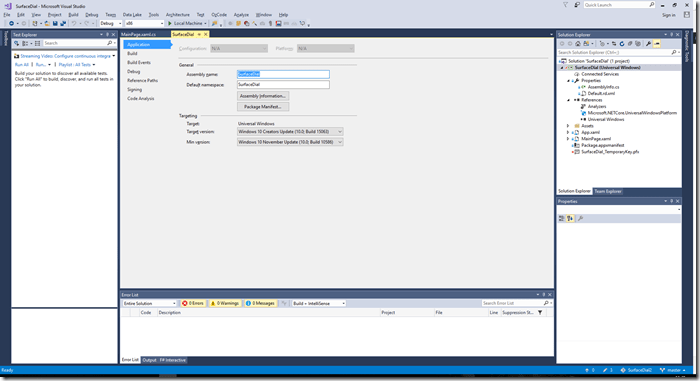
Some time ago, I’ve written a post about Surface Dial programming. With the introduction of the Creator’s Update, some things have improved. In this post, I will show some changes and will revisit the program that was developed and add these to the app. To use these changes, you need to have the Windows 10 Creator’s Update installed (you will have it if you are using the Windows Insider builds), Visual Studio 2017 and the Creator’s Update SDK (build 15063) installed. Once you have these pre requisites installed, go to the project properties in Visual Studio and change the target version to 15063:

With that, the new APIs will be opened.
Menu icons from font glyphs
A welcome change was the possibility to use font glyphs for the menu items. In the previous version, we had to add PNG files to the project, create the icon and then create the menu item, with some code like this:
var iconResize = RandomAccessStreamReference.CreateFromUri(new Uri("ms-appx:///Assets/Resize.png"));
var itemResize = RadialControllerMenuItem.CreateFromIcon("Resize", iconResize);
This is not needed anymore: now, we can use the CreateFromFontGlyph method, that creates the menu item from a font glyph, that can come both from an installed font or for a custom font for the app. This code creates the menu icons for the app:
// Create the items for the menu
var itemResize = RadialControllerMenuItem.CreateFromFontGlyph("Resize", "\xE8B9", "Segoe MDL2 Assets");
var itemRotate = RadialControllerMenuItem.CreateFromFontGlyph("Rotate", "\xE7AD", "Segoe MDL2 Assets");
var itemMoveX = RadialControllerMenuItem.CreateFromFontGlyph("MoveX", "\xE8AB", "Segoe MDL2 Assets");
var itemMoveY = RadialControllerMenuItem.CreateFromFontGlyph("MoveY", "\xE8CB", "Segoe MDL2 Assets");
var itemColor = RadialControllerMenuItem.CreateFromFontGlyph("Color", "\xE7E6", "Segoe MDL2 Assets");
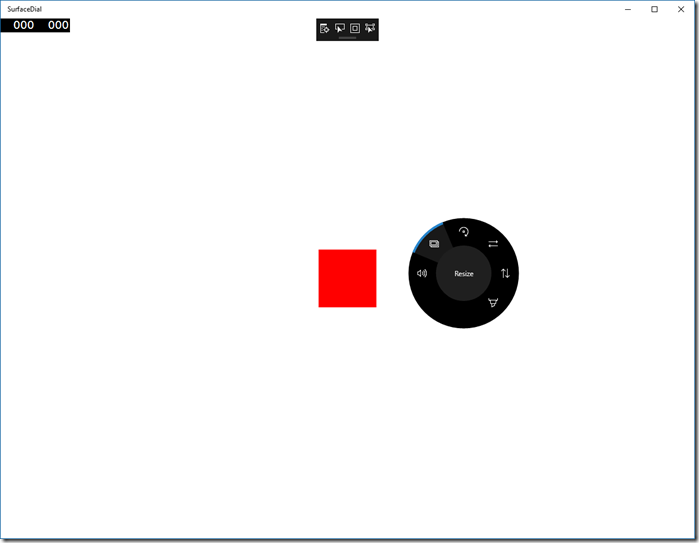
We only have to add the Unicode character and the font name and that’s all. The new Surface Dial menu is like this:

Once we have the new menu, we can add new features to the app.
Changing behavior when the button is pressed
One change that we can make to the project is to detect when the button is pressed and change the behavior when the dial is rotated. This is done by using the new IsButtonPressed property in the RadialControllerRotationChangedEventArgs class. We can use it in the RotationChanged event to move diagonally when the button is pressed. We only need to do a small change to the code:
private void ControllerRotationChanged(RadialController sender,
    RadialControllerRotationChangedEventArgs args)
{
    switch (_currentTool)
    {
        case CurrentTool.Resize:
            Scale.ScaleX += args.RotationDeltaInDegrees / 10;
            Scale.ScaleY += args.RotationDeltaInDegrees / 10;
            break;
        case CurrentTool.Rotate:
            Rotate.Angle += args.RotationDeltaInDegrees;
            break;
        case CurrentTool.MoveX:
            Translate.X += args.RotationDeltaInDegrees;
            if (args.IsButtonPressed)
                Translate.Y += args.RotationDeltaInDegrees;
            break;
        case CurrentTool.MoveY:
            Translate.Y += args.RotationDeltaInDegrees;
            if (args.IsButtonPressed)
                Translate.X += args.RotationDeltaInDegrees;
            break;
        case CurrentTool.Color:
            _selBrush += (int)(args.RotationDeltaInDegrees / 10);
            if (_selBrush >= _namedBrushes.Count)
                _selBrush = 0;
            if (_selBrush < 0)
                _selBrush = _namedBrushes.Count-1;
            Rectangle.Fill = _namedBrushes[(int)_selBrush];
            break;
        default:
            break;
    }
}
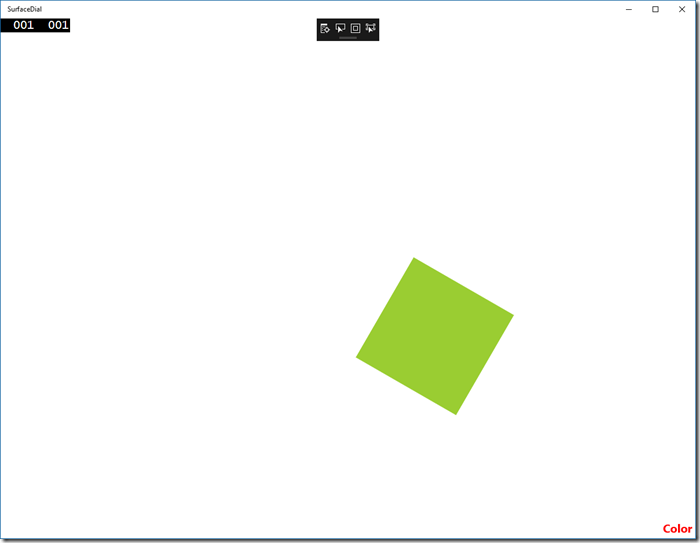
When the tool is MoveX or MoveY, we check for IsButtonPressed and, if it’s on, we move both in the X and Y directions at the same time. Now, if you run the code and press the button while rotating the dial, you will see that the rectangle moves in the diagonal.
Hiding the menu
The menu is a great tool, but some times, it’s too intrusive and you would like to hide it. Until now, there was no way to hide it, but the Creator’s Update introduced the possibility to do that. You just have to set the IsMenuSuppressed property of the RadialControllerConfiguration class to true and the menu will not appear anymore.
In this case, there will be an extra problem – the controller won’t send messages to the app anymore. You will need some extra steps to regain control:
- Set the ActiveControllerWhenMenuIsSuppressed property of RadialControllerConfiguration to point to the controller
- Capture the ButtonHoldingevent of the controller to set the actions when the user is holding the button
- Give feedback to the user, as he won’t see the menu anymore
With these steps, you’re ready and don’t need to show the menu.
We will add a new TextBlock to the window to show the tool the user is using. In MainPage.xaml, add this code:
<="" ...="">
Then, in the constructor of MainPage, add this code:
// Leave only the Volume default item - Zoom and Undo won't be used
RadialControllerConfiguration config = RadialControllerConfiguration.GetForCurrentView();
config.SetDefaultMenuItems(new[] { RadialControllerSystemMenuItemKind.Volume });
config.ActiveControllerWhenMenuIsSuppressed = controller;
config.IsMenuSuppressed = true;
controller.ButtonHolding += (s, e) => _isButtonHolding = true;
controller.ButtonReleased += (s, e) => _isButtonHolding = false;
ToolText.Text = _currentTool.ToString();
It will suppress the menu, set the controller as the active controller when the menu is suppressed and set the _isButtonHolding field to true when the button is pressed. The next step is to change tools when the button is pressed. This is done in the RotationChanged event:
private void ControllerRotationChanged(RadialController sender,
    RadialControllerRotationChangedEventArgs args)
{
    if (_isButtonHolding)
    {
        _currentTool = args.RotationDeltaInDegrees > 0 ?
            MoveNext(_currentTool) : MovePrevious(_currentTool);
        ToolText.Text = _currentTool.ToString();
        return;
    }
    switch (_currentTool)
    ...
When the button is pressed, we change the current tool by calling the MoveNextand MovePrevious (depending of the direction of the rotation) methods:
private CurrentTool MoveNext(CurrentTool currentTool)
{
    return Enum.GetValues(typeof(CurrentTool)).Cast()
        .FirstOrDefault(t => (int)t > (int)currentTool);
}

private CurrentTool MovePrevious(CurrentTool currentTool)
{
    return currentTool == CurrentTool.Resize ? CurrentTool.Color :
        Enum.GetValues(typeof(CurrentTool)).Cast()
        .OrderByDescending(t => t)
        .FirstOrDefault(t => (int)t < (int)currentTool);
}
These methods use LINQ to get the next tool and, if there isn’t one, reset to the first (or last). With this code in place, you can run the app and see that the menu isn’t shown, but the tool is changed when the dial is pressed and rotated, and the TextBlock reflects the current tool.

Haptic Feedback
Another improvement in the SDK is the ability to control the haptic feedback, the vibration the dial sends for every change in the rotation. You can disable this feedback by setting the UseAutomaticHapticFeedback property of the controller to false. You can then send your feedback using the methods SendHapticFeedback, SendHapticFeedbackForDuration and SendHapticFeedbackForPlayCount of the SimpleHapticsController class. You can get an instance of this class using the SimpleHapticsController property of the RadialControllerRotationChangedEventArgs class in the RotationChangedevent.
We will add the feedback when the user tries to move the rectangle beyond the window’s limits. The first step is to remove the feedback, in the constructor of MainPage:
controller.UseAutomaticHapticFeedback = false;
The next step is to check if the movement is beyond the window’s limits and send the feedback if it is:
case CurrentTool.MoveX:
    if (CanMove(Translate, Scale, args.RotationDeltaInDegrees))
    {
        Translate.X += args.RotationDeltaInDegrees;
        if (args.IsButtonPressed)
            Translate.Y += args.RotationDeltaInDegrees;
    }
    else
        SendHapticFeedback(args.SimpleHapticsController,3);
    break;
case CurrentTool.MoveY:
    if (CanMove(Translate, Scale, args.RotationDeltaInDegrees))
    {
        Translate.Y += args.RotationDeltaInDegrees;
        if (args.IsButtonPressed)
            Translate.X += args.RotationDeltaInDegrees;
    }
    else
        SendHapticFeedback(args.SimpleHapticsController,3);
    break;
The code uses the CanMove method to check if the user is trying to move outside the limits and then, if that’s the case, it calls the SendHapticFeedback method to send the feedback. The CanMove method uses the translation, scale and rotation delta to check it the rectangle can be moved:
private bool CanMove(TranslateTransform translate, ScaleTransform scale,
    double delta)
{
    var canMove = delta > 0 ?
        translate.X + 60 * scale.ScaleX + delta < ActualWidth / 2 &&
        translate.Y + 60 * scale.ScaleY + delta < ActualHeight / 2 :
        translate.X - 60 * scale.ScaleX + delta > -ActualWidth / 2 &&
        translate.Y - 60 * scale.ScaleY + delta > -ActualHeight / 2;
    return canMove;
}
SendHapticFeedback receives the SimpleHapticsController as a parameter and sends the feedback:
private void SendHapticFeedback(SimpleHapticsController simpleHapticsController, int count)
{
    var feedback = simpleHapticsController.SupportedFeedback.FirstOrDefault(f =>
        f.Waveform == KnownSimpleHapticsControllerWaveforms.Click);
    if (feedback != null)
        simpleHapticsController.SendHapticFeedbackForPlayCount(feedback, 1, count,
            TimeSpan.FromMilliseconds(100));
}
This method uses LINQ to get the feedback of type Click and, if it finds it, it uses the SendHapticFeedbackForPlayCountto send the feedback three times with an interval of 100ms. We just need to make an extra change: as we removed completely the feedback, there will be no feedback when the user changes tools. One way to restore it is to send the feedback every time we change tools:
if (_isButtonHolding)
{
    _currentTool = args.RotationDeltaInDegrees > 0 ?
        MoveNext(_currentTool) : MovePrevious(_currentTool);
    ToolText.Text = _currentTool.ToString();
    SendHapticFeedback(args.SimpleHapticsController, 1);
    return;
}
Now, if you run the app, you will see that there is no more feedback for every rotation, but you still get feedback when you change tools or when you try to move beyond window’s limits.
Conclusions
We could see a lot of improvements in the Surface Dial API, now we have a lot of control on the menu and on the feedback sent to the user. The Surface Dial brings a new way to input data into your apps, and using it can improve the user experience for your users and make your app stand above the competition.
